How to fill shapes by using image patterns
Posted on Categories Object Editing
QubiMap supports customizing fill types for shapes. You can use a single color, gradient, image pattern, or CAD pattern to fill a shape. This article describes how to use an image pattern to fill a shape.
1) PC
Draw a the map on the map. In the [Shape Settings] dialog box that appears, select [Image Pattern] from the [Fill Type] drop-down list, and click [Fill Preview].
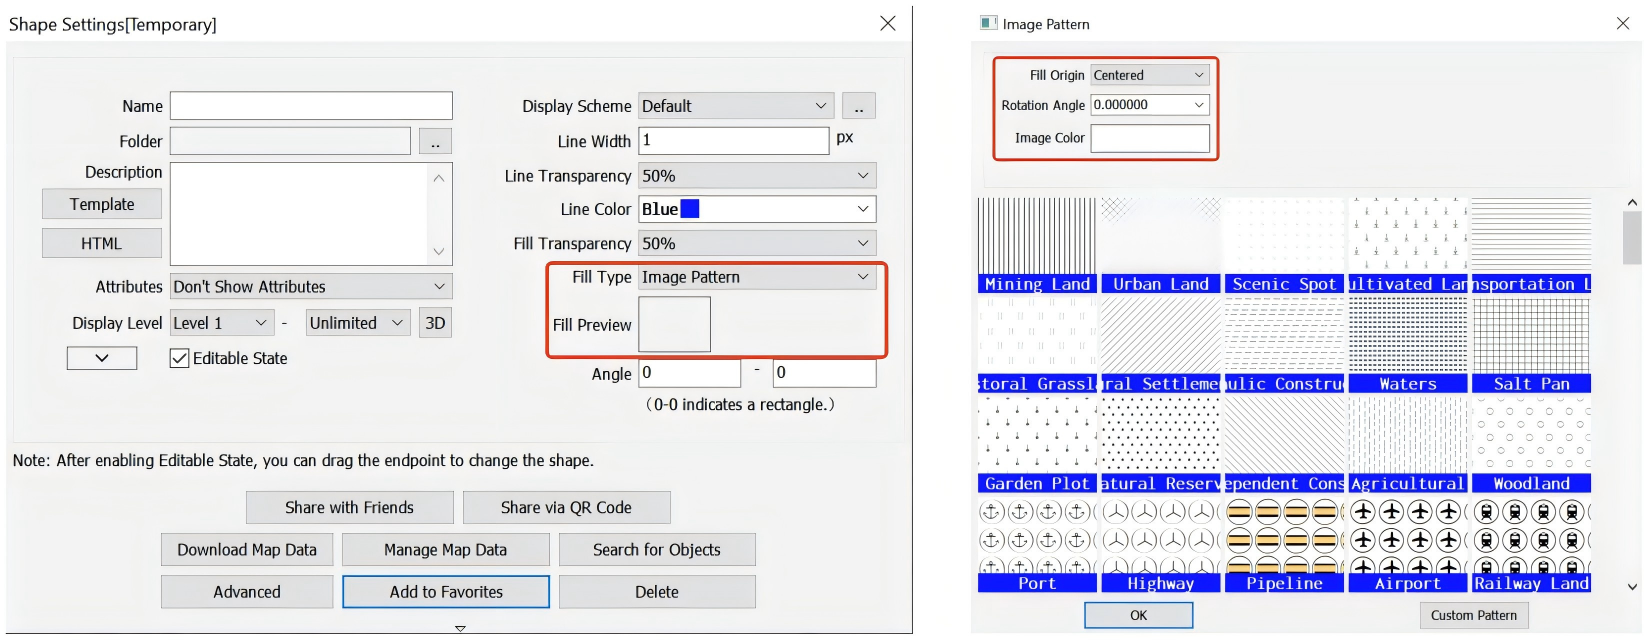
QubiMap provides commonly used patterns. You can select an image pattern and modify the attributes of the pattern as needed.
Fill Origin: The default value is [Centered]. You can also select [Custom] to set the origin.
Rotation Angle: After you set this value, the pattern on the right changes accordingly.
Image Color: Set the color of the image.
You can also click [Custom Pattern] to add custom image patterns. Note that the image length and width cannot exceed 64 pixels.
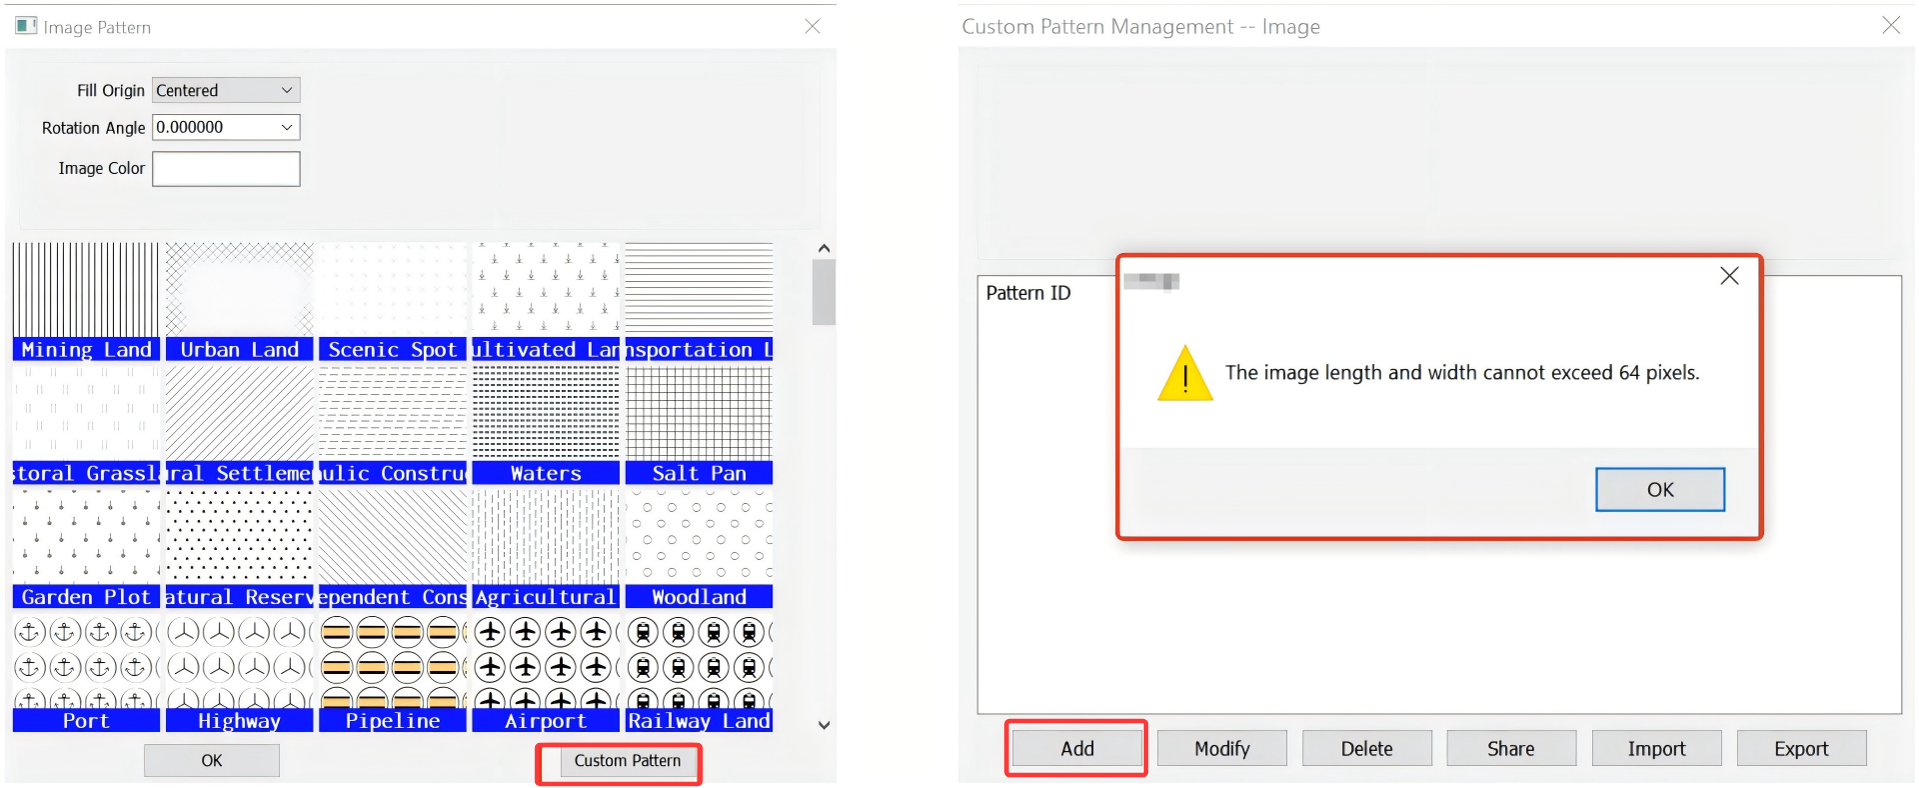
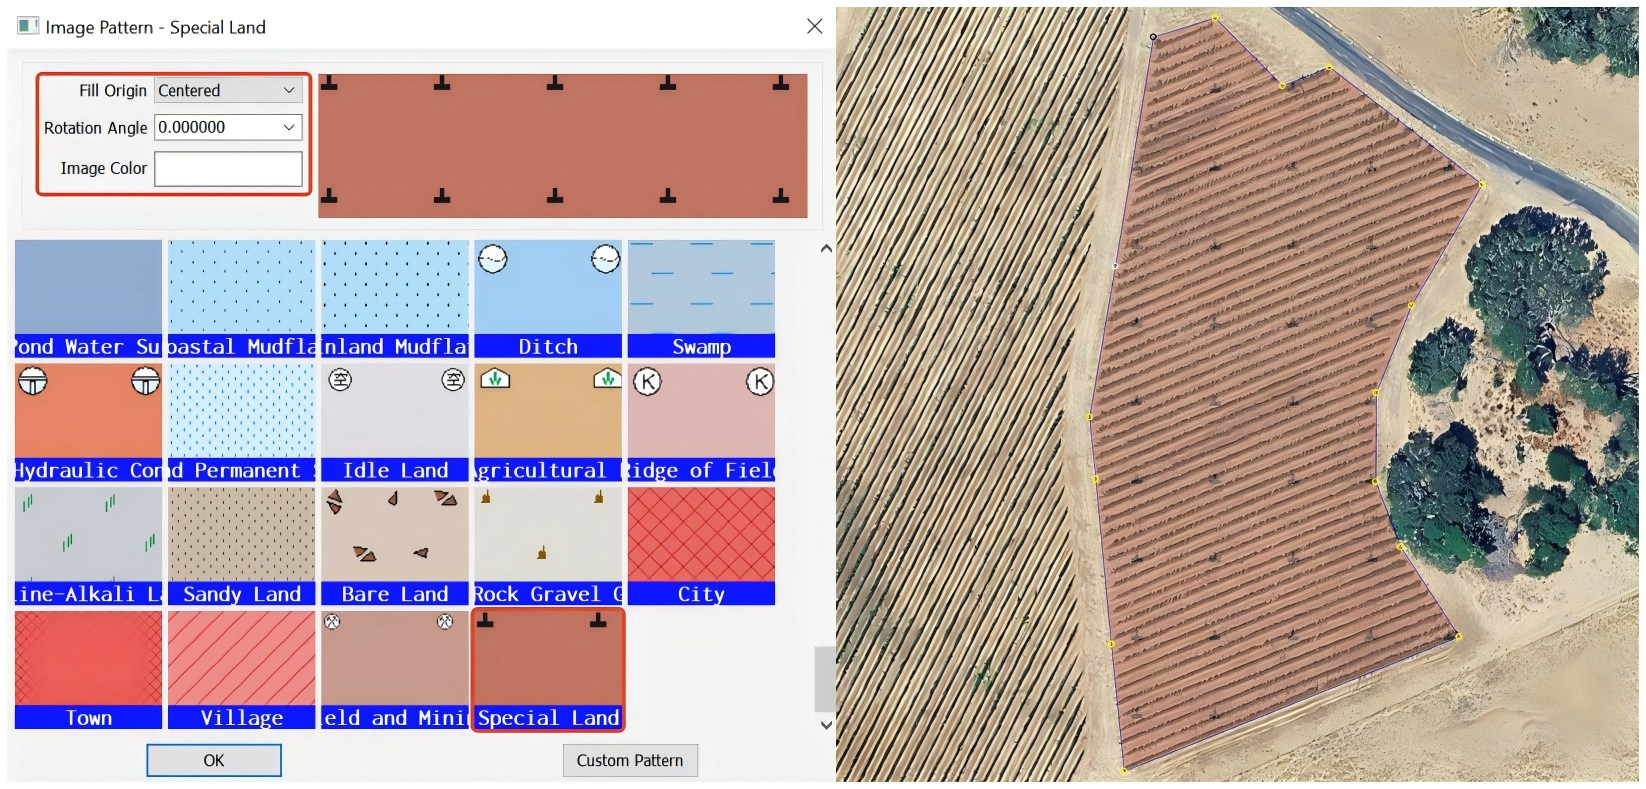
After you add the image patterns, close the [Custom Pattern Management–CAD] dialog box. In the [Image Pattern] dialog box, you can select a custom CAD pattern to fill the shape. Then, click [OK]. In the [Shape Settings] dialog box, click [Add to Favorites] to add the shape to your favorites.
2) Mobile device
On the main UI, tap [Edit] → [Shape] to draw a shape. Tap the Favorites button at the bottom to go to the [Shape Settings] page, and then tap [Set Shape Attributes].
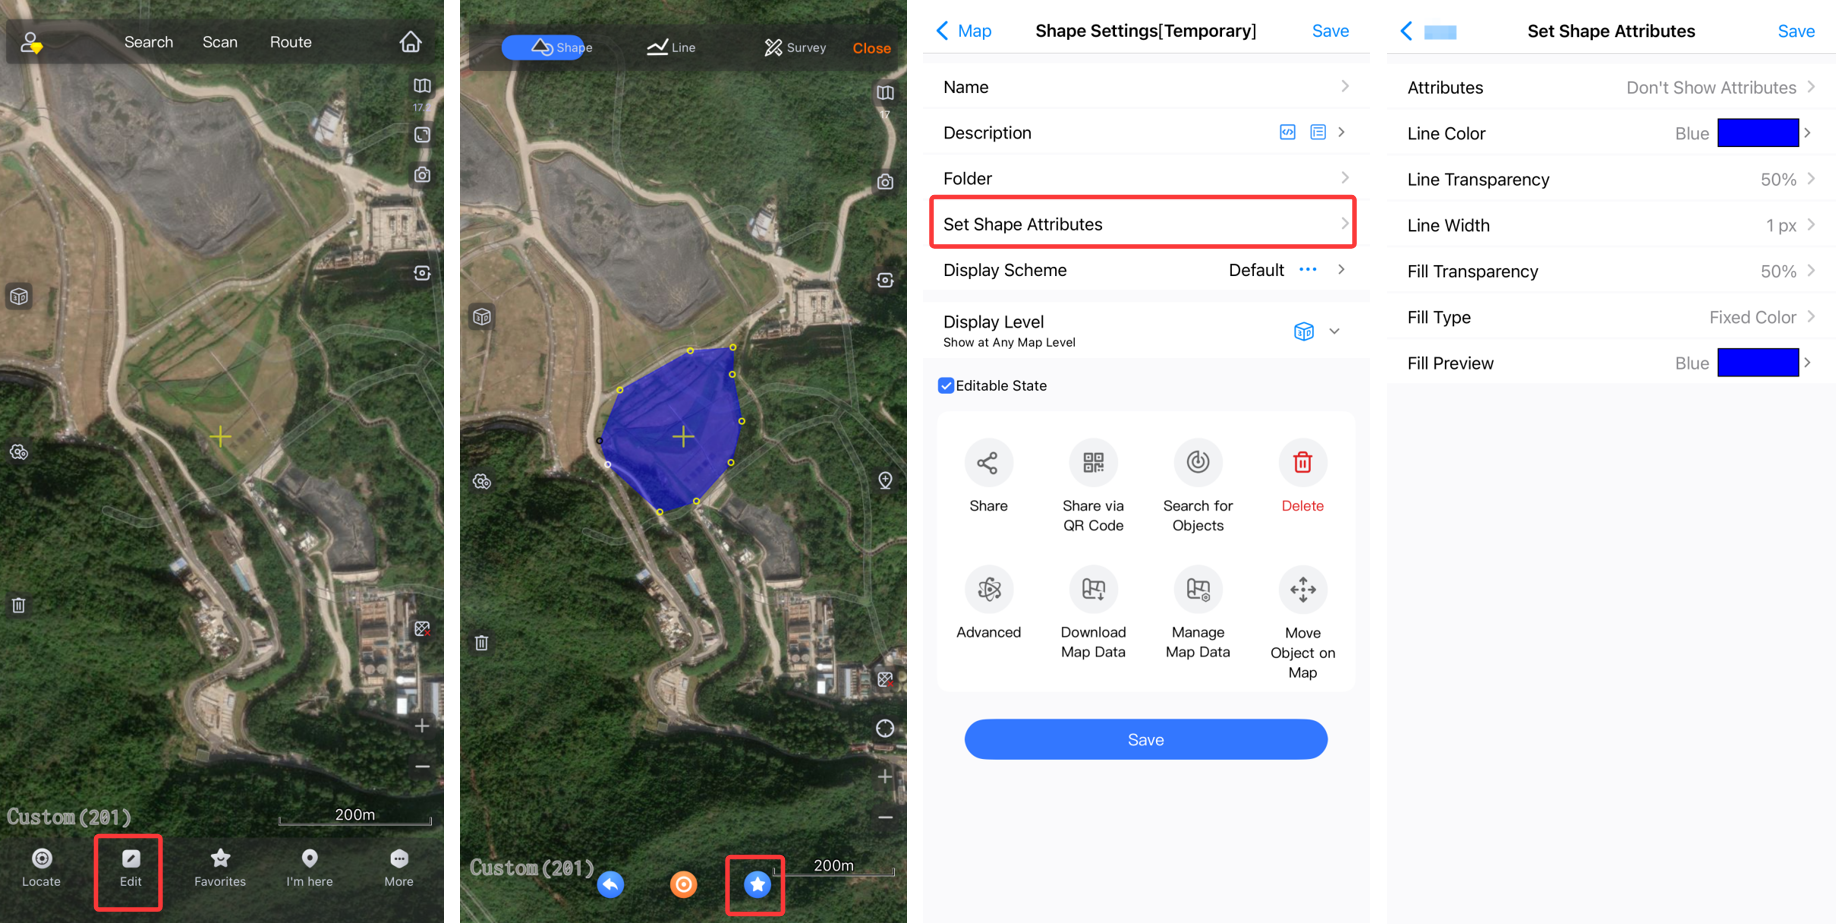
Set [Fill Type] to [Image Pattern], and tap [Fill Preview] to go to the [Image Pattern] page. You can select an image pattern and modify the attributes of the pattern as needed. Note that the [Fill Origin] parameter is set to [Centered] by default and cannot be modified on the mobile device. To add a custom image pattern, you must import the corresponding file.
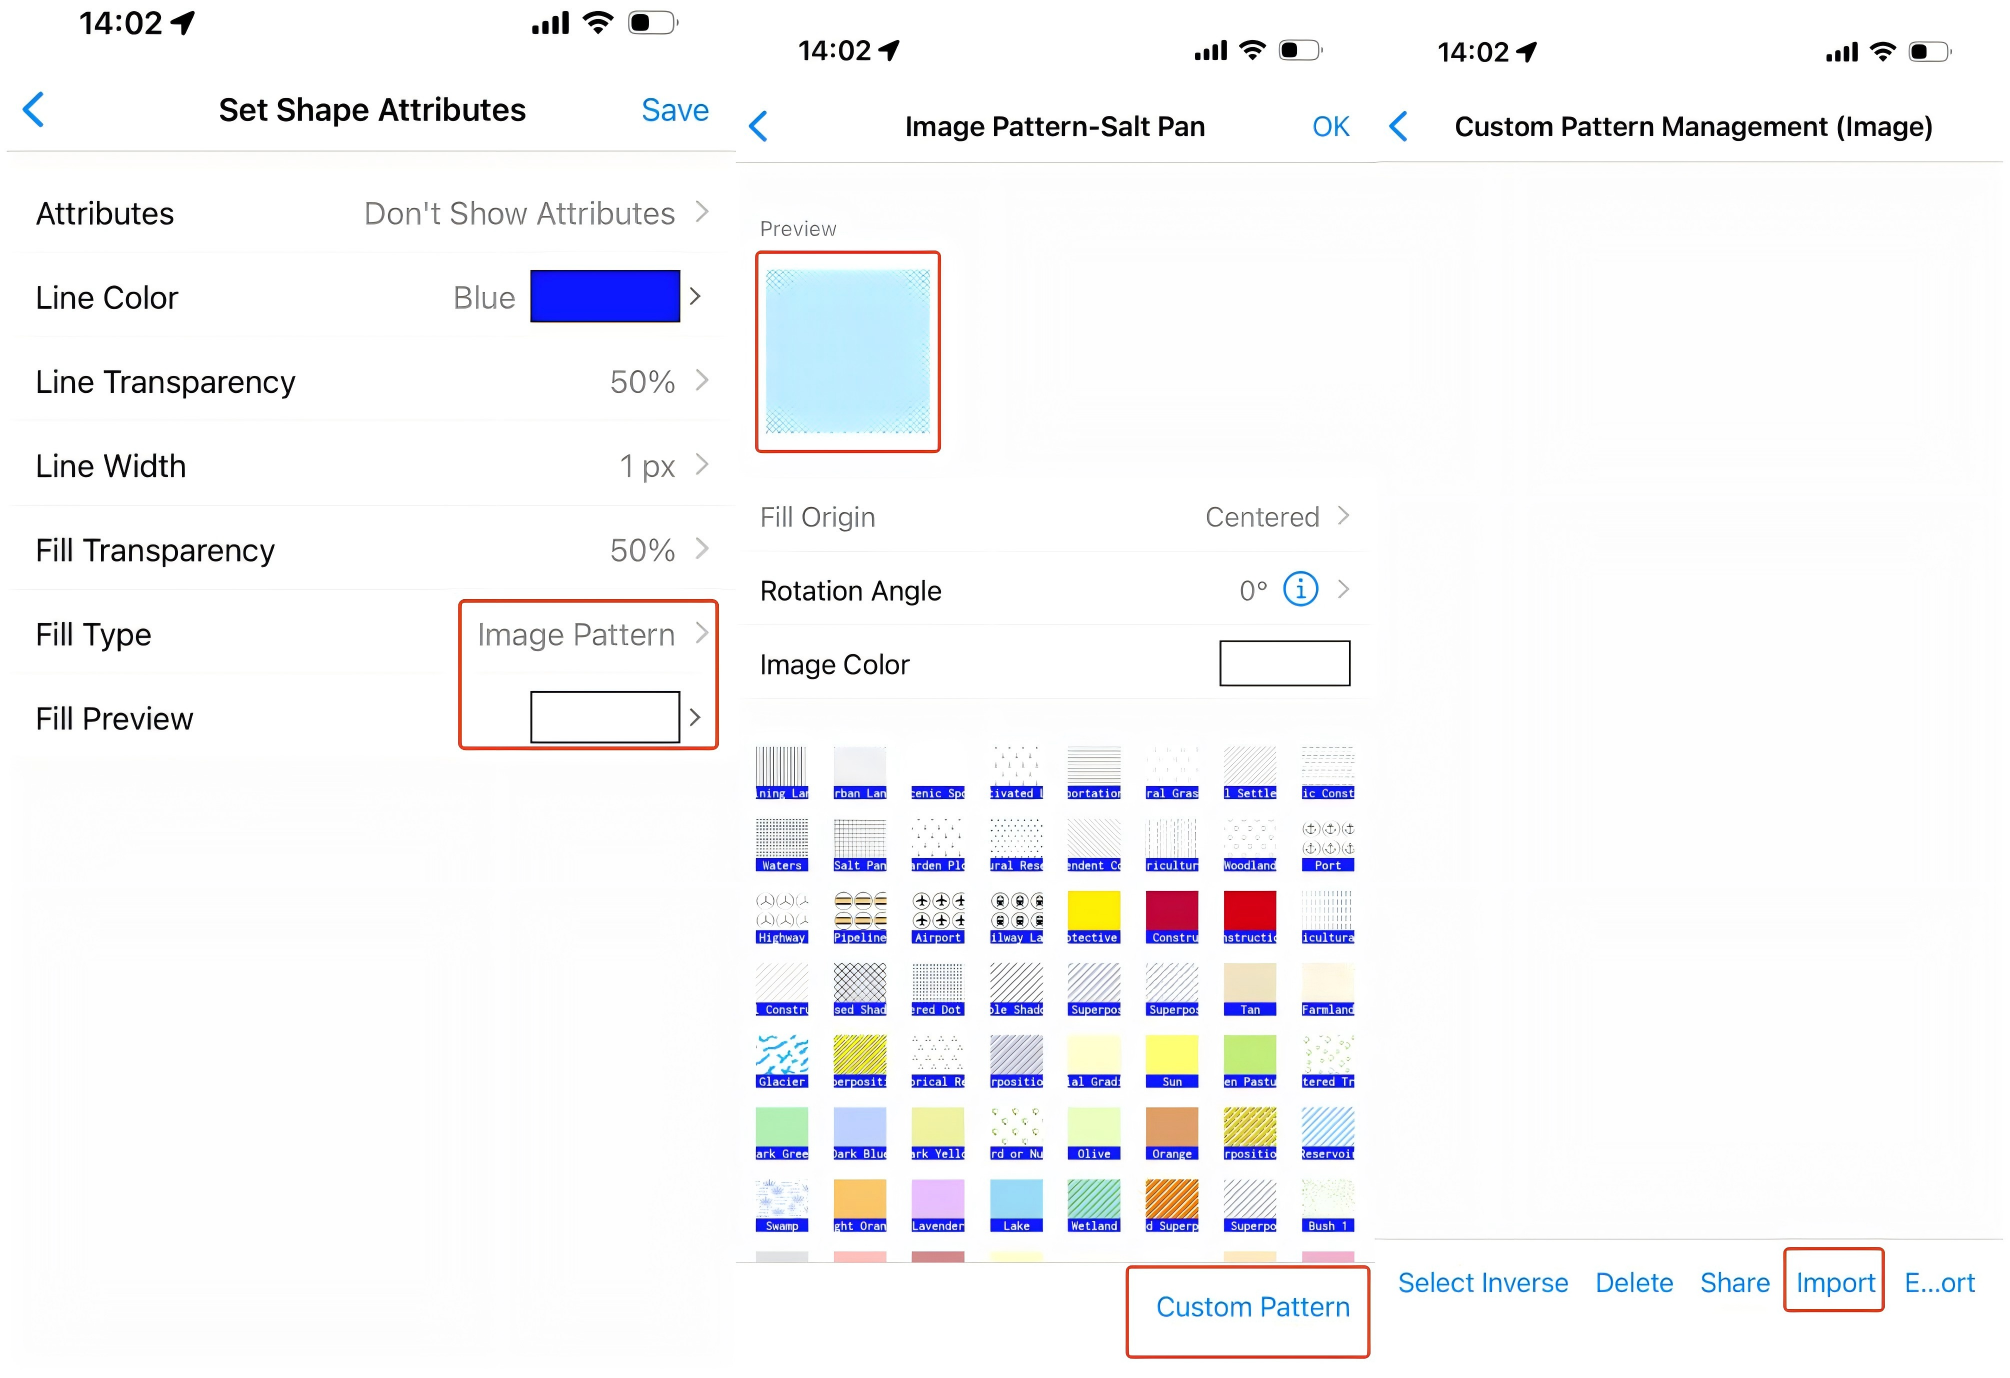
After configuration, tap [OK] → [Save] → [Save] to add the shape to your favorites.