How to fill shapes by using CAD patterns
Posted on Categories Object Editing
QubiMap supports customizing fill types for shapes. You can use a single color, gradient, image pattern, or CAD pattern to fill a shape. CAD patterns are defined consistent with common CAD software, enabling the seamless integration of QubiMap with CAD software.
This article describes how to use a CAD pattern to fill a shape.
1. Select a built-in CAD pattern to fill a shape
1) PC
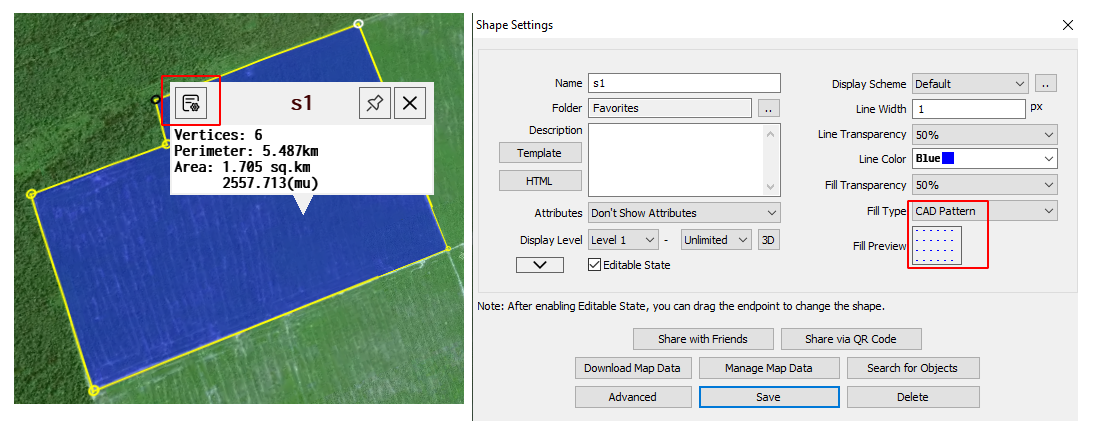
On the map, click on the shape to go to the [Shape Settings] dialog box.
Select [CAD Pattern] from the [Fill Type] drop-down list, and click [Fill Preview].
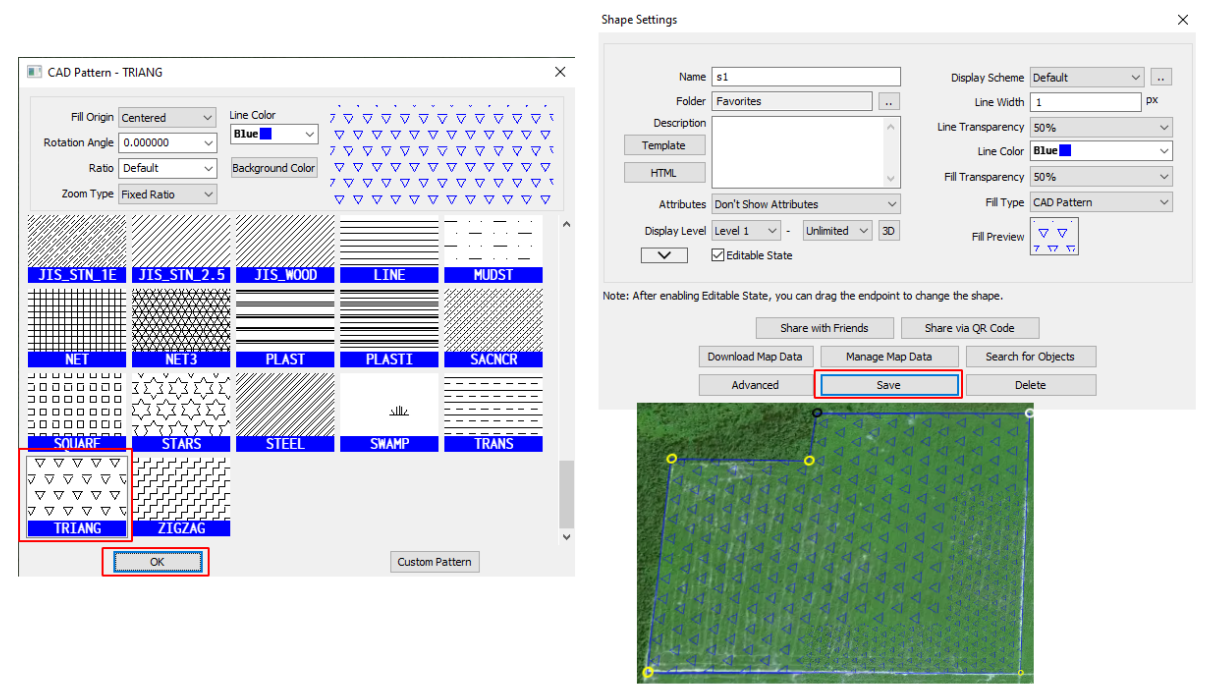
QubiMap provides commonly used patterns. You can select a CAD pattern and modify the attributes of the pattern as needed.
Fill Origin: The default value is [Centered]. You can also select [Custom] to set the origin.
Rotation Angle: After you set this value, the pattern on the right changes accordingly.
Zoom Type: The default value is [Fixed Ratio]. In this case, you can specify a zoom ratio. You can also select [Zoom with Map]. In this case, the zoom ratio changes automatically.
Line Color: Set the color of the lines in the pattern.
Background Color: You can select [Transparent] or specify a color as needed.
Then, click [OK] → [Save] to apply the settings.
2) Mobile device
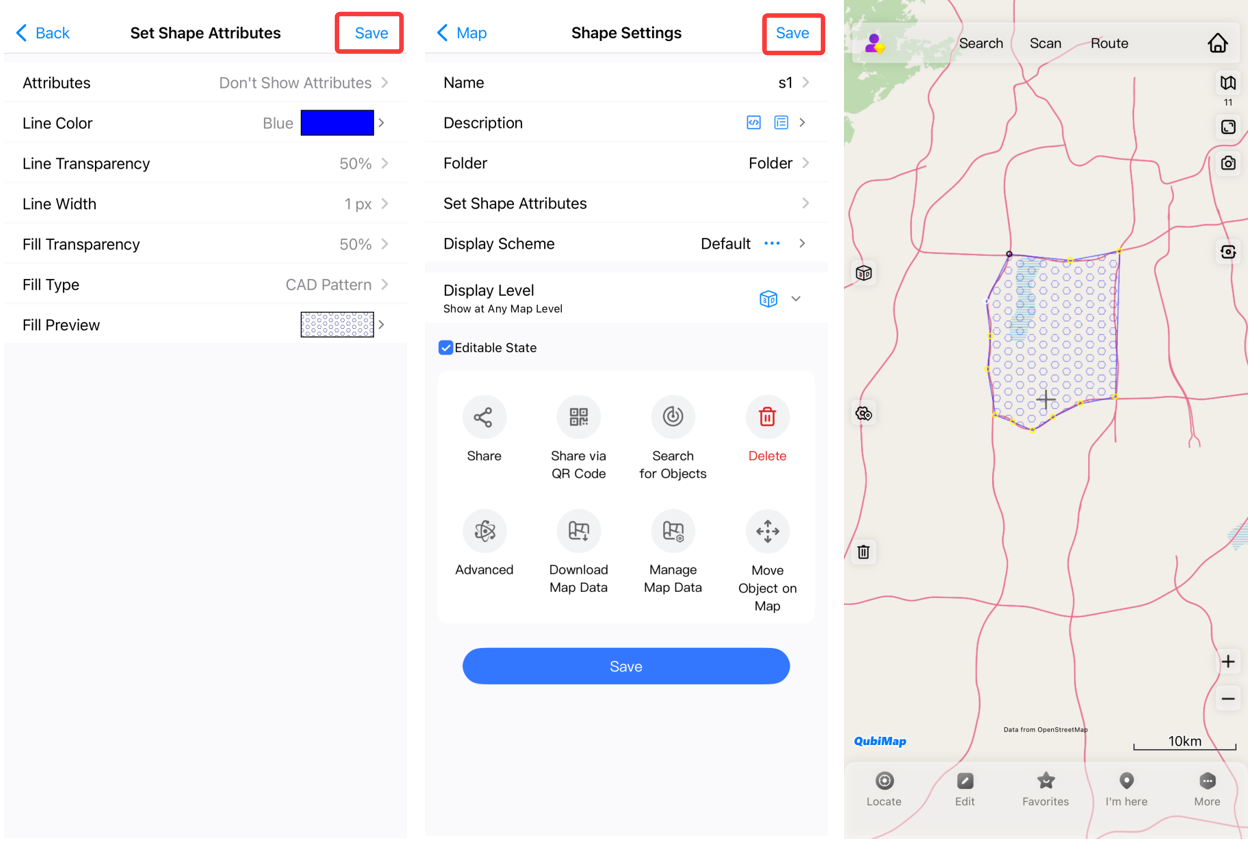
On the main UI, double-tap on the shape to go the [Shape Settings] page. On this page, tap [Set Shape Attributes].
Select [CAD Pattern] from the [Fill Type] drop-down list, and tap [Fill Preview].
You can select a CAD pattern and modify the attributes of the pattern as needed.
After setting the parameters, tap [OK].
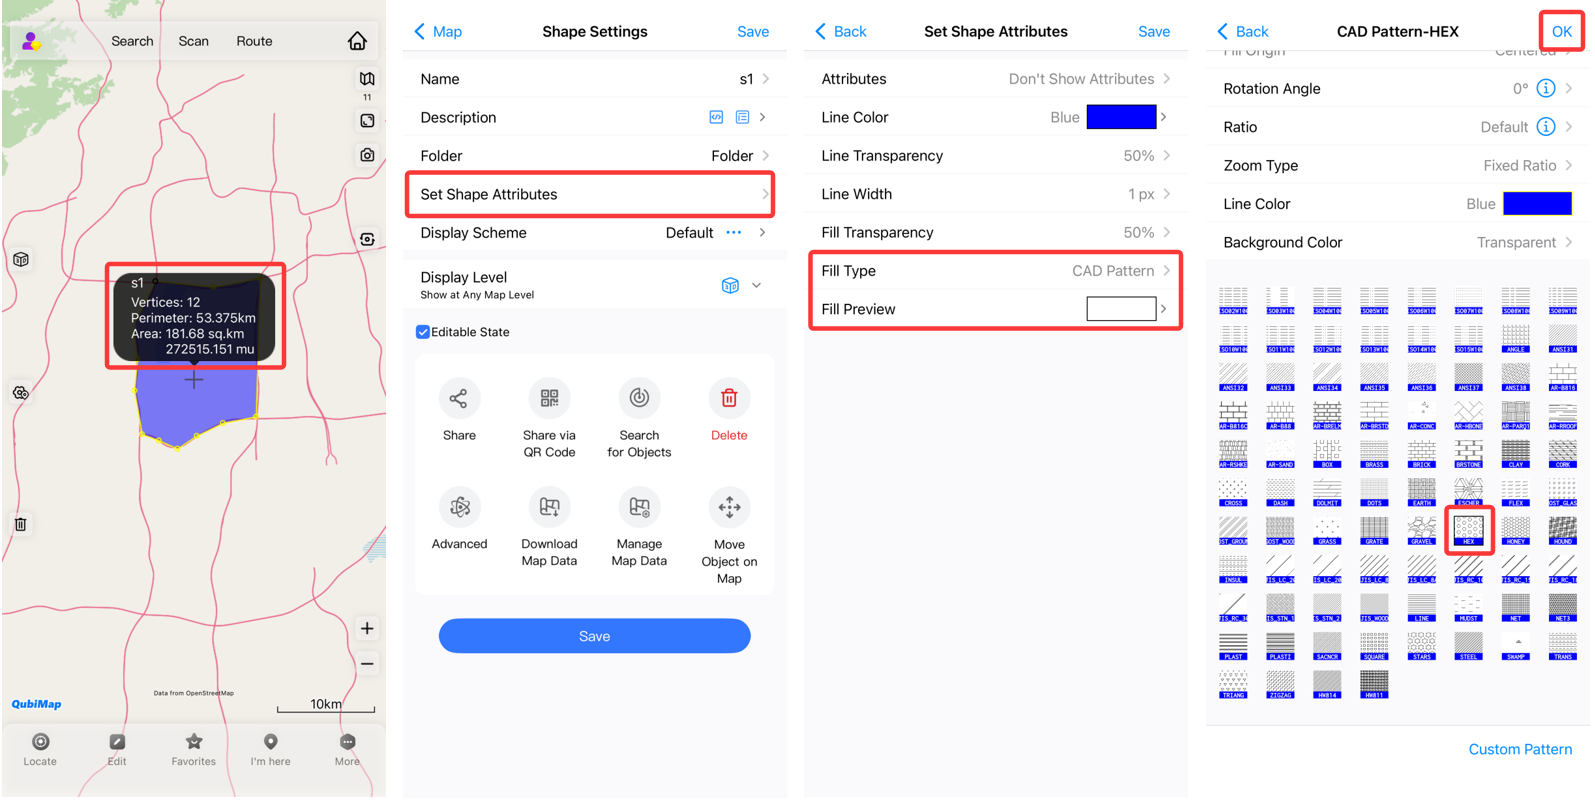
Tap [Save] → [Save] to apply the settings.
2. Add a custom CAD pattern to fill a shape
You can add custom CAD patterns, whose attributes must comply with the format requirements defined by QubiMap.
On your PC, go to the [CAD Pattern] dialog box, and then click [Custom Pattern]. In the [Custom Pattern Management–CAD] dialog box, click [Add].
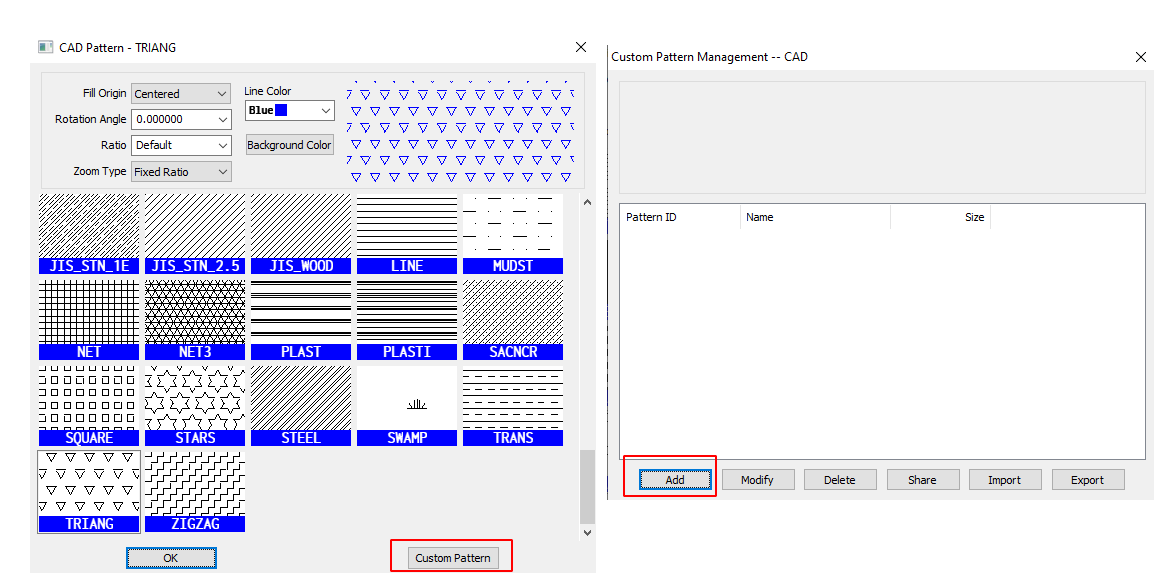
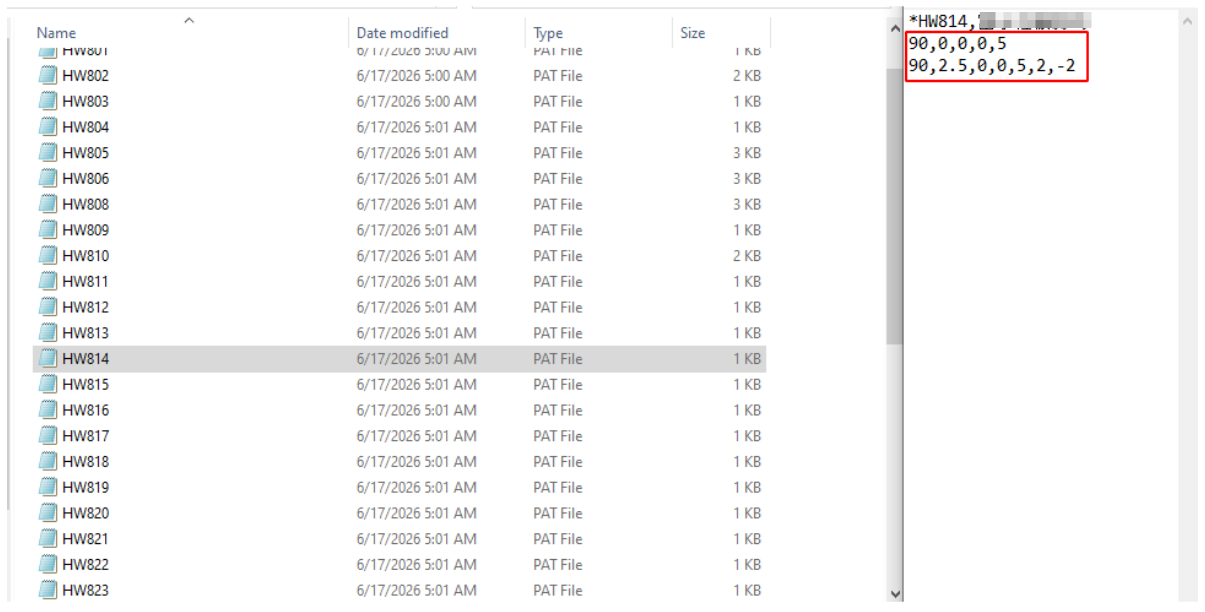
In the dialog box that appears, enter the standard code of the CAD pattern in the [Pattern Text] section.
You can open the required CAD pattern (.pat) file with Notepad, and then copy the pattern code to QubiMap.
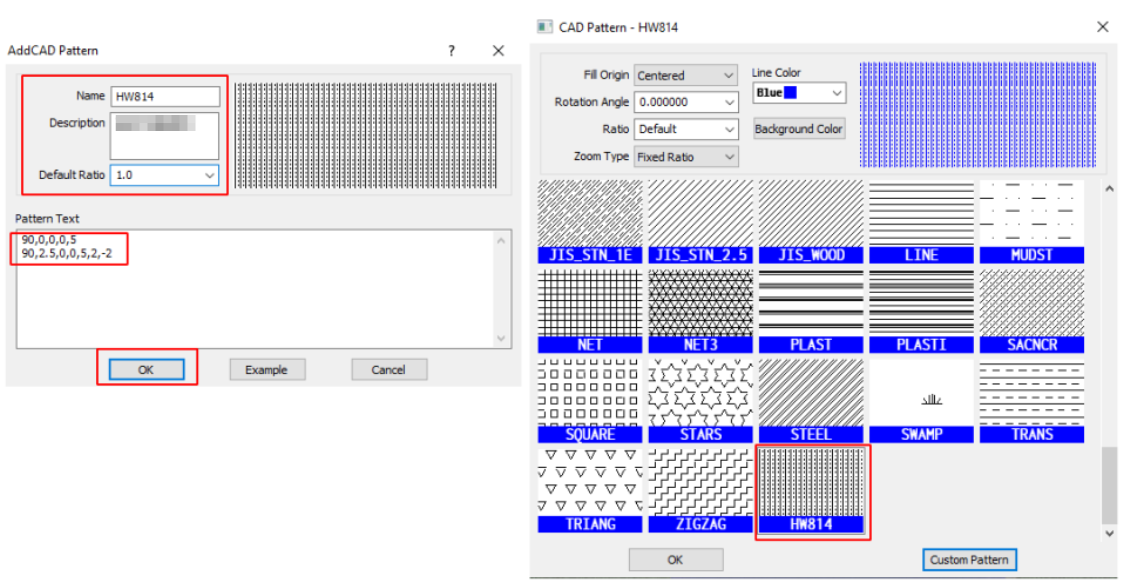
Set the other parameters such as [Name] and [Description], and click [OK]. Close the [Custom Pattern Management–CAD] dialog box.
In the [CAD Pattern] dialog box, you can select the added custom CAD pattern. The attributes of the pattern can be modified as needed.
Examples of CAD pattern text:
*Quartz sandstone:
0,0,0,0,2.4
0,-0.04,1.2,2,2.4,0.08,-0.992,0.08,-2.92
0,-0.04,1.25,2,2.4,0.08,-0.992,0.08,-2.92
*Diorite:
0,1,0.75,0,5,2,-3
90,2,0.75,0,5,2,-3
0,3.5,3.25,0,5,2,-3
90,4.5,3.25,0,5,2,-3
*Powdery clay:
45,0,0,0,3.5355
45,2.5,0,3.5355,3.5355,3.5355,-3.5355
*Pebble:
45,2.5,1.25,3.5355,3.5355,0.7071,-13.435
45,3,0.75,3.5355,3.5355,0.7071,-13.435
0,2.5,0.75,0,5,0.5,-9.5
0,3,1.75,0,5,0.5,-9.5
90,2.5,0.75,0,10,0.5,-4.5
90,3.5,1.25,0,10,0.5,-4.5
45,7.5,3.75,3.5355,3.5355,0.7071,-13.435
45,8,3.25,3.5355,3.5355,0.7071,-13.435
0,7.5,3.25,0,5,0.5,-9.5
0,8,4.25,0,5,0.5,-9.5
90,7.5,3.25,0,10,0.5,-4.5
90,8.5,3.75,0,10,0.5,-4.5
3. Send custom patterns to your mobile device
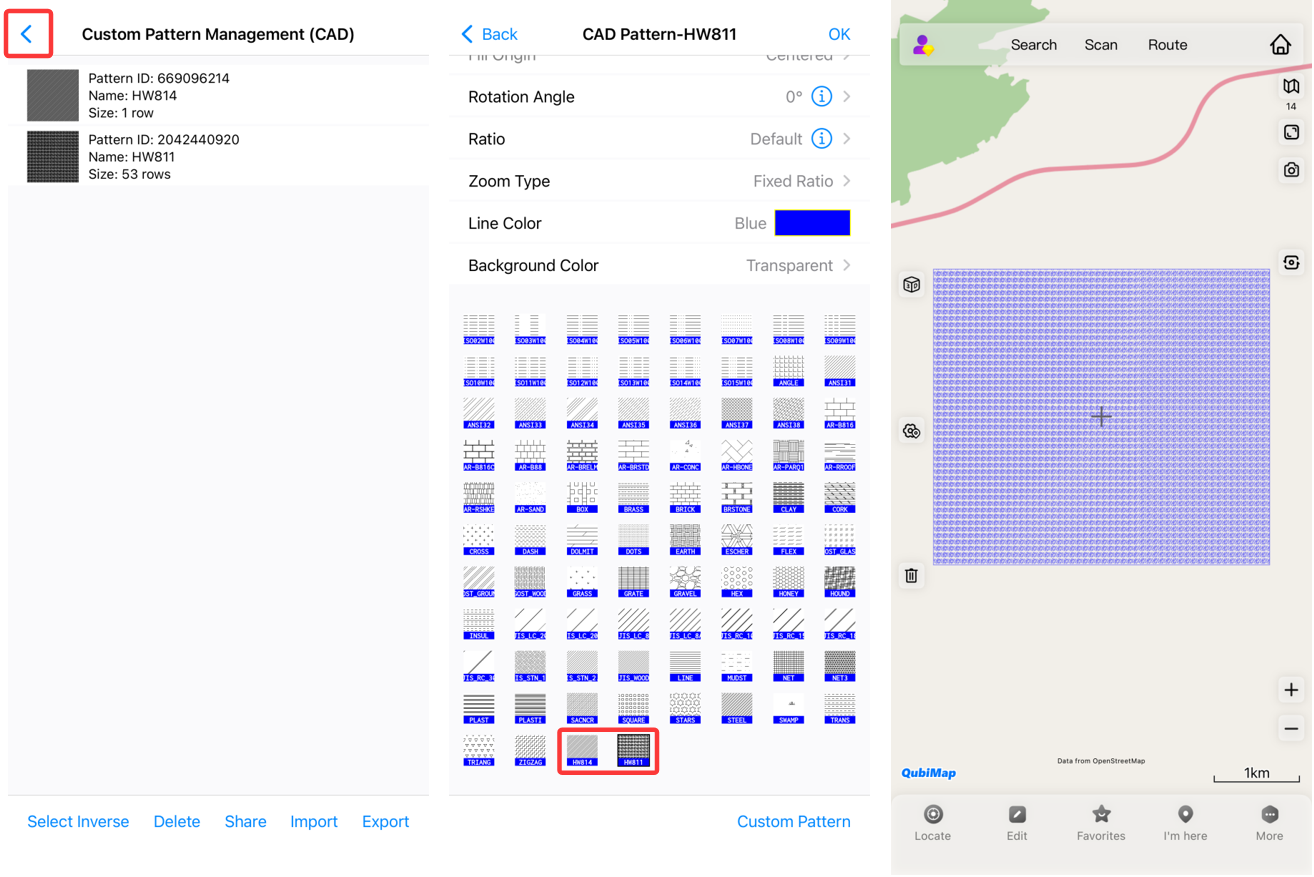
If you need to use custom CAD patterns on your mobile device, you can first add the patterns to your PC and then send them to your mobile device.
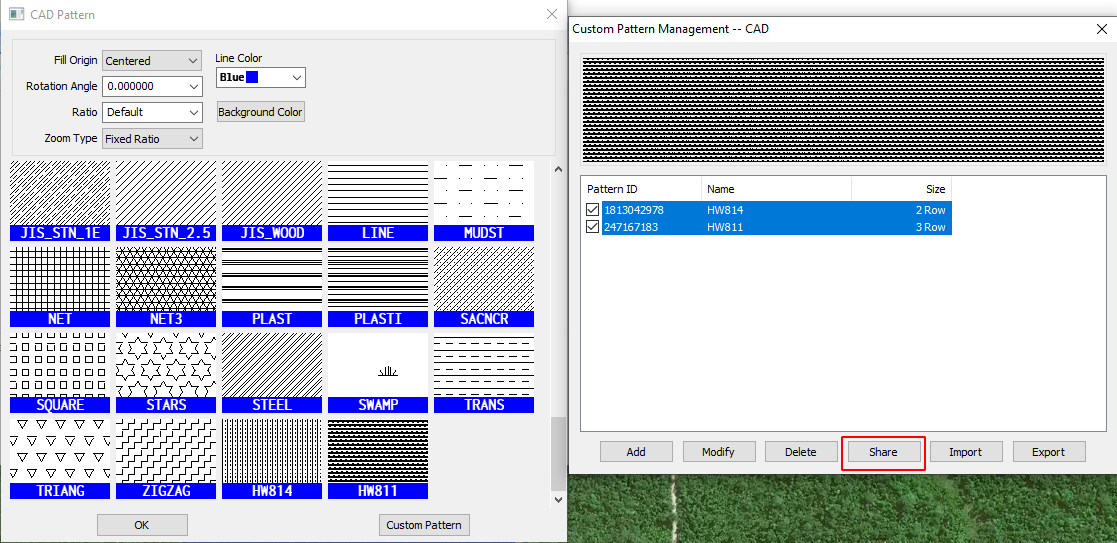
On your PC, go to the [Custom Pattern Management–CAD] dialog box, select the required CAD patterns, and then click [Share].
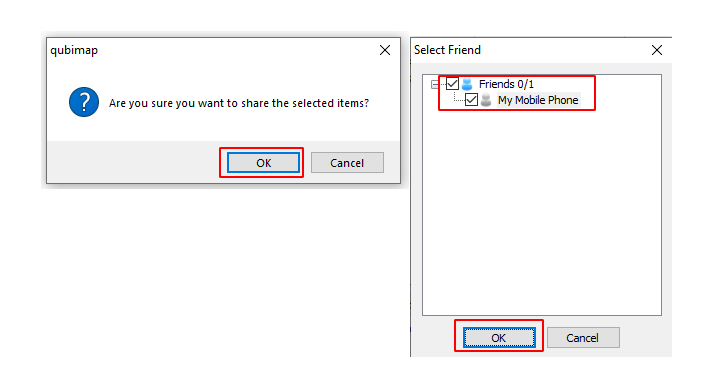
In the message that appears, click [OK]. In the [Select Friend] list, select [My Mobile Phone], and then click [OK]. You can also select your friends to share the CAD patterns with.
Log into your account on the mobile device, tap the profile icon in the upper-left corner, and switch to the [Dialogue] page. Tap [My Computer] to view the messages sent from your PC.
Download the CAD patterns you just sent, and then tap that message. In the system message that appears, tap [OK].
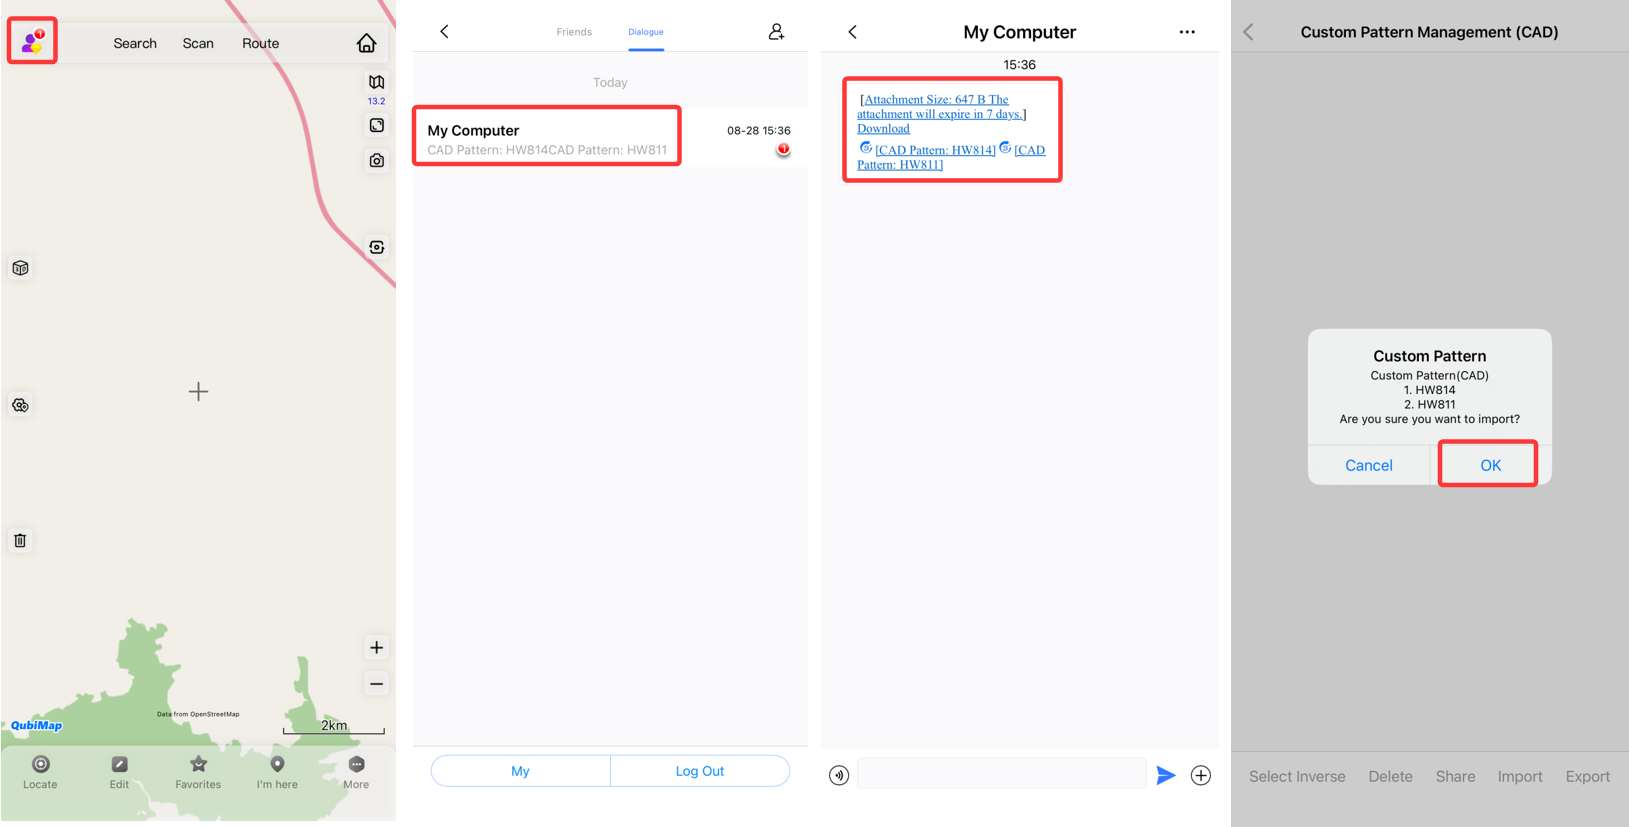
Return to the main UI and go to the [CAD Pattern] page. You can view the patterns you just imported, and use them directly.