How to add custom maps via WMTS
Posted on Categories Custom Maps
You can add custom maps to QubiMap by using the WMTS service. Currently, only Lat-Long coordinates and transverse Mercator projection coordinates are supported; local coordinate systems are not supported.
This article describes how to add a custom map via the WMTS service.
1. Retrieve a WMTS URL
Prepare a valid WMTS URL supported by QubiMap. You can retrieve WMTS URLs from local map websites or geographic information websites.
2. Add a custom map via WMTS
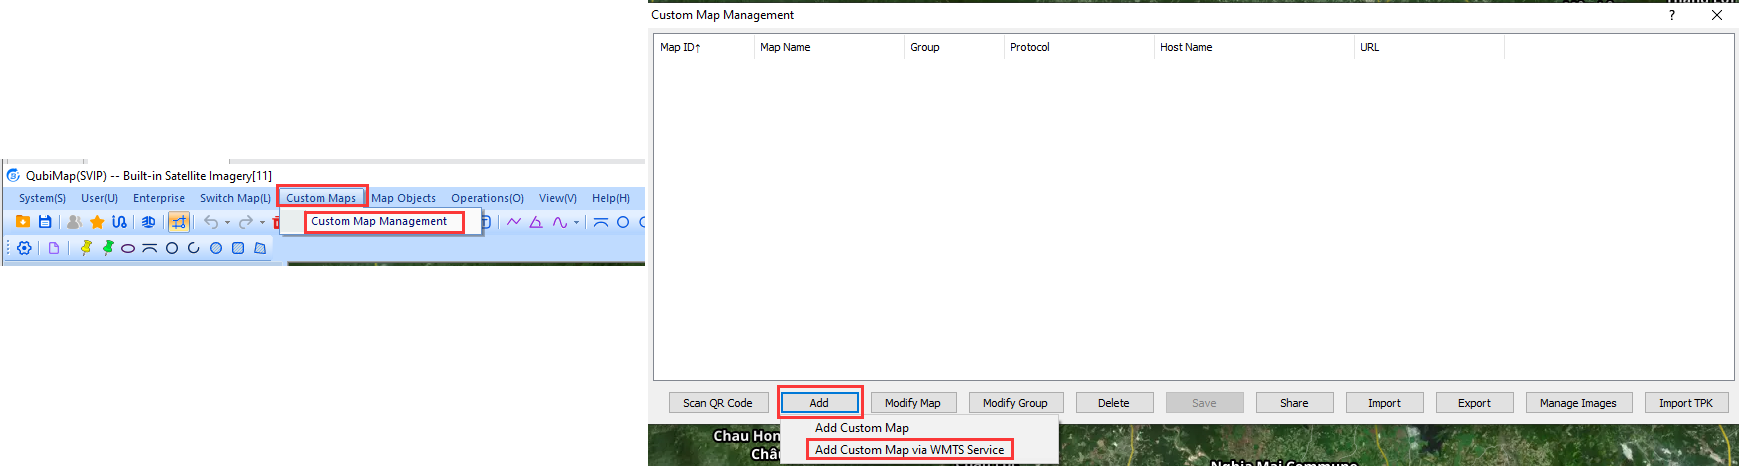
On the main UI of QubiMap, choose [Custom Maps] > [Custom Map Management]. In the [Custom Map Management] dialog box, click [Add] and select [Add Custom Map via WMTS Service].
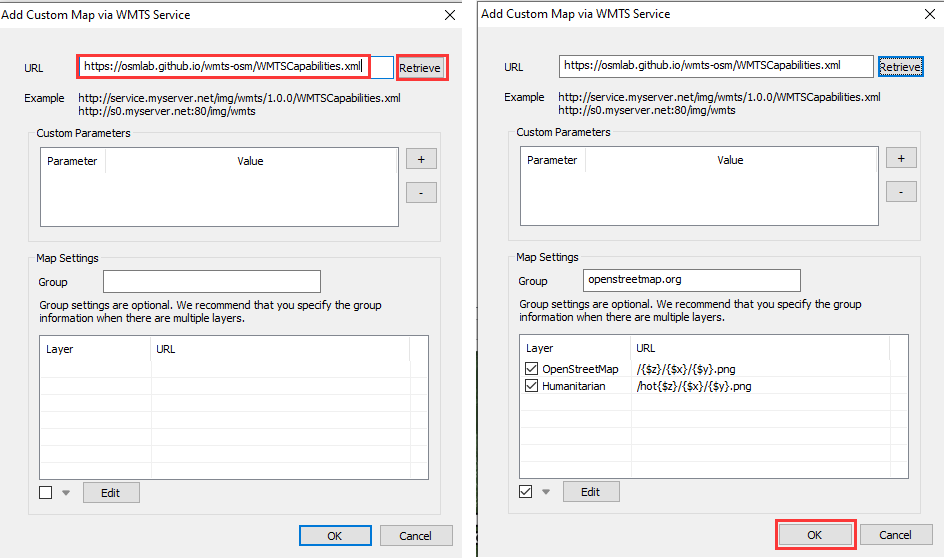
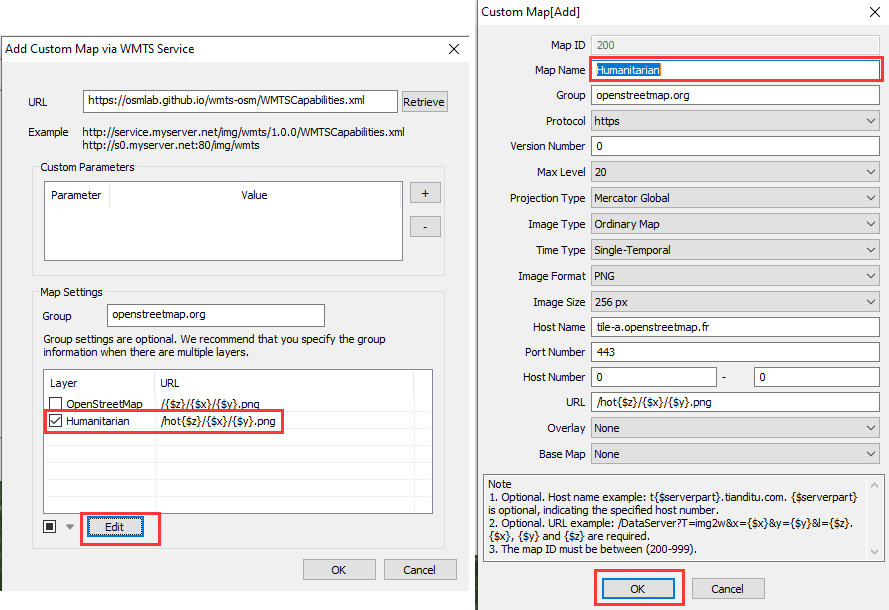
In the [Add Custom Map via WMTS Service] dialog box, enter a WMTS URL, and click [Retrieve]. Then, click [OK].
Note:
Custom Parameters: If the WMTS URL requires a token, you can click the [+] sign next to [Custom Parameters], and double-click the cells in the table to enter the corresponding parameter and value. Then, enter the URL, and click [Retrieve] → [OK] → [OK].
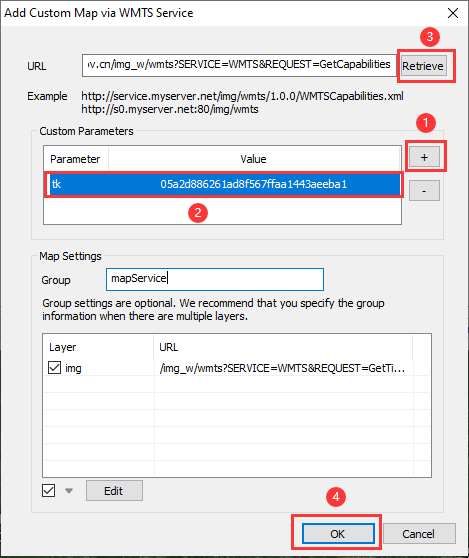
Layers: Select a layer and click [Edit] to edit the custom map layer. In the dialog box that appears, set the parameters such as [Map Name] and [Projection Type]. Then, click [OK] → [OK].
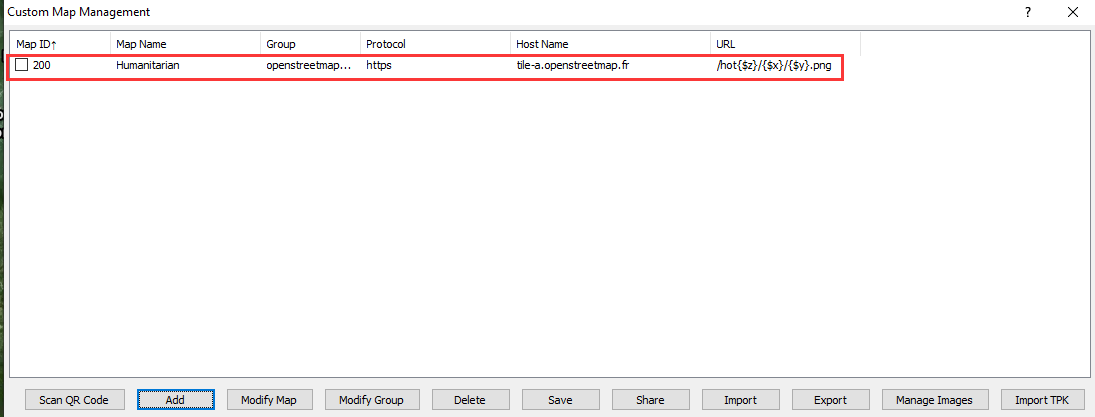
The added map layer is displayed in the custom map list.
3. View the map layer
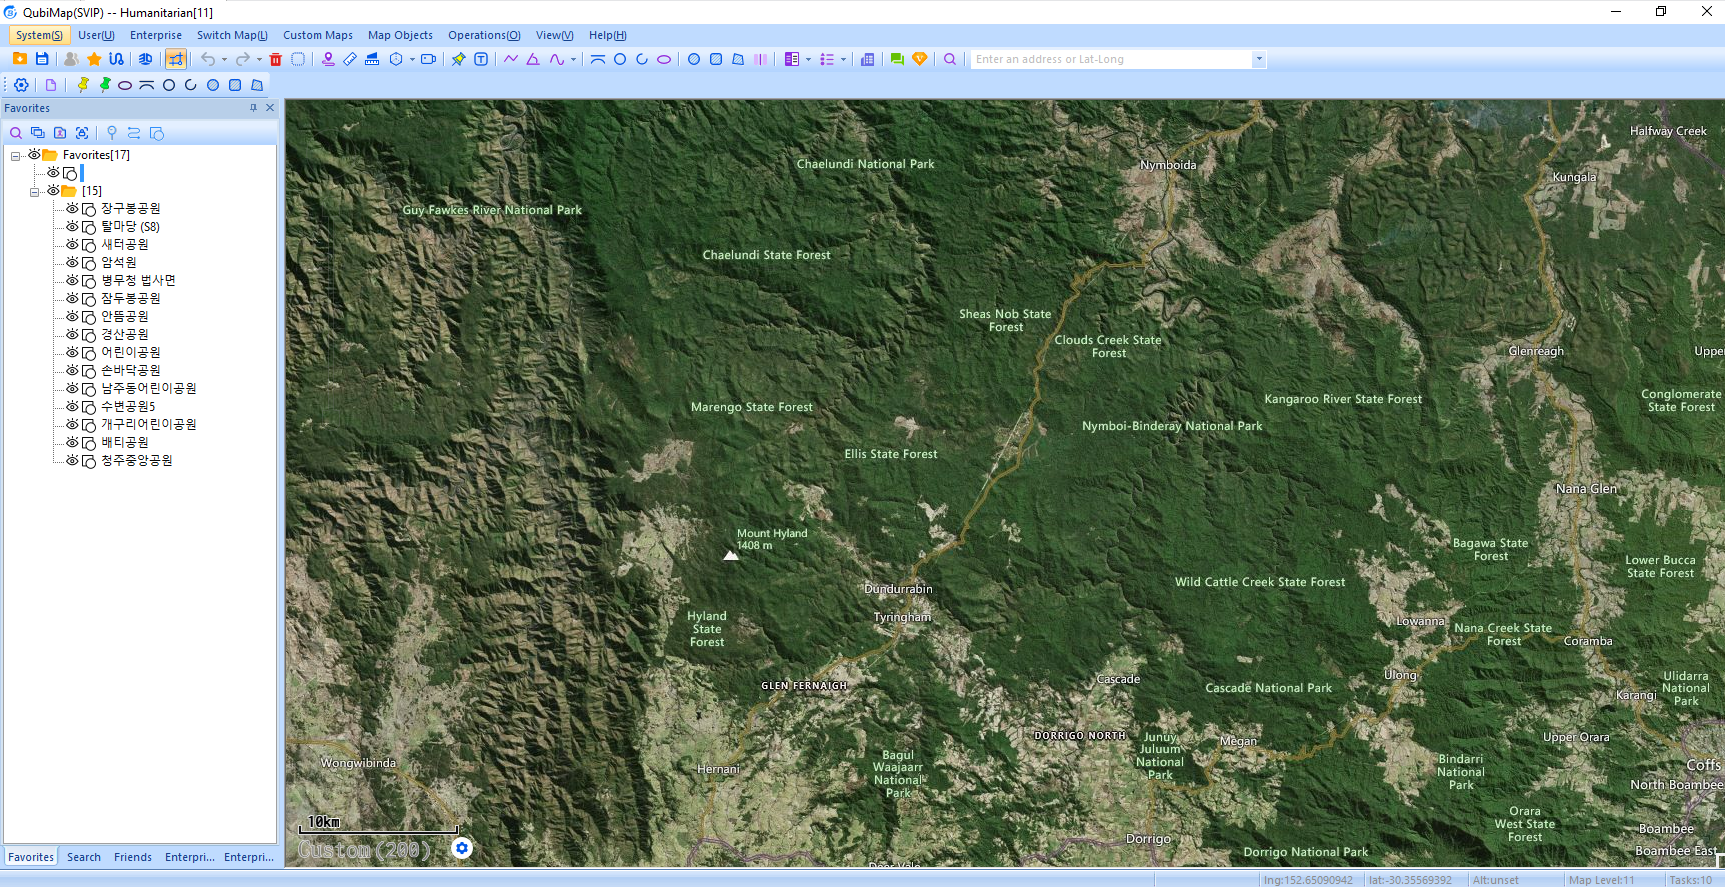
On the main UI, switch to the custom map that is added, and you can view the added map layer.