How to use the track attribute extension feature
Posted on Categories Common Features
To meet the business requirements in various industries, QubiMap provides the track attribute extension feature. VIP users can add custom track categories with user-defined attribute options as fields to the track settings, and also add two custom fields that can be used to specify time or integers to the extended information section of the track point editing dialog box. By using the folder statistics feature, you can view these custom categories, custom fields, and the summary value of all custom extended numbers for all track points and export the track statistics information to a CSV file for further processing in Excel.
This article uses the telecommunications industry as an example. The differences between the settings before and after configuration are shown as follows:
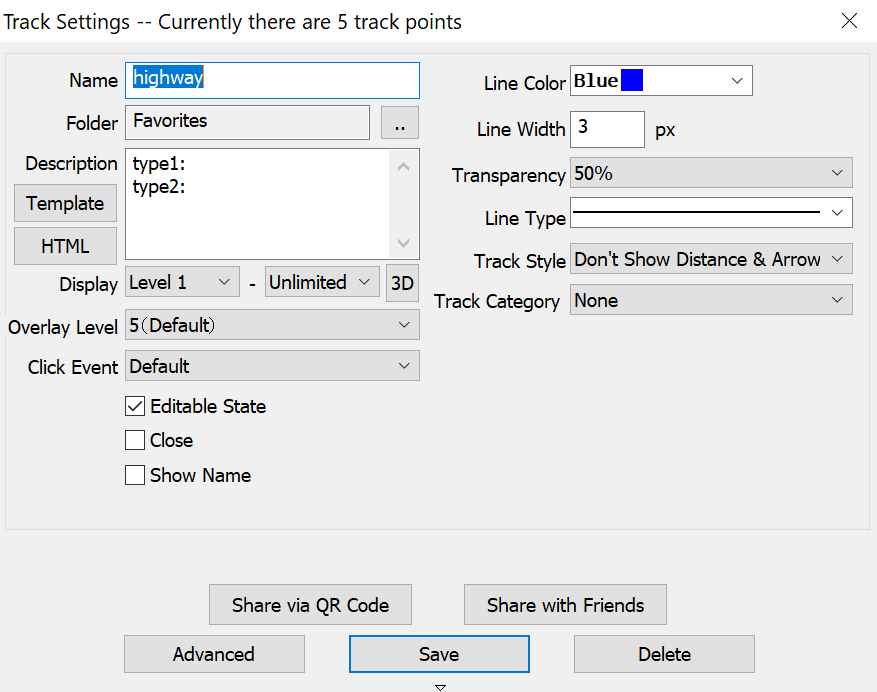
Before configuration: You can only use the default track settings to edit a telecommunications line. You cannot specify custom parameters except adding notes in the [Description] field. The following figure shows the default track settings:
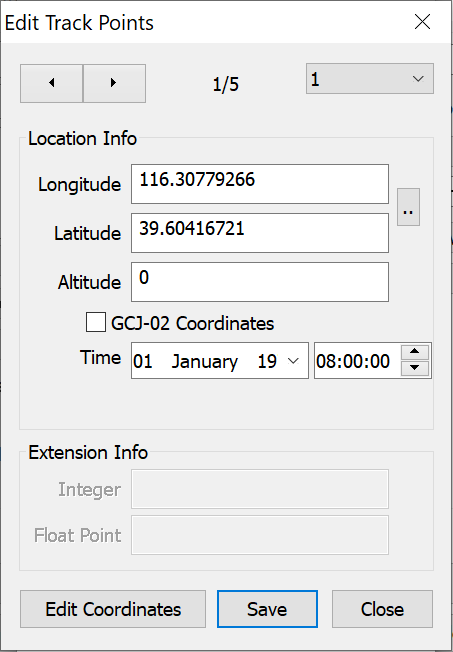
Before configuration: Choose [Advanced] > [Edit Track Points]. In the track point editing dialog box, you can only specify the location information, while the extended information section is uneditable.
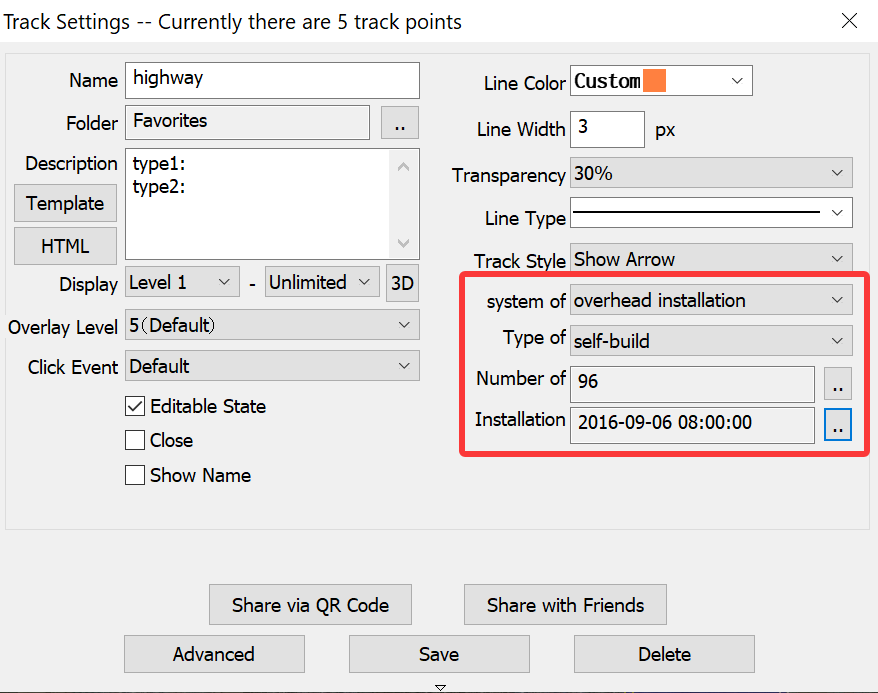
After configuration: In the track settings dialog box, the original [Track Category] field is replaced with several custom track category fields with user-defined attribute options. These fields can be displayed in the track statistics by using the folder statistics feature and can be exported as a CSV file.
After configuration: Choose [Advanced] > [Edit Track Points]. In the track point editing dialog box, you can not only specify the location information, but also the custom extended information of track points.
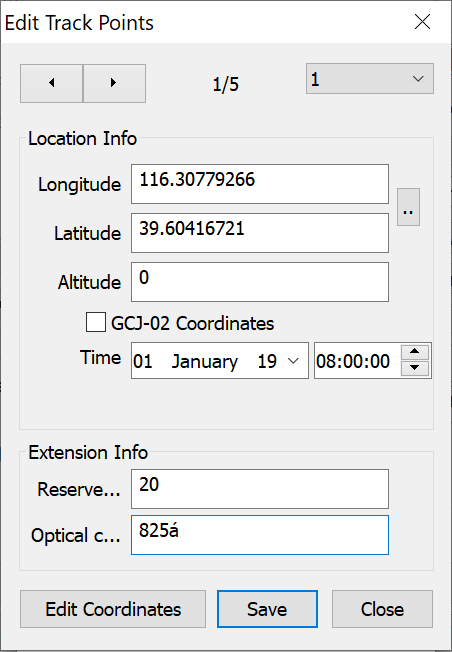
Note: When a track is in editable mode, you can right-click a track point and select the point to go to the the track point editing dialog box.
In this example, the track attribute extension settings are configured as follows:
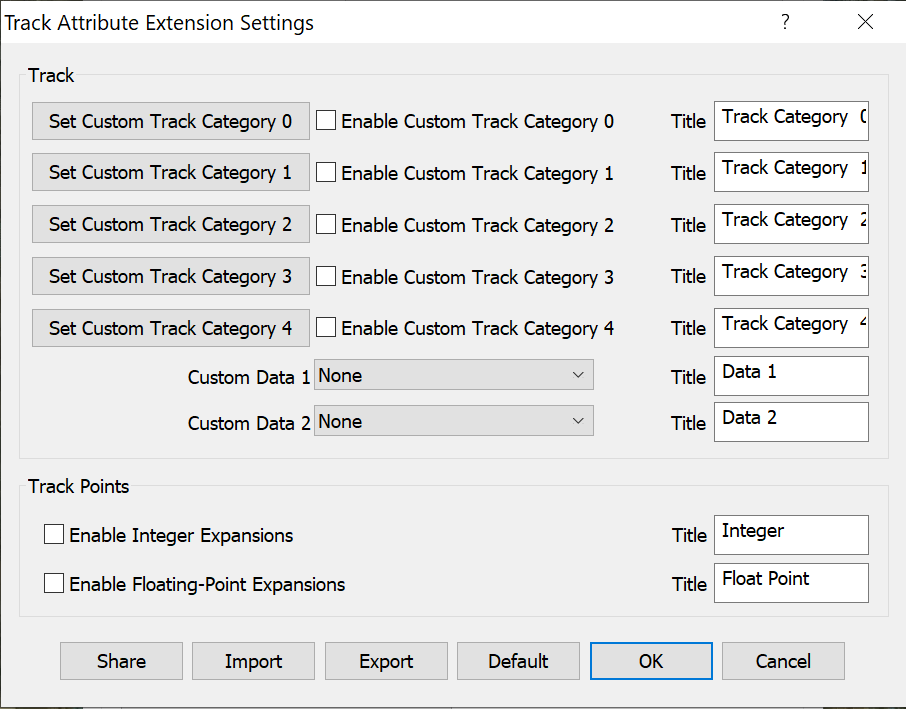
(1) Choose [System] > [System Settings] > [Track Attribute Extension Settings]. The following figure shows the default [Track Attribute Extension Settings] dialog box:
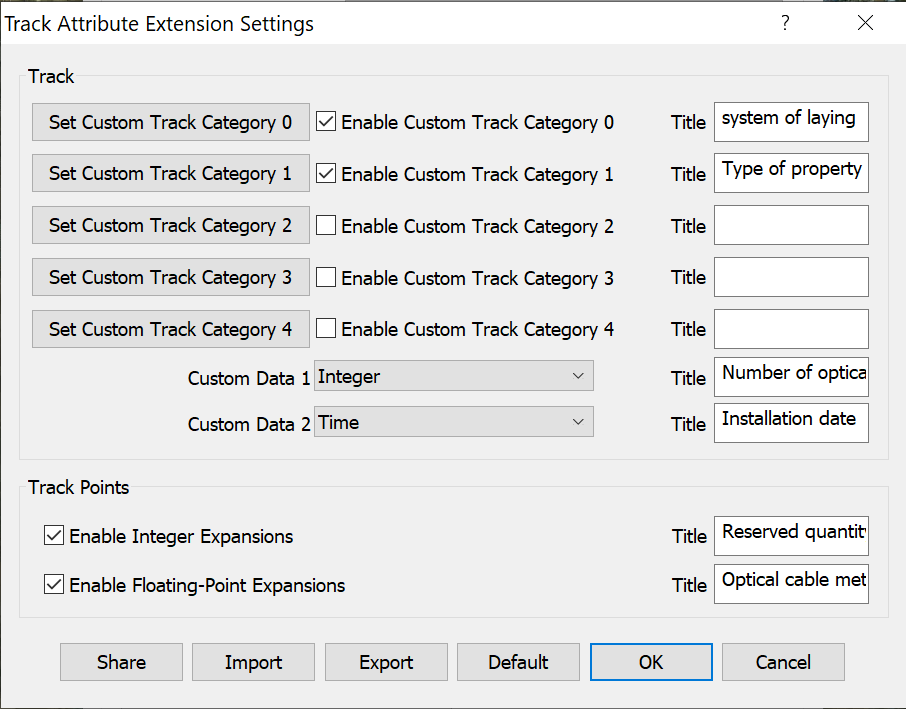
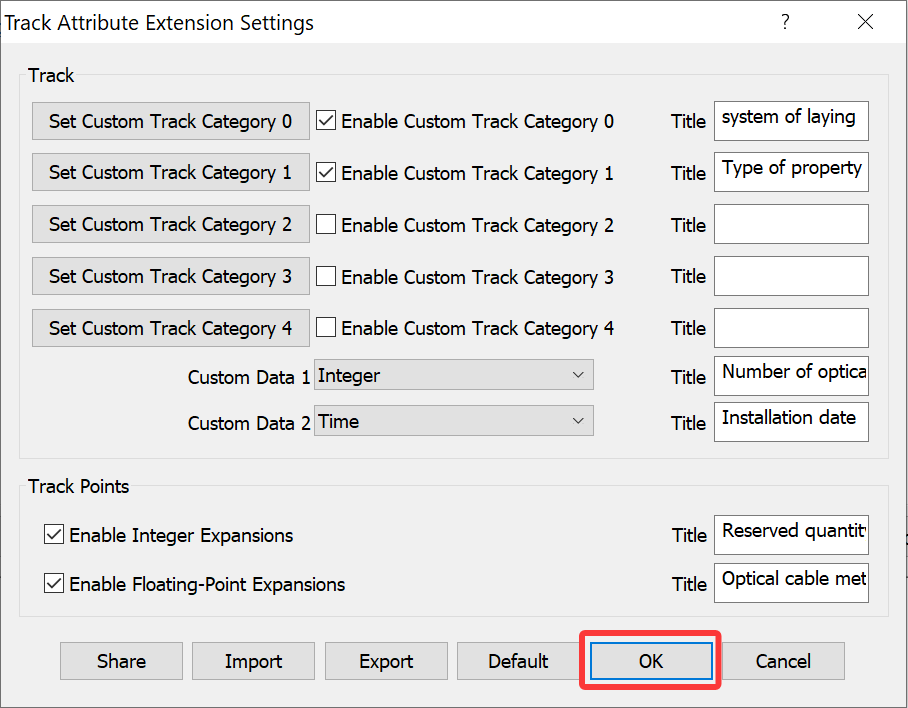
(2) Select the options and specify the titles as follows. These parameters as shown in the following titles (system of laying, type of property, number of optical fiber cores, installation date, reserved quantity, and optical cable meter) are commonly used in the telecommunications industry.
(3) Click [Set Custom Track Category 0] to go to the custom track category list.
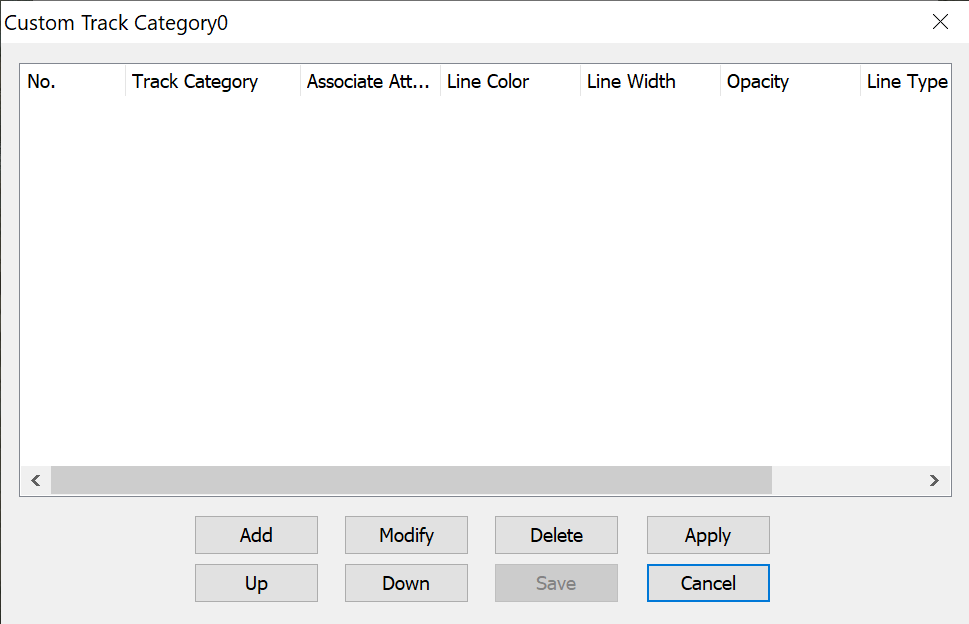
3-1) Click [Add] to add a track category option. In the [Custom Track Category] dialog box, specify a name as needed, and select the [Associate Attributes] option to set the track display attributes.
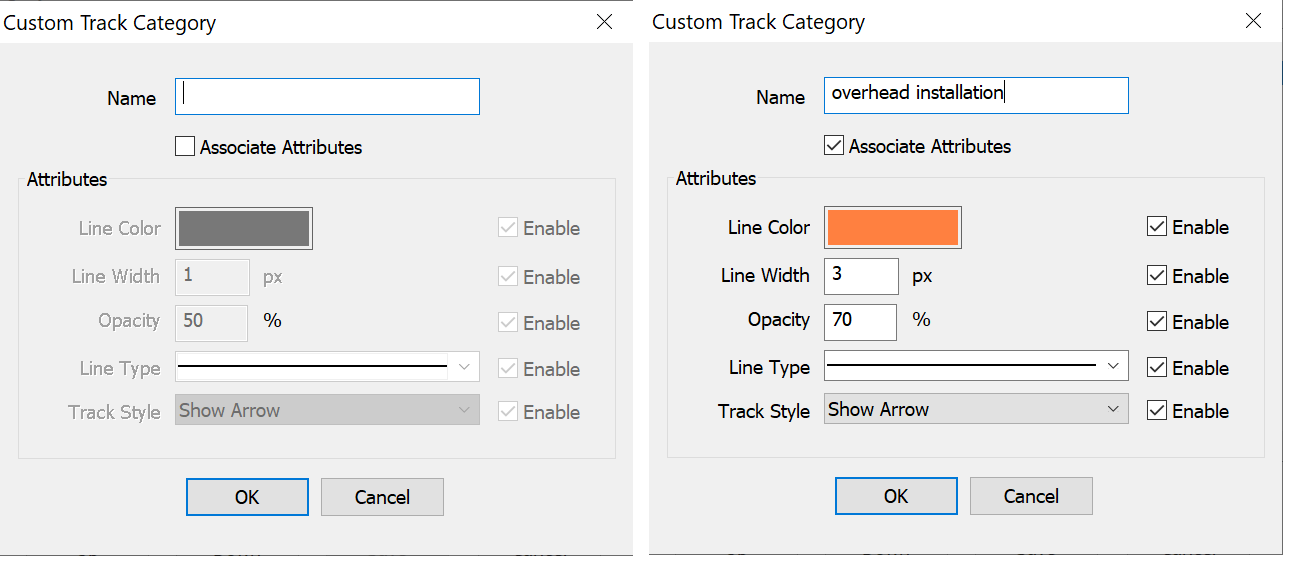
Note: You must select [Associate Attributes] and set the display attributes, so that you can select this category option in the track settings to demonstrate the track with these associated attributes.
3-2) Click [OK] to return to the custom track category list. You can add other track category options based on your needs.
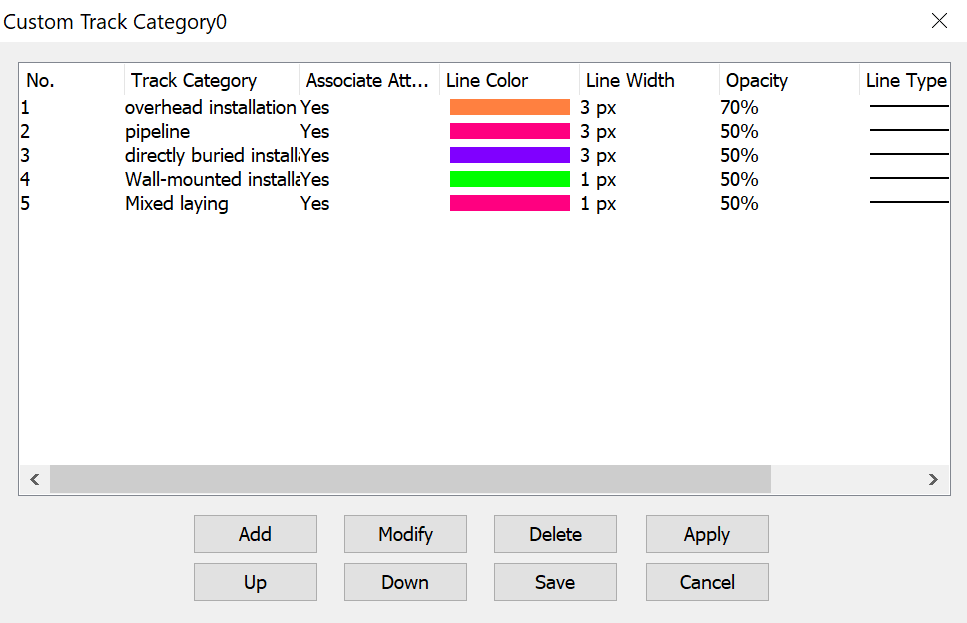
If you need to modify a track category option, select the required item, and click [Modify].
If you need to delete a track category option, select the required item, and click [Delete].
To adjust the order of a track category option, select the required item, and click [Up] or [Down].
If a track category option in the list has associated attributes, you can click [Apply] to apply them to the tracks of this category.
3-3) Click [Save] to save the changes made to the list. The current dialog box is also closed.
(4) In the [Track Attribute Extension Settings] dialog box, click [Set Custom Track Category 1] to set another custom track category. The steps are the same as in (3). The following figure shows the custom track category list after configuration:
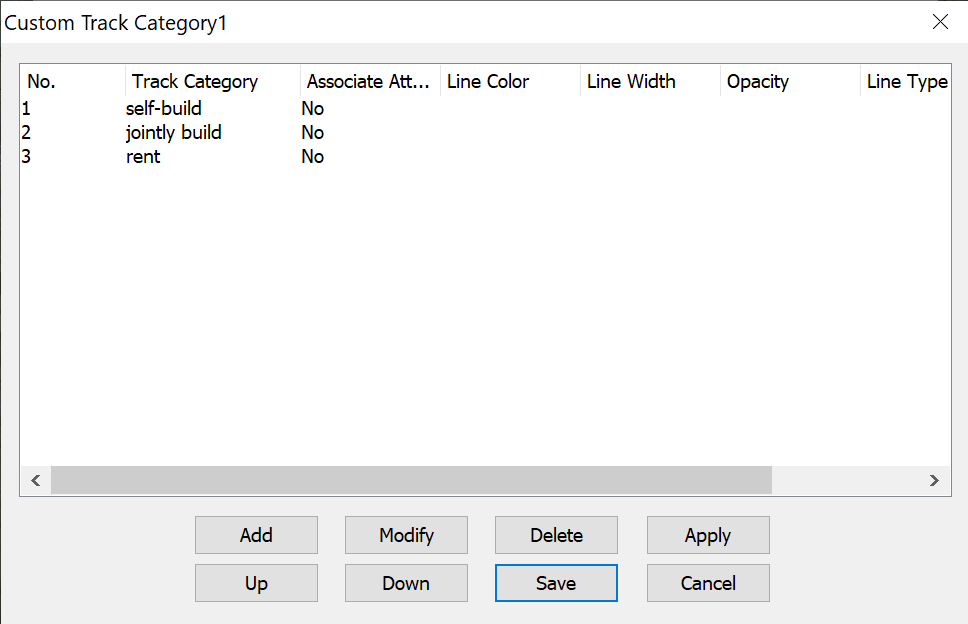
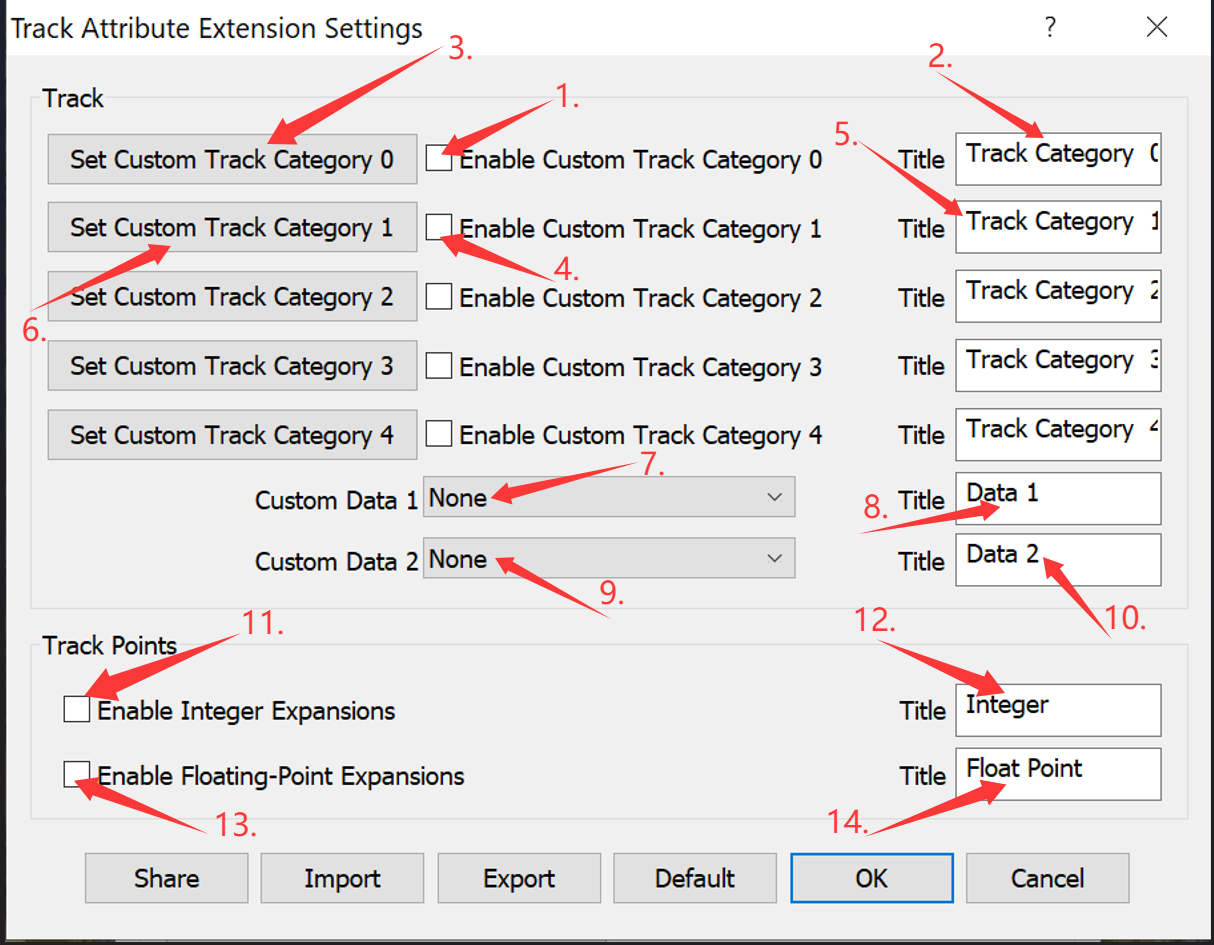
How to set parameters in the [Track Attribute Extension Settings] dialog box
-
Select [Enable Custom Track Category 0]. Only when you select this option, the specified category title can be displayed as a field in the [Track Settings] dialog box, and the category options as the field values.
-
Specify the category title. The default title is [Track Category 0]. You can change it to an actual category name based on business requirements. For example, ‘system of laying’ is a category commonly used in the telecommunications industry.
-
Click [Set Custom Track Category 0]. You can add category options and set relevant display attributes for each option.
-
Select [Enable Custom Track Category 1] to add another track category.
-
Specify the category title. The default title is [Track Category 1]. You can change it to an required category name. In this example, ‘type of property’ is used.
-
Click [Set Custom Track Category 1] to set options for this category.
-
Select the type of Custom Data 1 from the drop-down list. None: The field for Custom Data 1 is not used and will not be added to the track settings. Integer: The field is used to specify an integer and will be added to the track settings. Time: The field is used to specify a time point and will be added to the track settings.
-
Specify the title. The default title is [Data 1]. Enter the required title based on the data type set in step 7, such as ‘number of optical fiber cores’ in this example.
-
Select the type of Custom Data 2 from the drop-down list.
-
Specify the title. The default title is [Data 2]. Enter the required title based on the data type set in step 9, such as ‘installation date’ in this example.
-
Select [Enable Integer Expansions] in the [Track Points] section. This allows you to specify an integer value in the extended information section of the track point editing dialog box.
-
Specify the title. The default title is [Integer]. Enter the required title as needed, such as ‘reserved quantity’ in this example.
-
Select [Enable Floating Point Expansions]. This allows you to specify a floating point value with up to three decimal places in the extended information section of the track point editing dialog box.
-
Specify the title. The default title is [Floating Point]. Enter the required title as needed, such as ‘optical cable meter’ in this example.
How to share track attribute extension settings
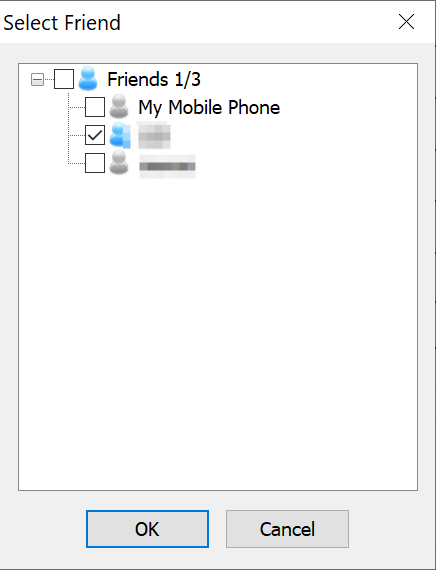
(1) Click [Share] in the [Track Attribute Extension Settings] dialog box. In the [Select Friend] dialog box that appears, select the friend you want to share with:
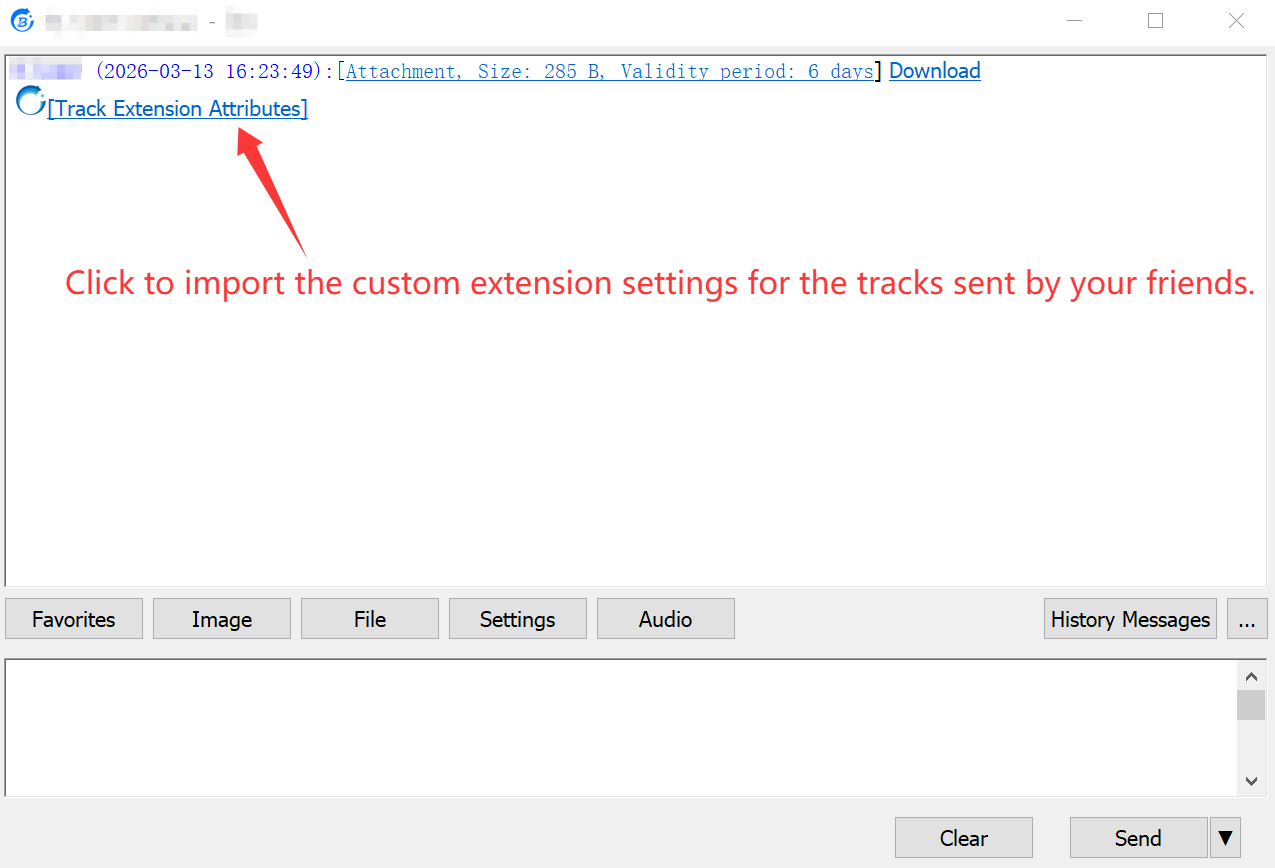
(2) Your friend receives the message from you. He can download and import the track attribute extension settings by performing the following steps:
2-1) Click [Track Extension Attributes] in the dialog box.
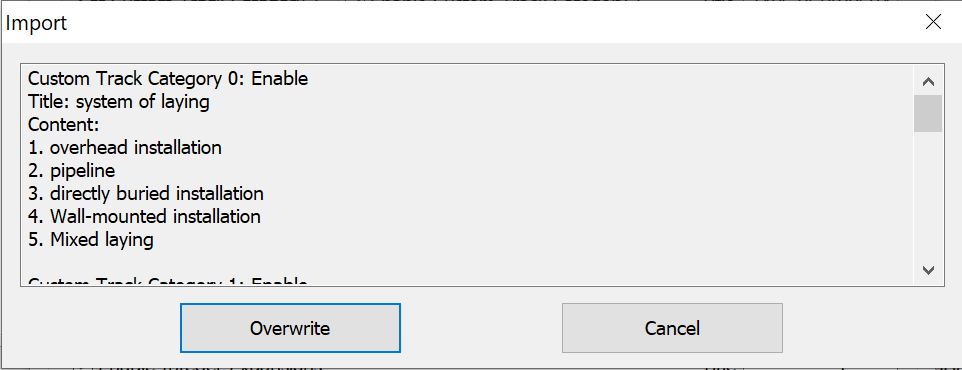
2-2) In the following attribute importing dialog box that appears, click [Overwrite] to overwrite the local settings.
3-3) In the [Track Attribute Extension Settings] dialog box, click [OK]. This way, your friend can use the same track attribute extension settings to edit tracks.
How to export track attribute extension settings
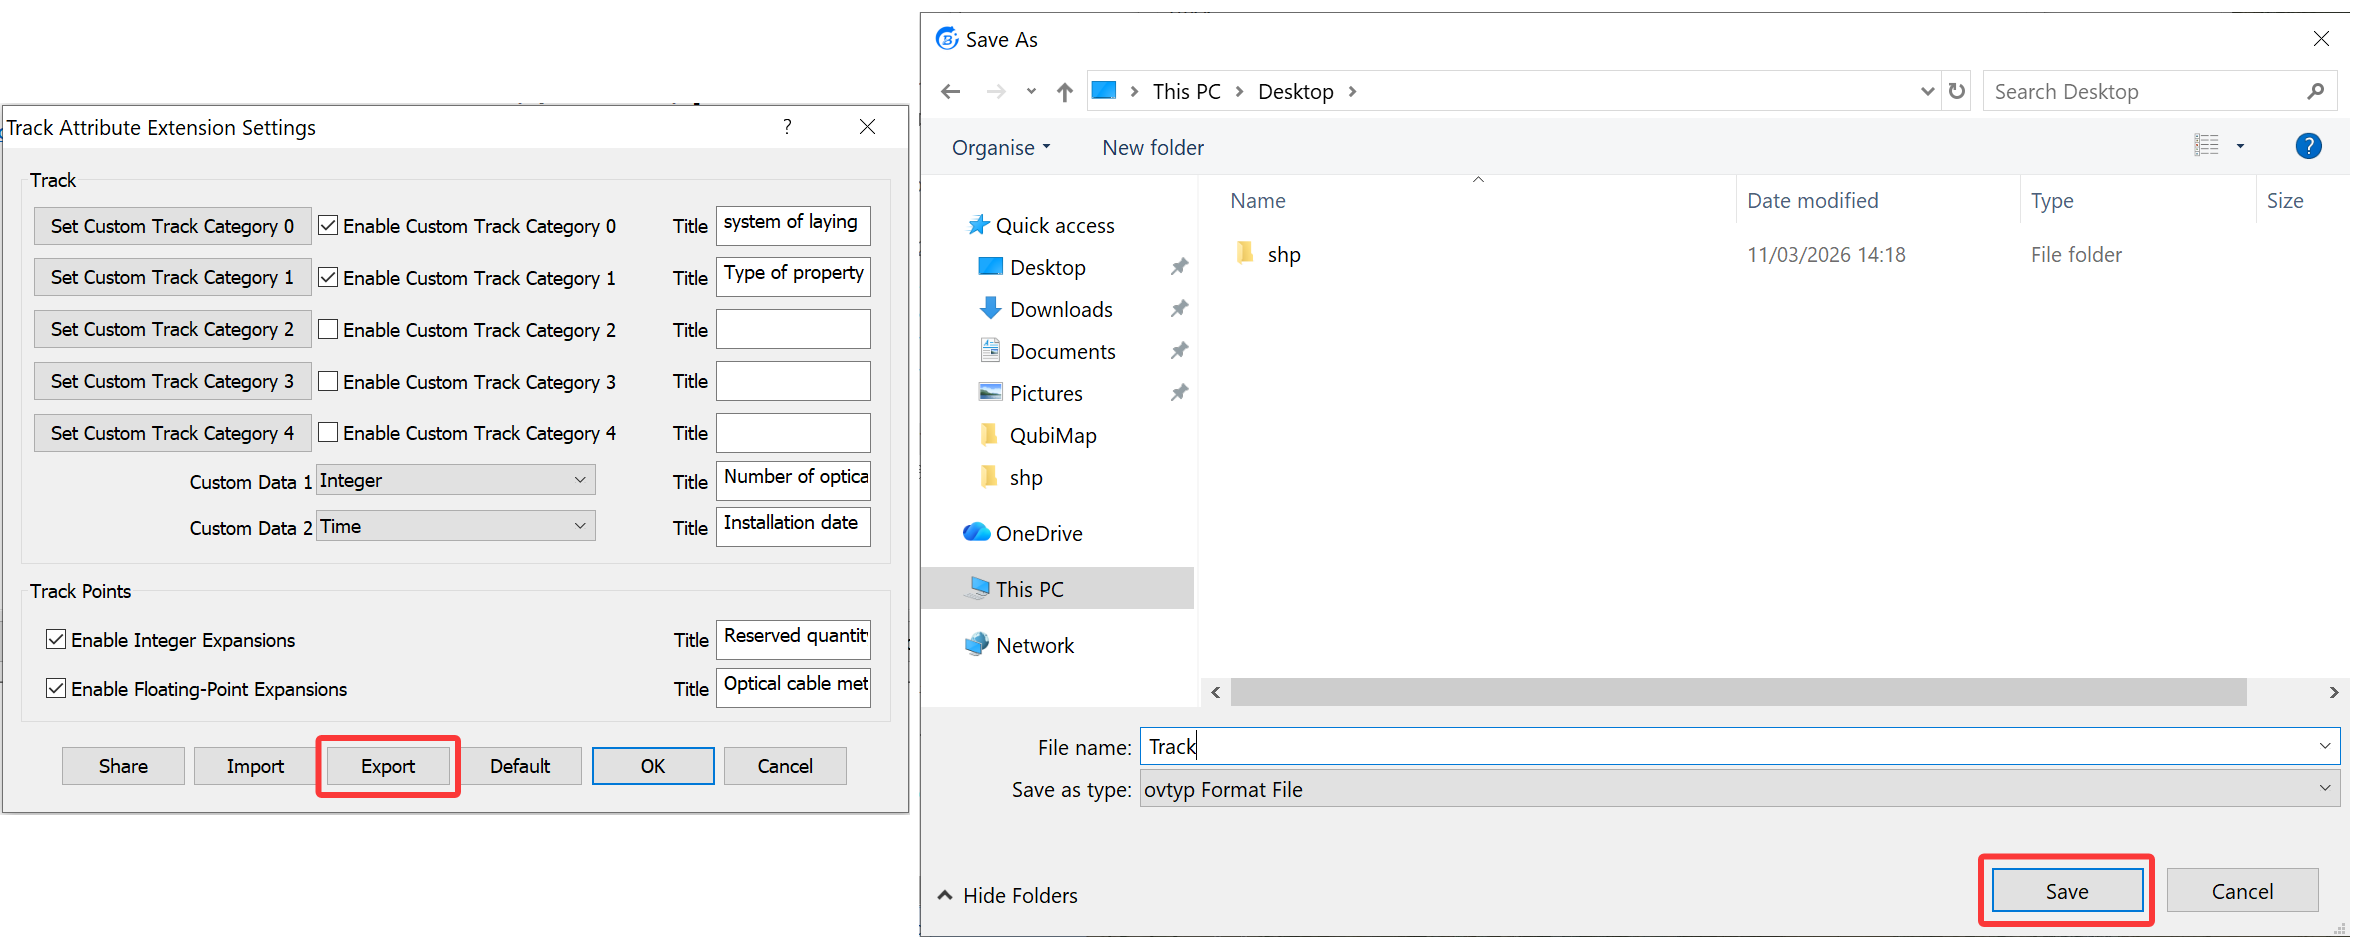
In the [Track Attribute Extension Settings] dialog box, click [Export]. In the dialog box that appears, select a storage location, specify a file name, and then click [Save]. This way, the current track attribute extension settings are saved to your local disk.
How to import track attribute extension settings
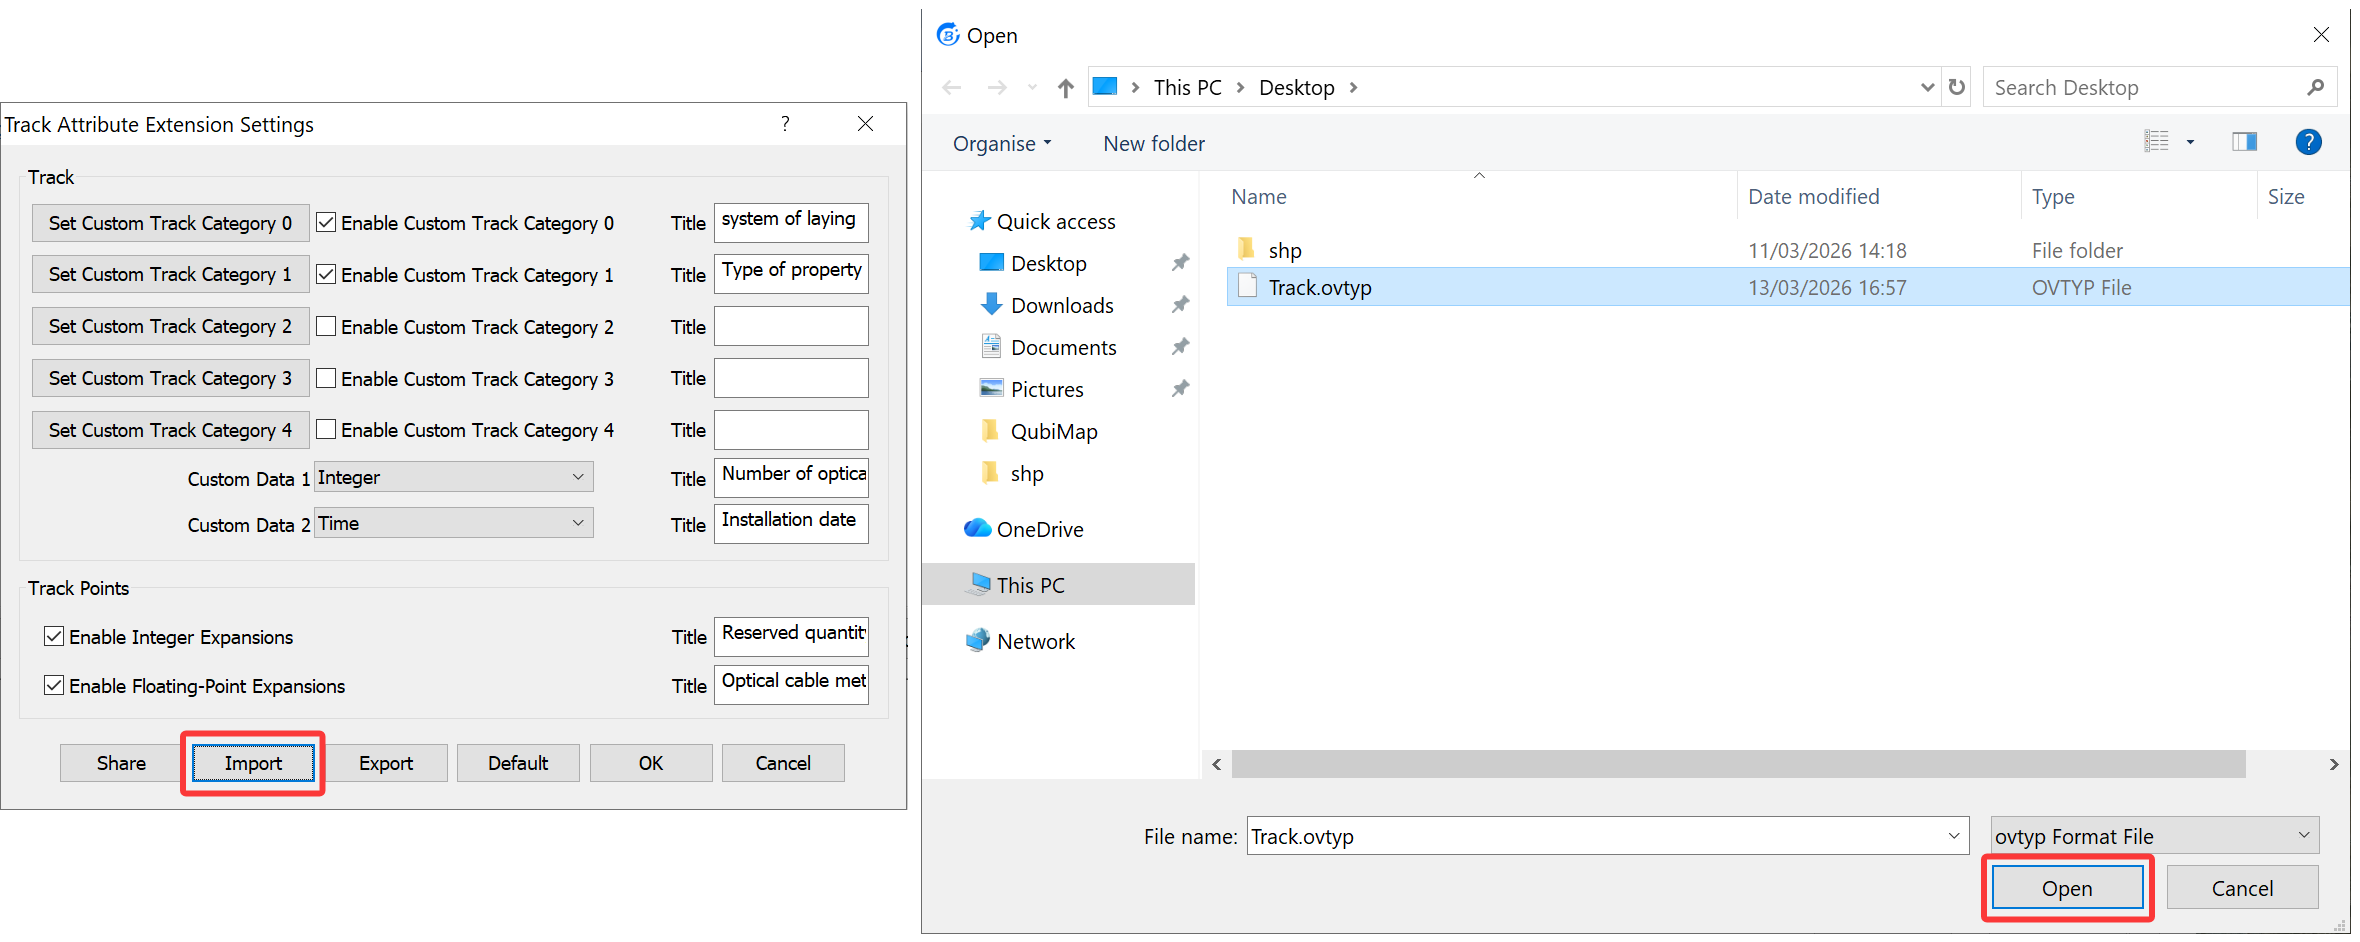
(1) Click [Import]. In the file selection dialog box, select the required configuration file and click [Open].
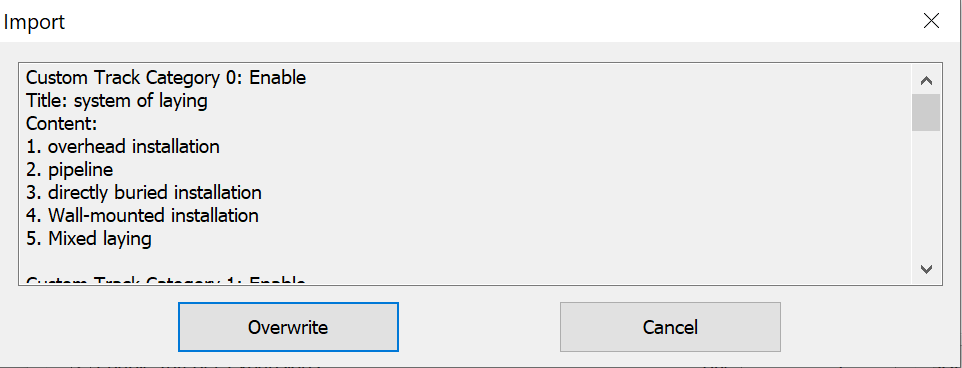
(2) In the dialog box that shows the information to be imported, click [Overwrite] to overwrite the local settings.
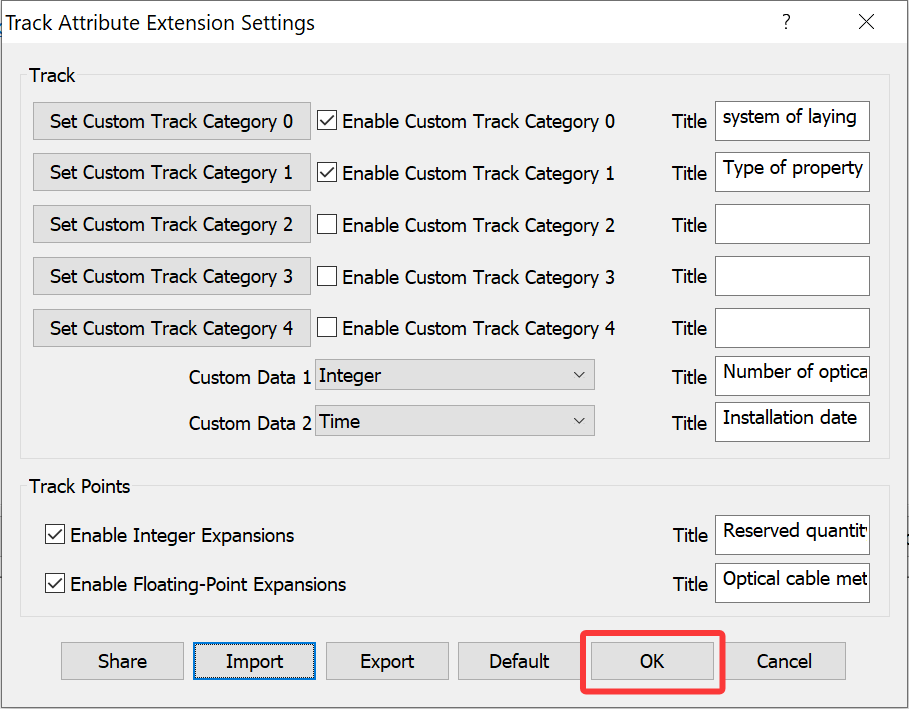
(3) Click [OK] to make the settings take effect. The [Track Attribute Extension Settings] dialog box is also closed.
How to export track attribute details from a folder as a CSV table
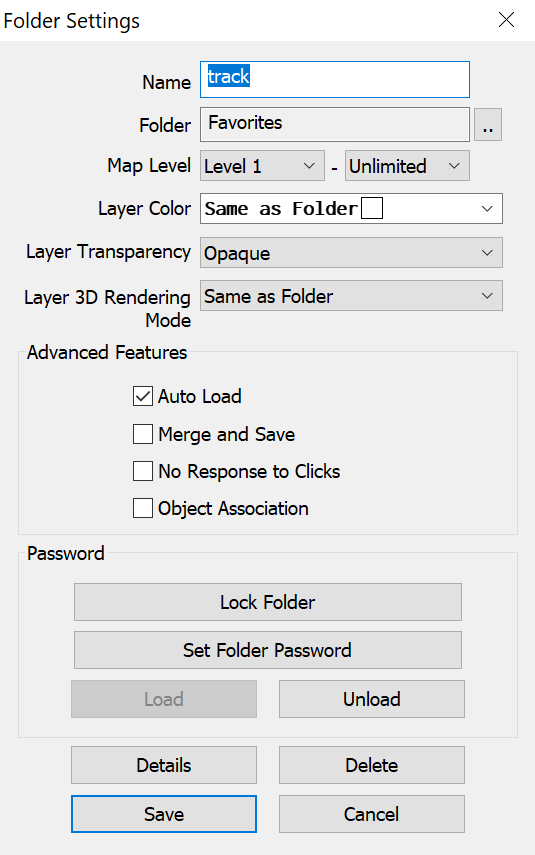
(1) Select the folder where the required tracks are located, right-click the folder and select [Attributes] to go to the [Folder Settings] dialog box. In this dialog box, click the [Details] button.
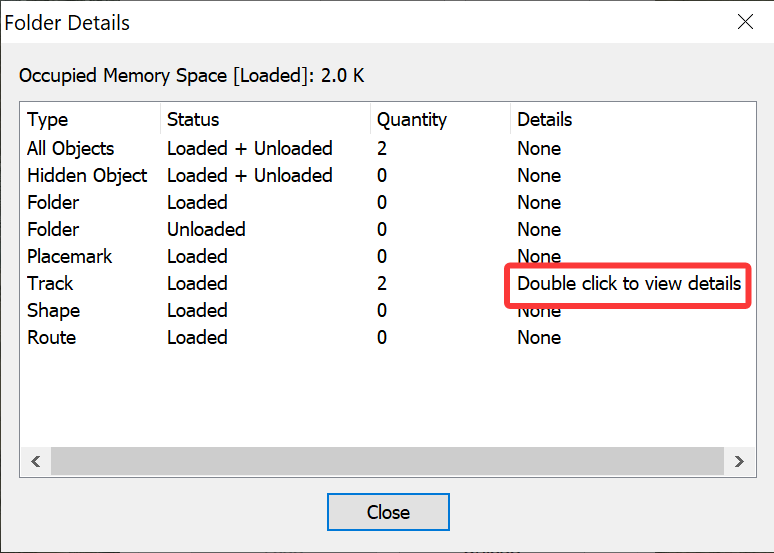
(2) In the folder details list, double-click the [Track] row.
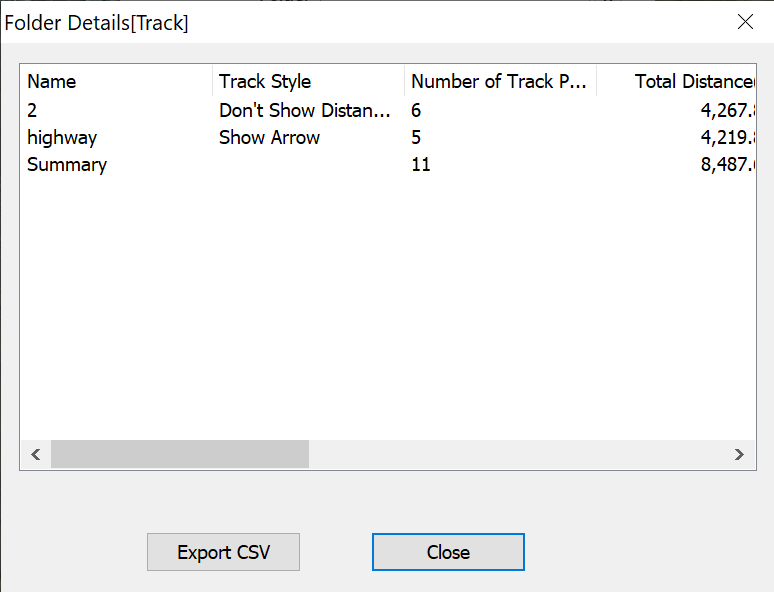
(3) In the track details dialog box, click [Export CSV].
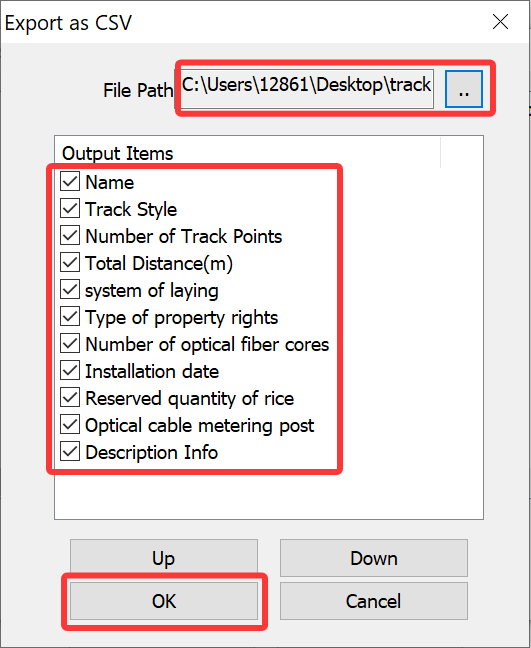
(4) In the track export configuration dialog box, set the file path and select the required output items. You can adjust the order of any item if necessary. Then, click [OK].
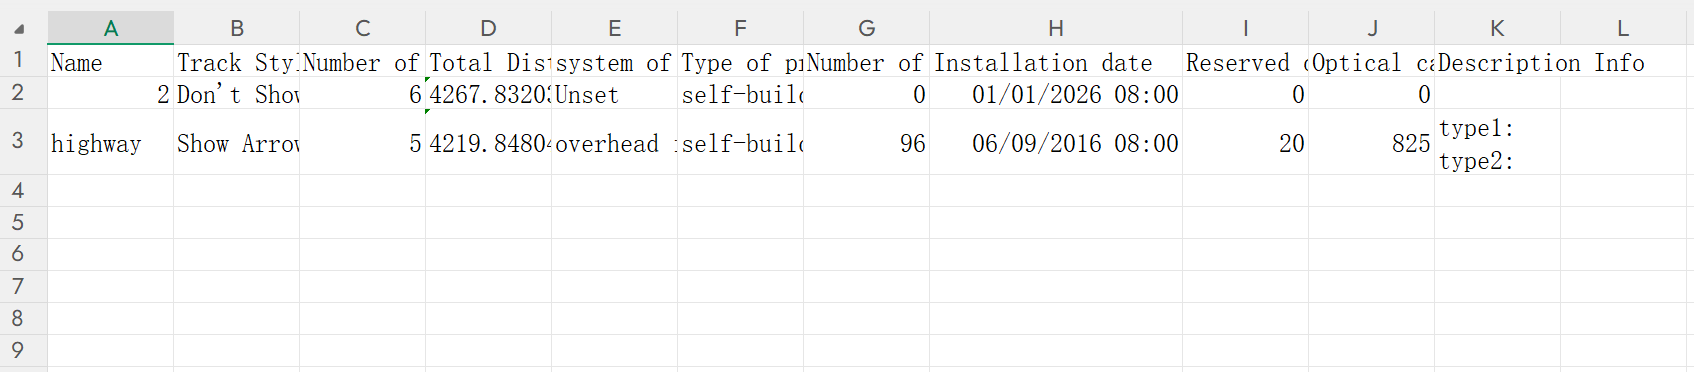
(5) You can open the saved CSV file with Excel for further editing, as shown in the following figure: