How to load the map services published in ArcGIS
Posted on Categories Custom Maps
You may want to demonstrate a large number of aerial images in QubiMap. To directly import and load these images, the system needs to process heavy data workloads, which requires high-performance computer hardware. In this case, you can publish the aerial images as a map service through ArcGIS and load them in QubiMap as an online custom map layer.
1. Publish a map service in ArcGIS
In ArcGIS, you can publish aerial images or vector graphics as map services.
(1) Load data
Open ArcMap, click the  button in the toolbar, and then click the
  button.
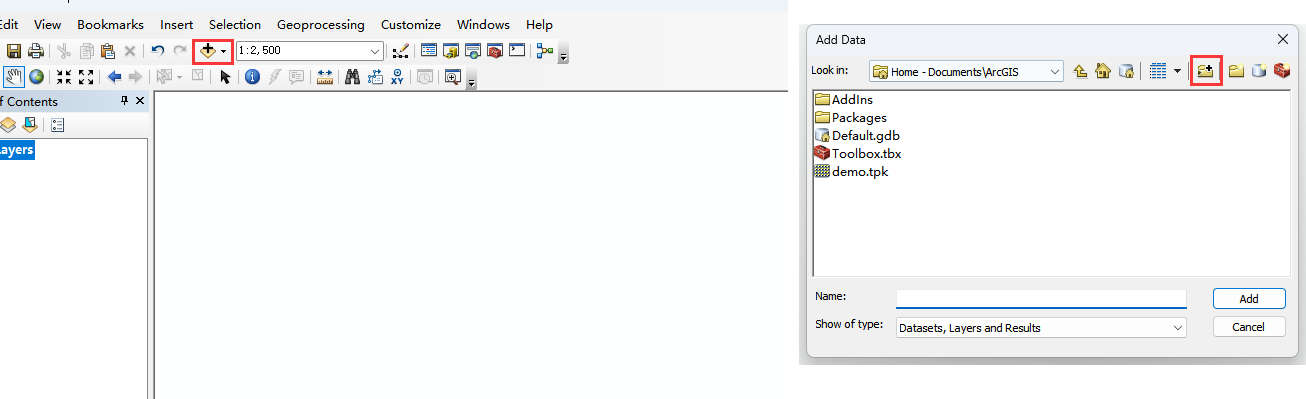
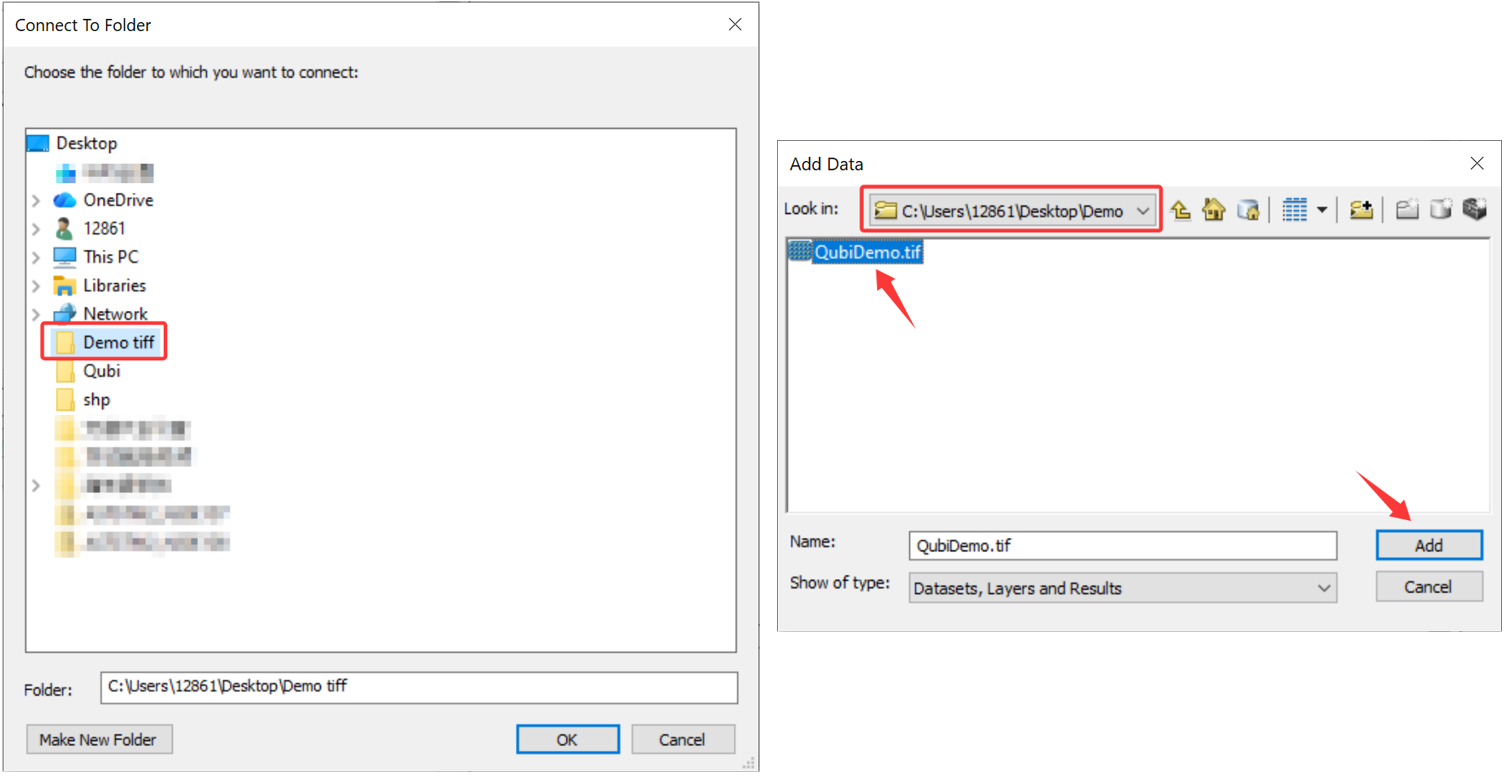
Select the folder where you save the map files and click [OK]. Select one or multiple aerial images you want to publish and click [Add].
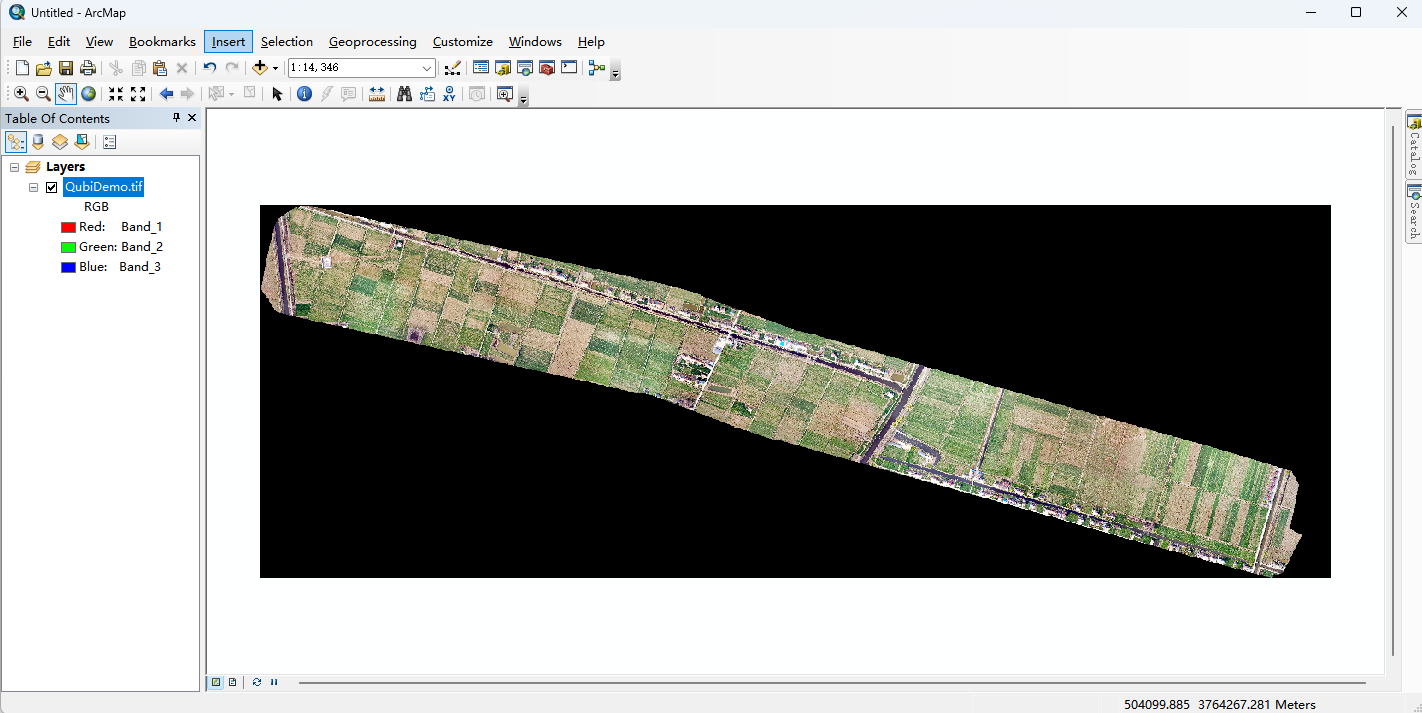
The added aerial images are displayed in the map window.
(2) Publish a map service
- Connect to the ArcGIS server
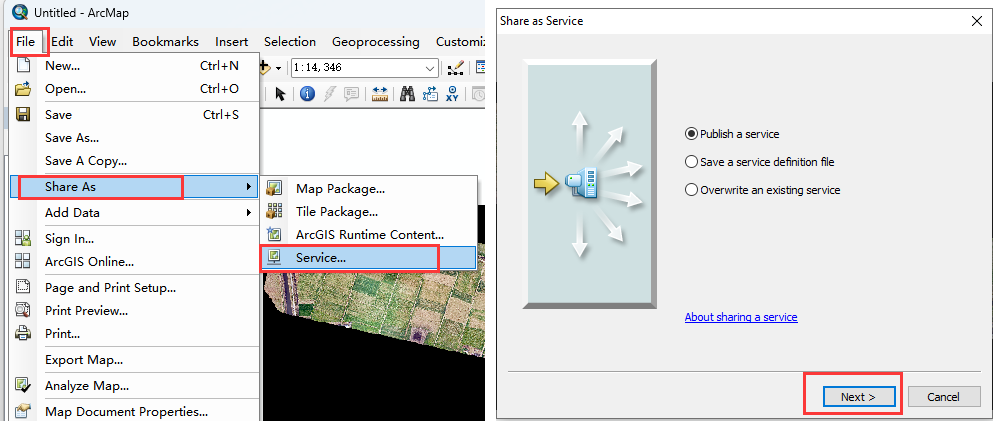
Choose [File] >[Share As] > [Service]. Select [Publish a service], and click [Next].
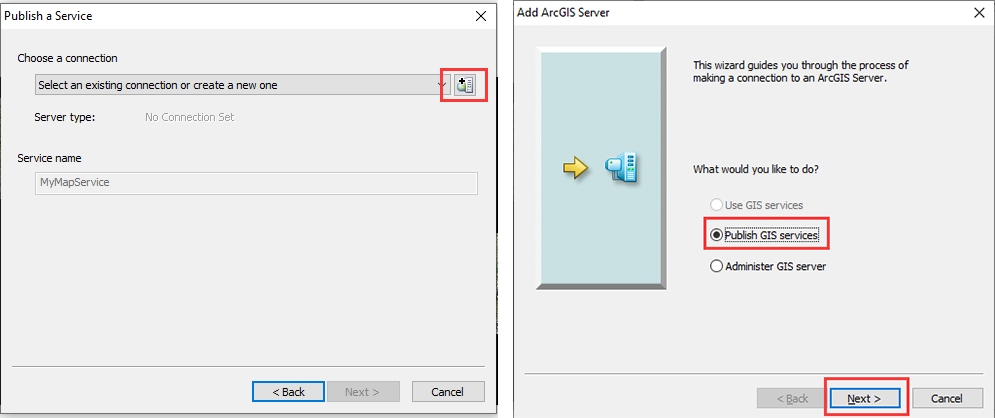
In the [Publish a Service] dialog box, click the  button. In the [Add ArcGIS Server] dialog box, select [Publish GIS services] and click [Next].
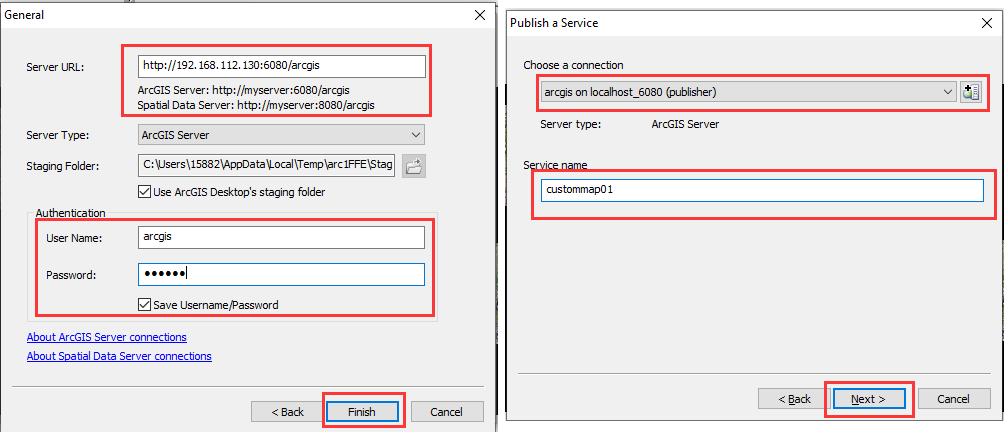
In the [General] dialog box, set the server URL, keep the server type and staging folder as default, enter the username and password, and click [Finish] to create a connection. and return to the [Publish Service] window.
Server URL: Replace “myserver” with the IP address of the host where the ArcGIS server is located. If ArcGIS Desktop and ArcGIS Server are deployed on the same device, you can replace “myserver” with “localhost”.
In the [Publish a Service] dialog box, select the connection you created, enter the service name, and click [Next].
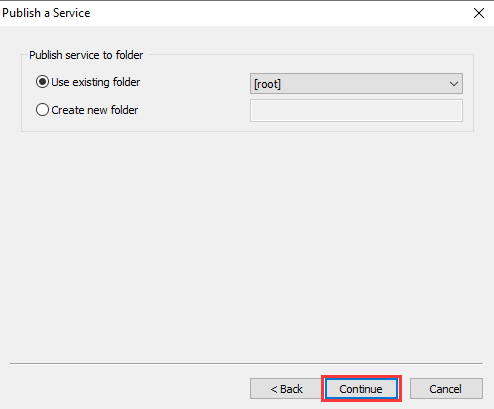
Click [Continue] to go to the [Service Editor] dialog box.
- Set map tile attributes
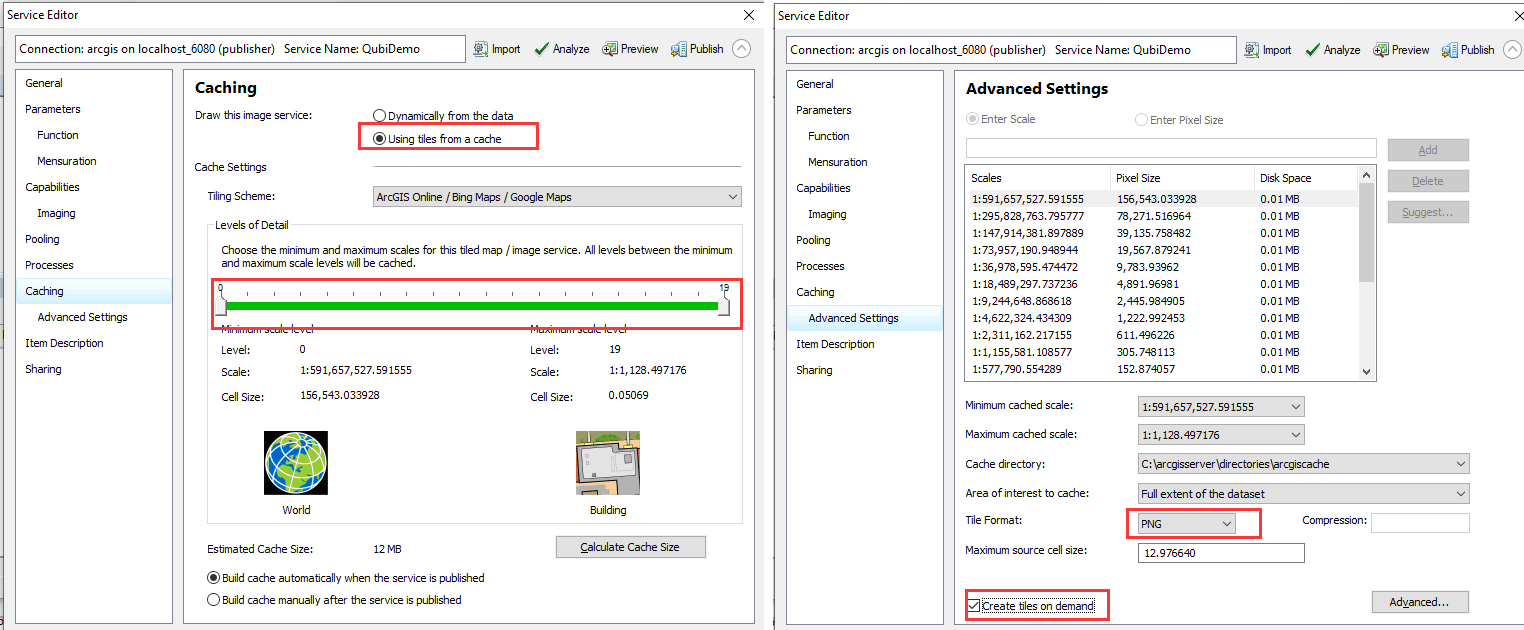
In the [Service Editor] dialog box, switch to [Caching] and set the following parameters:
① [Draw this image service]: Select [Using tiles from a cache].
② [Tiling Scheme]: Keep the default value. QubiMap only supports loading ArcGIS map services of the [ArcGIS Online/Bing Maps/Google Maps] tiling scheme, with the projection type as [Web Mercator].
③ [Levels of Detail]: Set an appropriate tile level range based on the resolution of the aerial images. Generally, the minimum level is set to “0”.
④ [Estimated Cache Size]: Keep the default value.
Switch to [Advanced Settings]. Set the following parameters and select [Create tiles on demand]:
① [Minimum cached scale]: Keep the default value.
② [Maximum cached scale]: Keep the default value.
③ [Tile Format]: Select a format, such as PNG. QubiMap only supports loading map tiles in PNG and JPG formats.
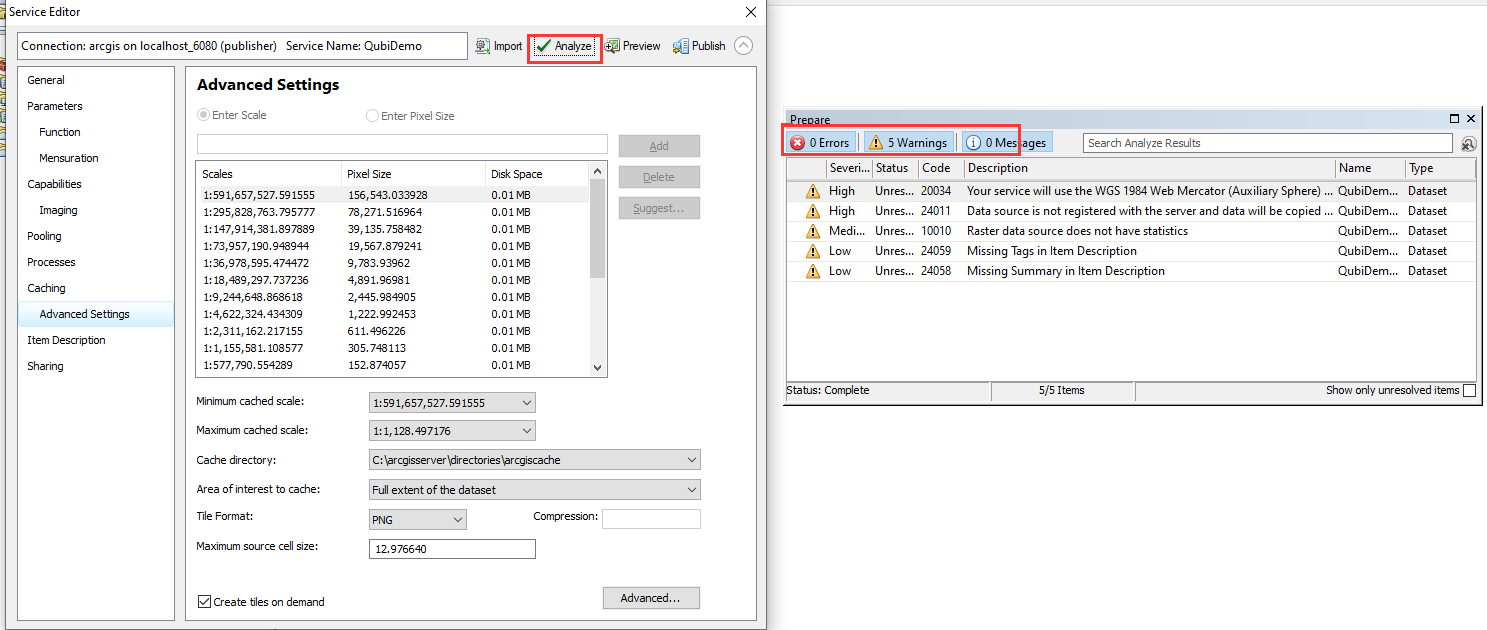
Click [Analyze]. In the [Prepare] dialog box, the errors, warnings, and messages are displayed.
If no errors occur, the map service can be published; otherwise, please modify according to the prompts.
Warnings and messages can be skipped.
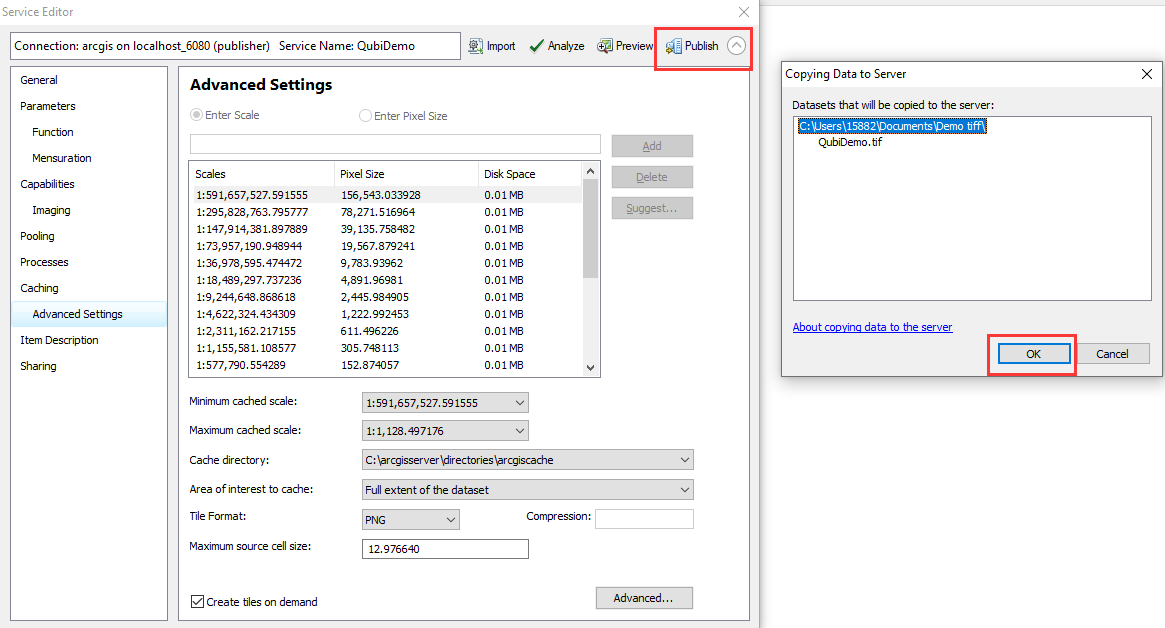
Click [Publish] → [OK].
In a message that appears, you can view the service publishing result. Click [OK].
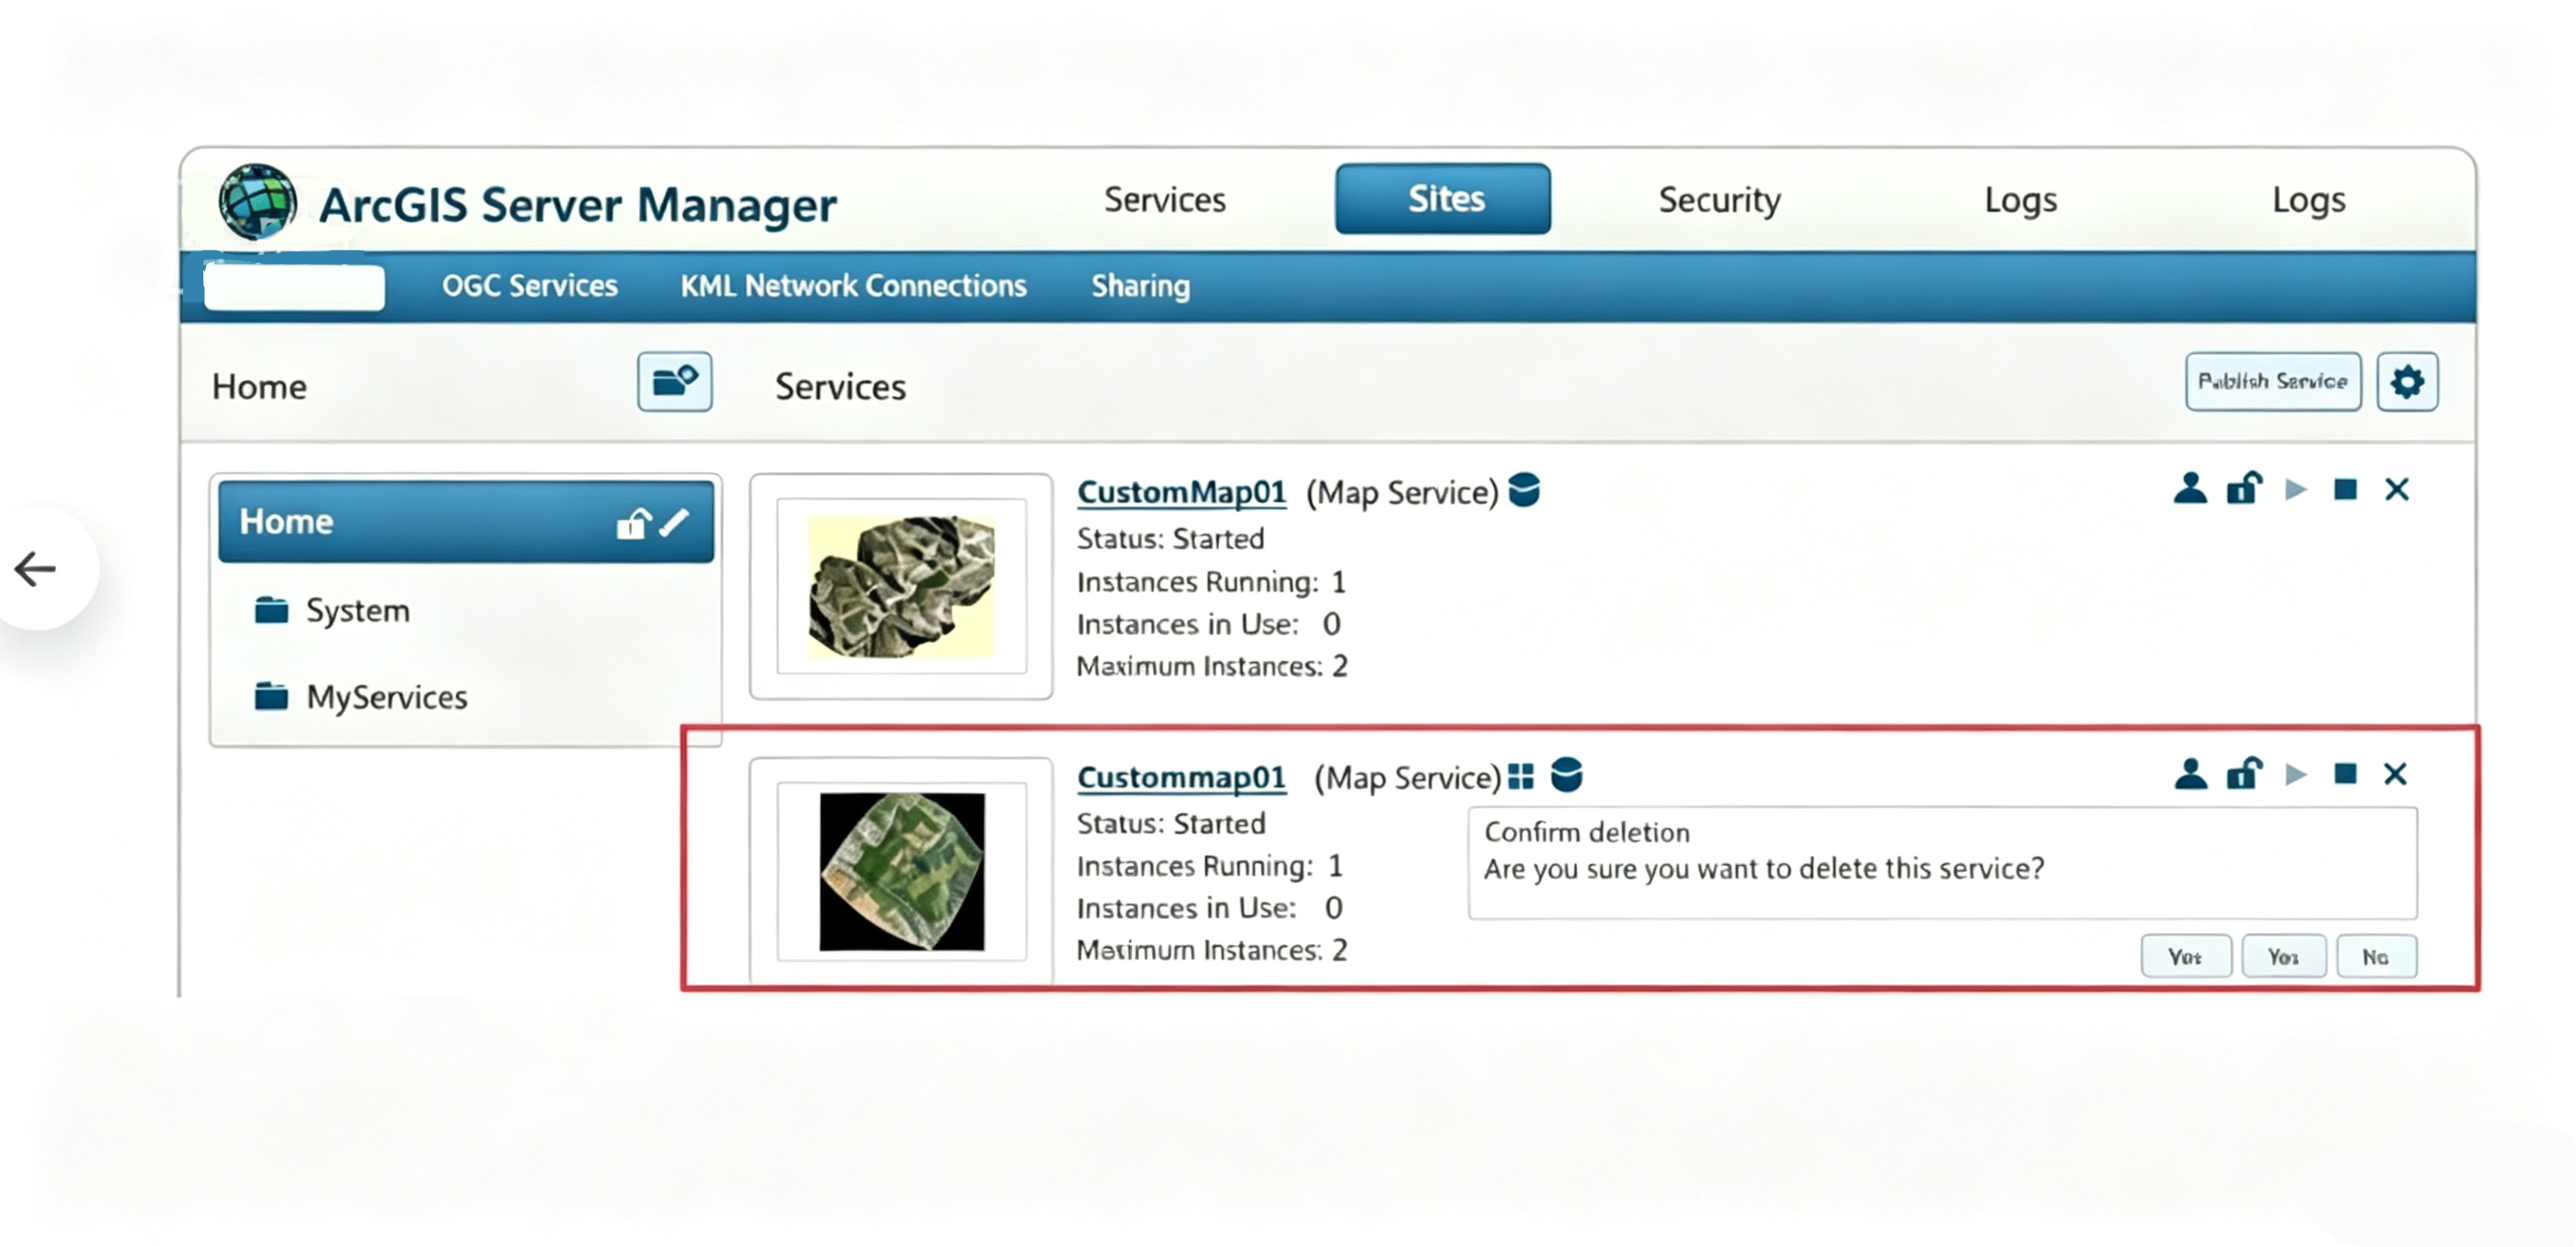
After the map service is published, you can view it in the ArcGIS Server Manager.
- View the map service
In the Windows Start menu, find the ArcGIS directory, select [Manager], enter your username and password, and click [Login].
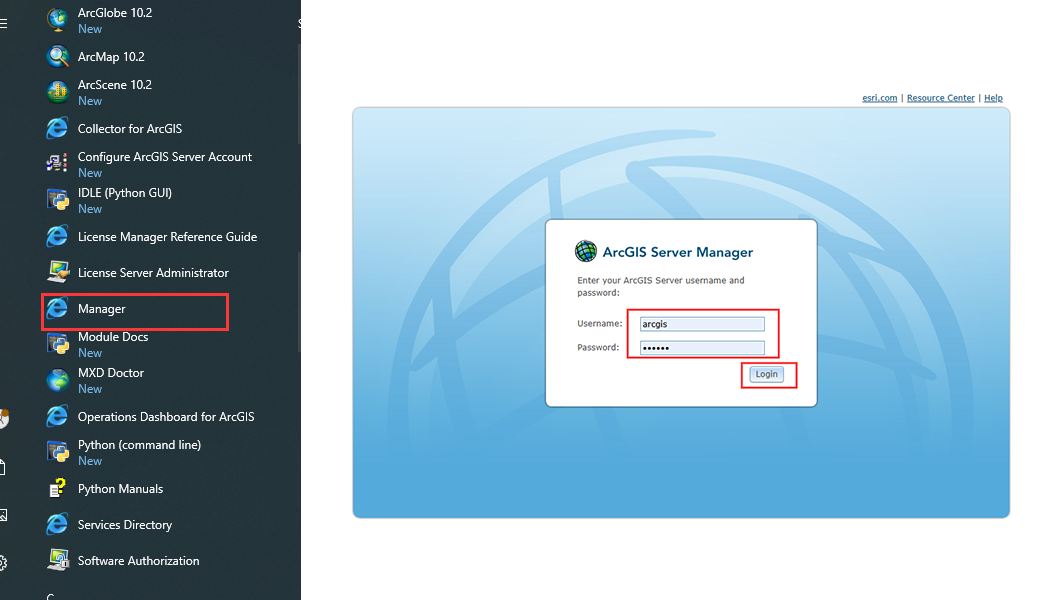
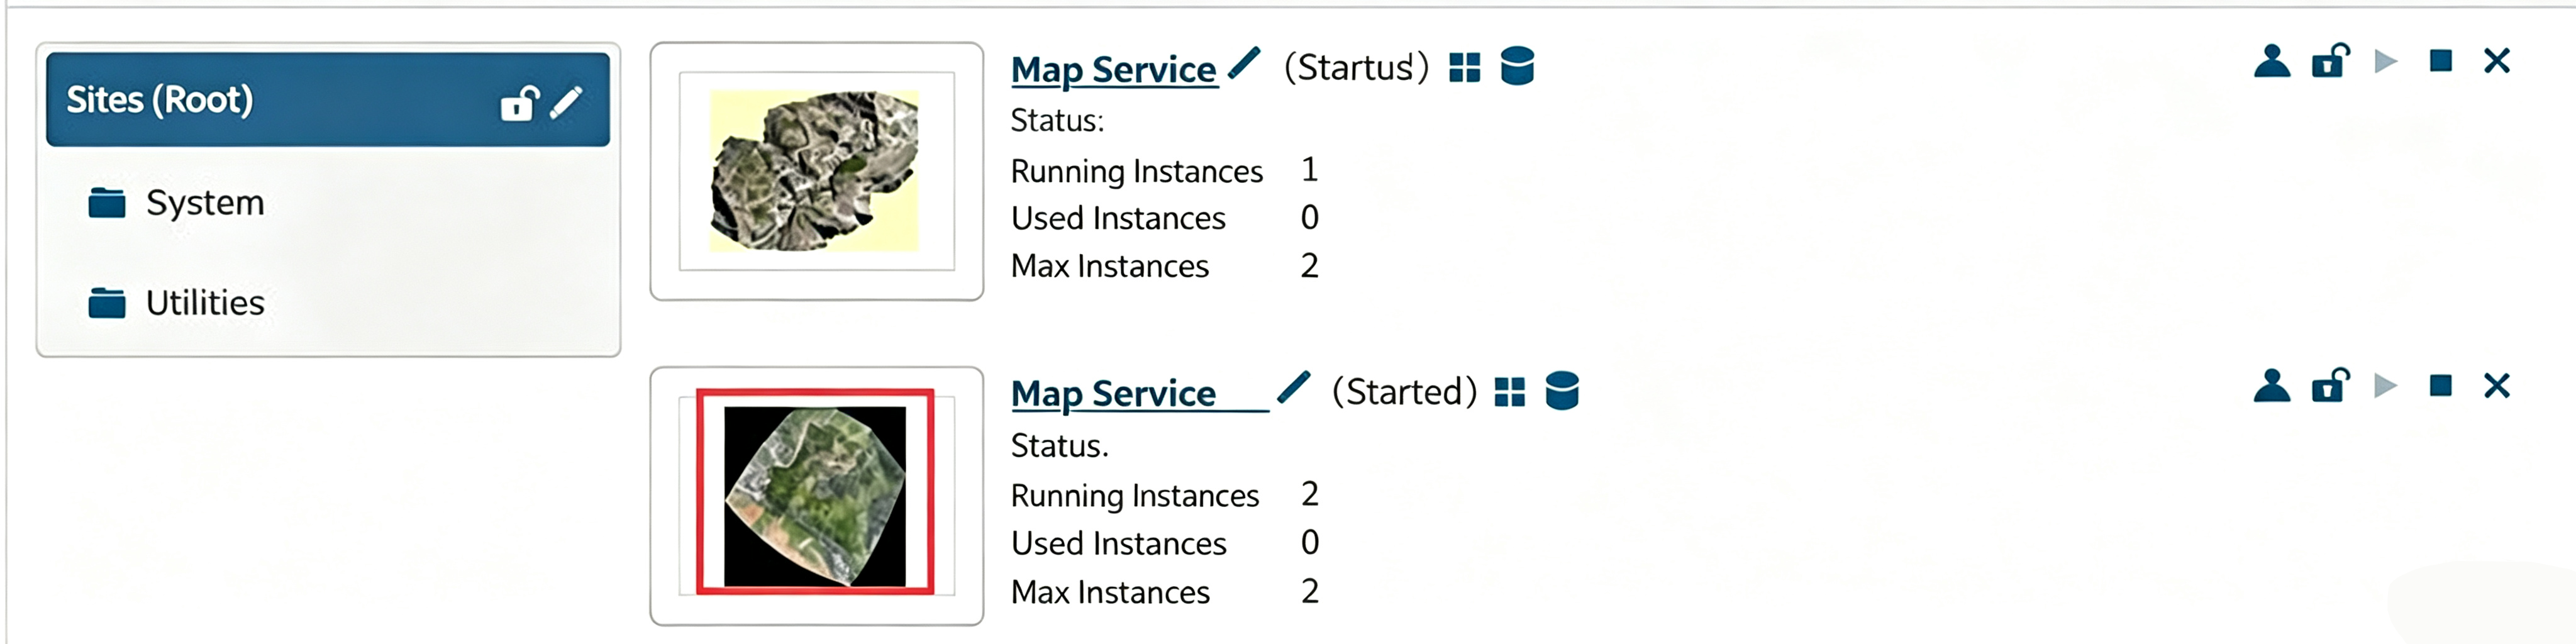
After login, you can view the published map services on the [Services] tab.
2. Load the ArcGIS map service in QubiMap
You can load ArcGIS map services on both the mobile and PC clients of QubiMap.
(1) Retrieve the URL
Find your service, and click its thumbnail to open it in the built‑in web viewer.
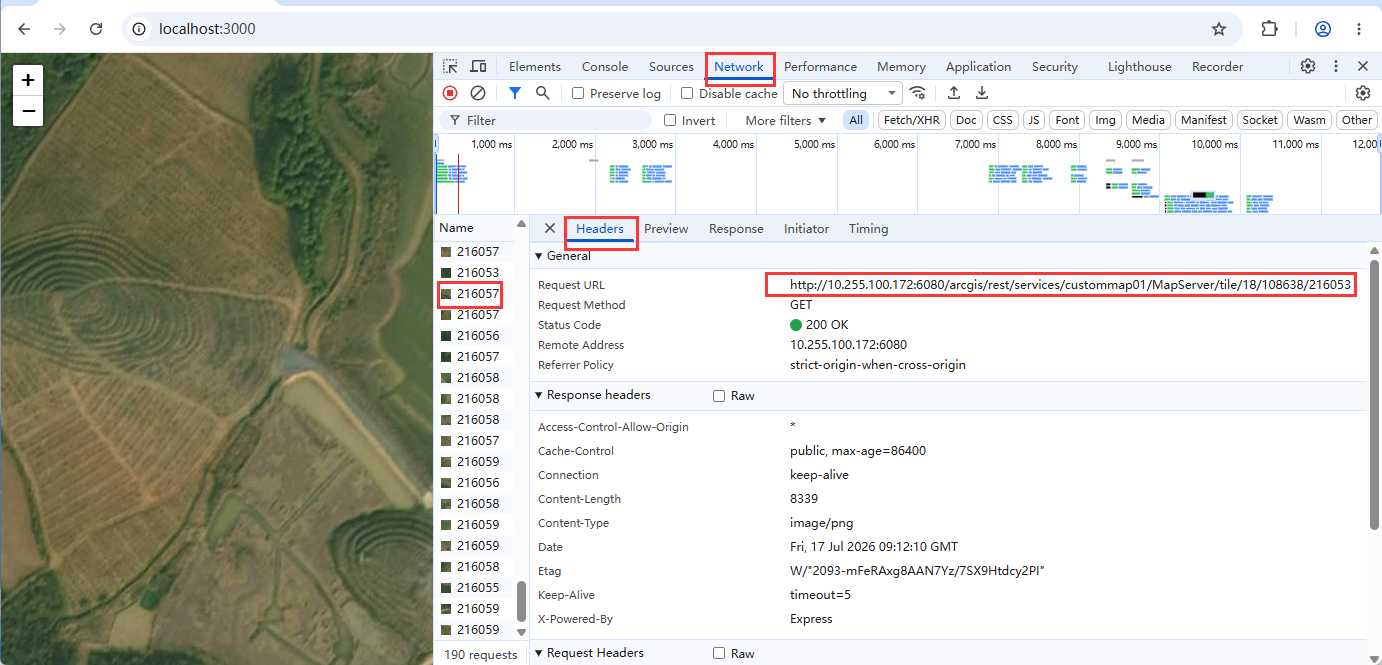
In the map viewer, press F12 on your keyboard, and click [Network]. Zoom in on the map on the left, and a list of images appear. Select an image, and you can view the request URL in the headers. Then, you can create a text document and copy the request URL into it.
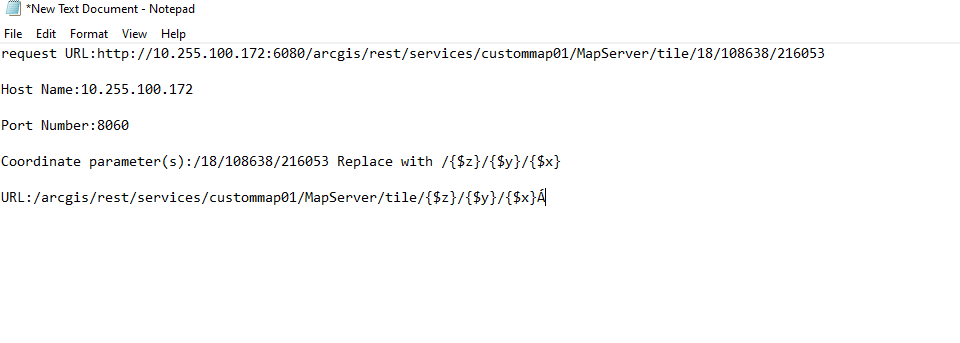
Specify the information that are required for QubiMap in the text document by using the following format:
(2) Load the ArcGIS map service on a QubiMap PC client
On the main UI, choose [Custom Maps] > [Custom Map Management]. Then, click [Add] and select [Add Custom Map].
In the dialog box that appears, set the parameters and click [OK] to add the map service.
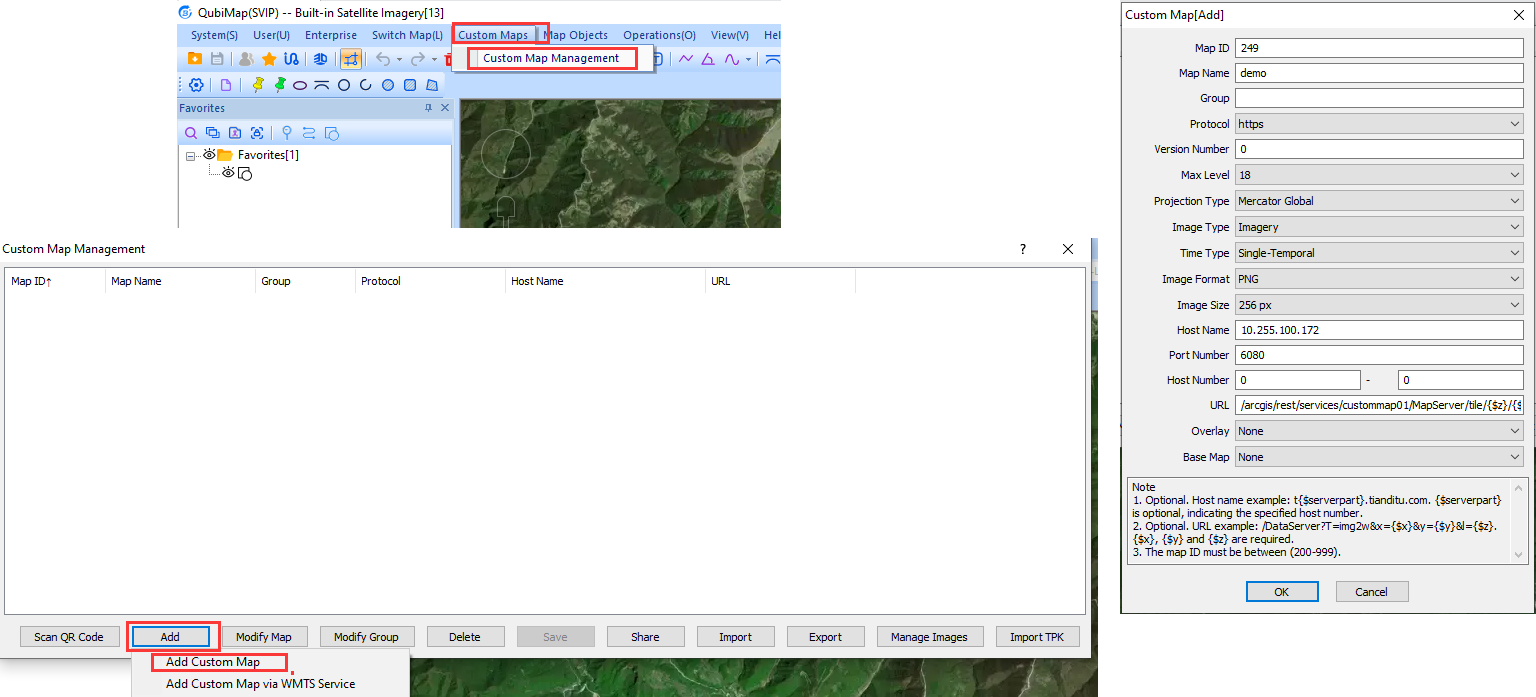
☆ Parameters:
① [Map ID]: Keep the default value.
② [Map Name]: Set the name of the custom map.
③ [Max Level]: Set this value as the maximum cache level you set when publishing the map service in ArcGIS.
④ [Projection Type]: Select [Mercator Global].
⑤ [Image Type]: For aerial images, select [Imagery].
⑥[Image Format]: Set this value as the tile format you set when publishing the map service.
⑦ [Image Size]: Select [256 px].
⑧ [Host Name]: Enter the IP address or domain name of the device where the ArcGIS Server is located.
⑨ [Port Number]: Enter the port number. In this example, set the value to 6080.
⑩ [URL]: Enter the part after the port number. In this example, enter “/arcgis/rest/services/custommap01/MapServer/tile/{$z}/{$y}/{$x}”.
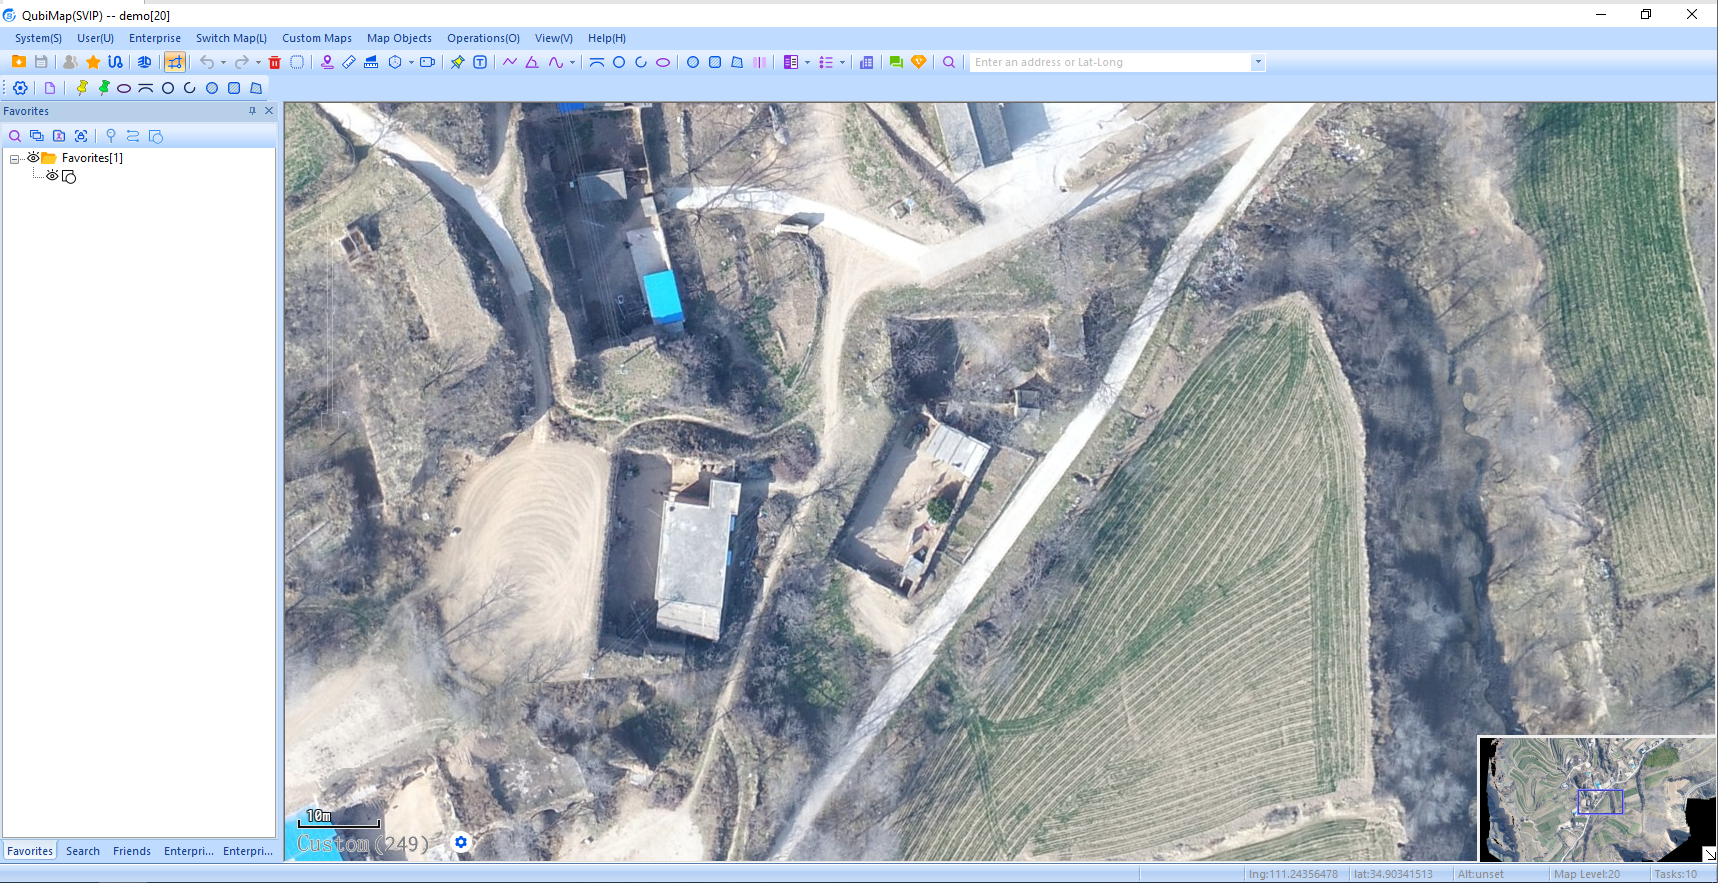
After the custom map is added, you can select the map from the [Custom Maps] list to view it.
(3) Load the ArcGIS map service on a QubiMap mobile client
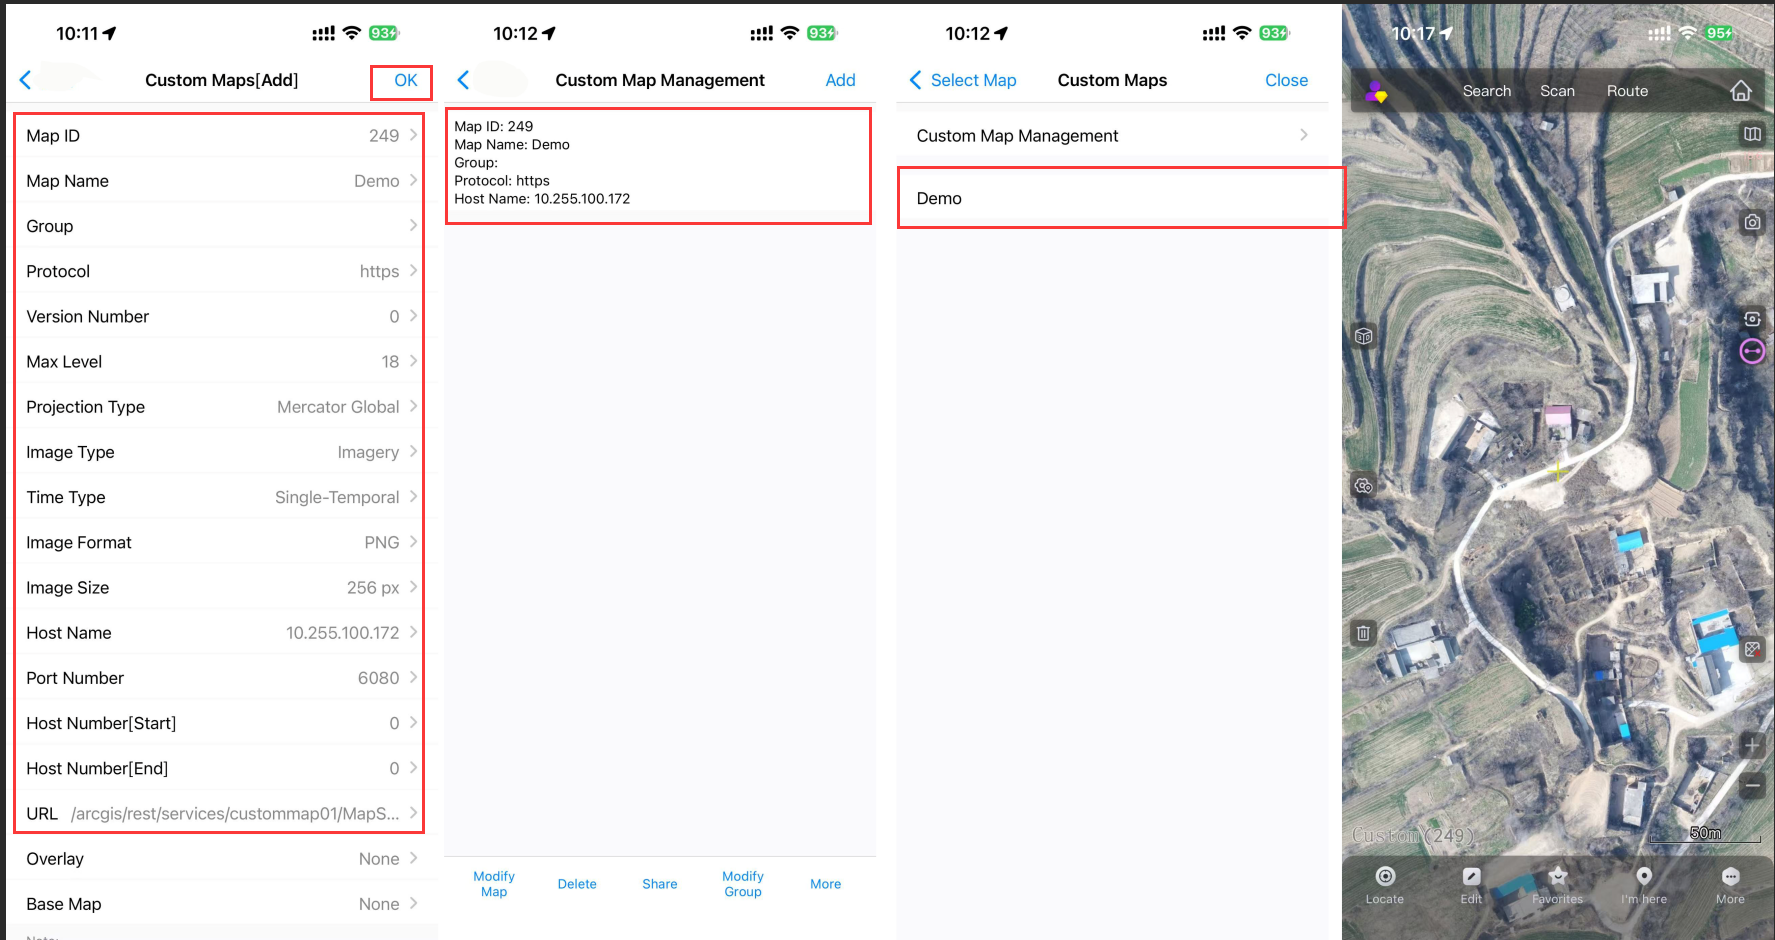
On the main UI, tap the  button, then tap [Custom Maps] → [Custom Map Management] → [Add].
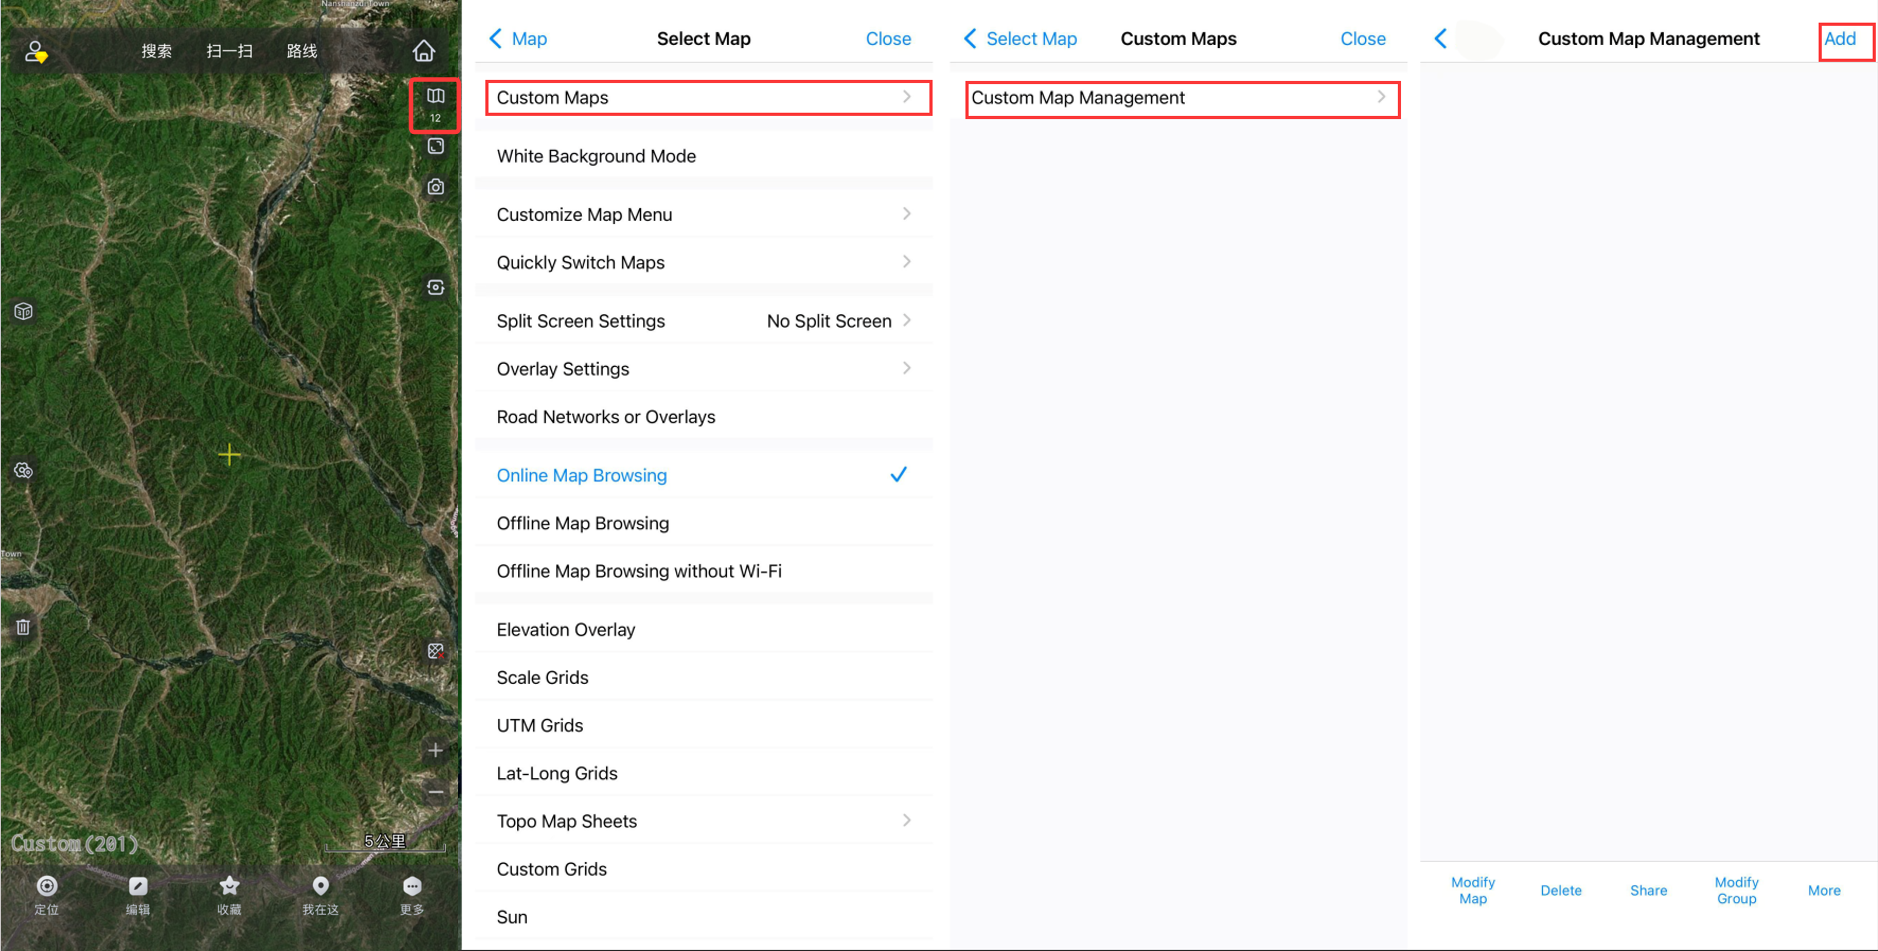
Set the parameters as needed, and tap [OK]. For more information, see the preceding section “(2) Load the ArcGIS map service on a QubiMap PC client”.
After the custom map is added, you can select the map from the [Custom Maps] list to view it.