How to use the shape splitting and shape composition features on a PC
Posted on Categories Object Editing
In QubiMap, you can split one or more shapes into several parts. You can also perform topological operations such as union (∪), intersection (∩), difference (–), and XOR (⊕) on shapes. The latter shape composition feature is only available to VIP users.
This article describes how to use the shape splitting and shape composition features on a PC. For information about how to use these features on a mobile device, see the help document “How to use the shape splitting and shape composition features on a mobile device“.
1. Shape splitting
1.1. Split a single shape
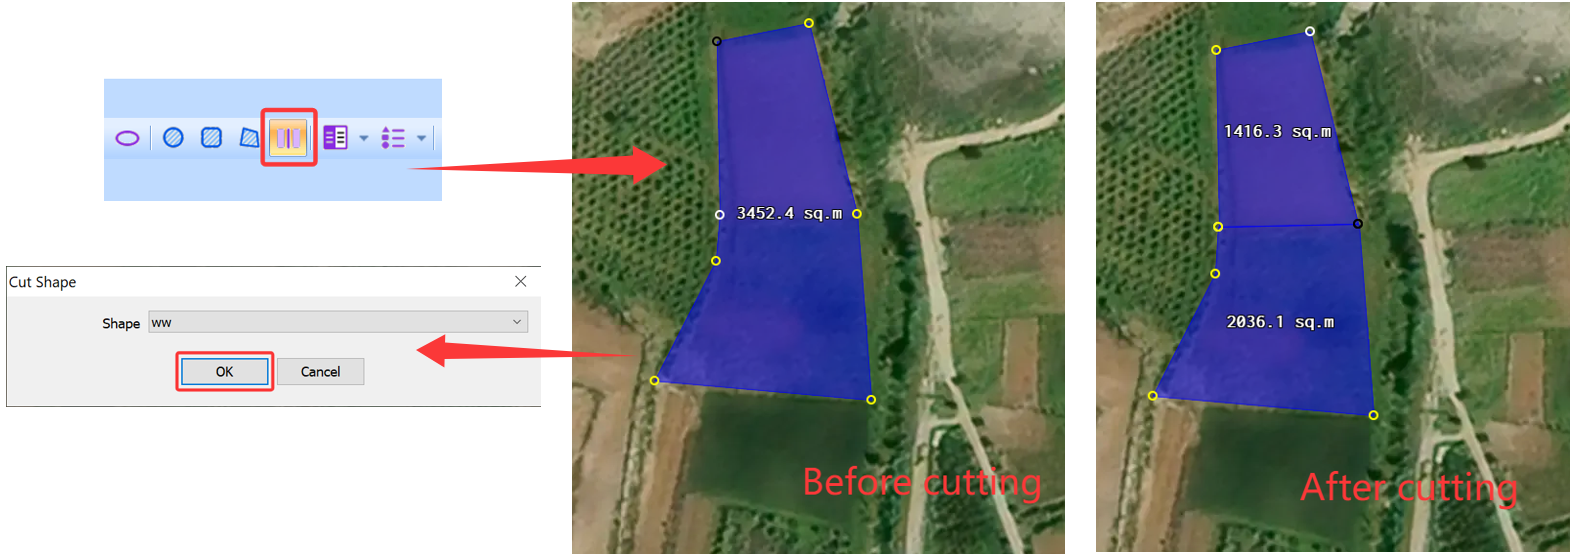
Find the required shape on the map, and click the  button in the toolbar to draw a line through the shape. Click on the map to start drawing, and double-click to finish drawing.
In the [Cut Shape] dialog box that appears, select the shape and then click [OK].
After cutting, the attributes of the shapes such as name and fill color remain unchanged, and the common edge is displayed.
1.2. Split multiple shapes
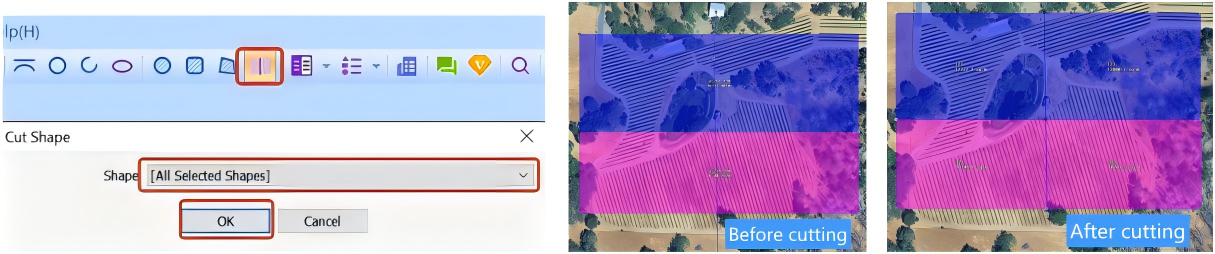
Find the required shapes on the map, and click the button in the toolbar to draw a line through the shapes.
In the [Cut Shape] dialog box that appears, select [All Selected Shapes] and then click [OK].
After cutting, the attributes of the shapes such as name and fill color remain unchanged, and the common edges are displayed.
2. Shape composition
You can perform topological operations such as union (∪), intersection (∩), difference (-), and XOR (⊕) for shape composition.
| Operation | Number of shapes | Optimization option | New shape attributes |
| Union (∪) | ≥2 | Optimize proximate points/Delete original shapes | Number of vertices, number of regions, perimeter, and area |
| Intersection (∩) | ≥2 | ||
| Difference (-) | 2 | ||
| XOR (⊕) | ≥2 |
2.1. Union (∪)
This operation is used to merge multiple shapes into a single shape. The attributes of the generated shape after merging such as name and fill color remain the same as the first shape before merging. If the original shapes intersect or share common edges, the intersections or common edges are deleted.
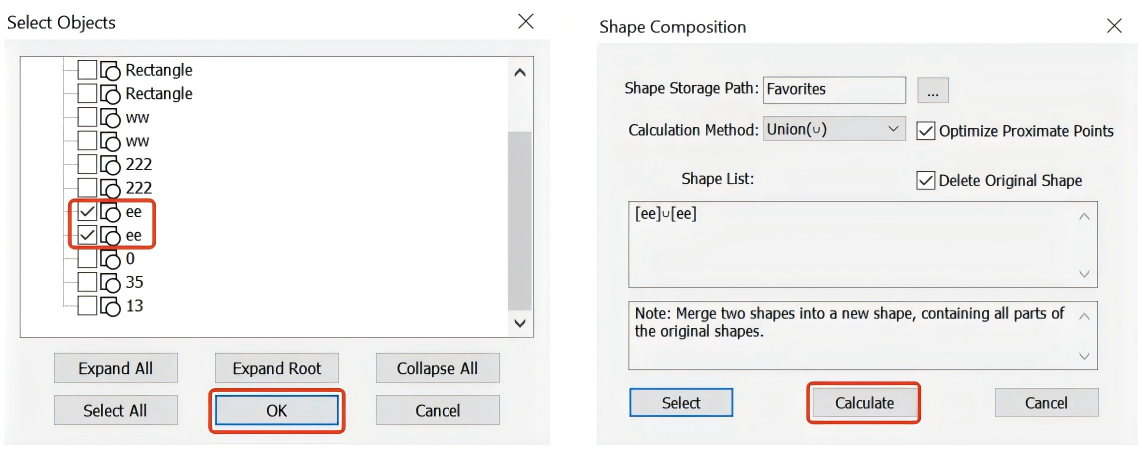
On the main UI, choose [System] > [Data Conversion] > [Shape Composition]. Specify a shape storage location, set the operation method to [Union (∪)], and click [Select] to select shapes.
Optimize Proximate Points: This option can prevent small gaps from appearing when you import and export the generated shape. We recommend that you keep the default settings.
Delete Original Shapes: The original shapes are not retained after merging. We recommend that you keep the default settings.
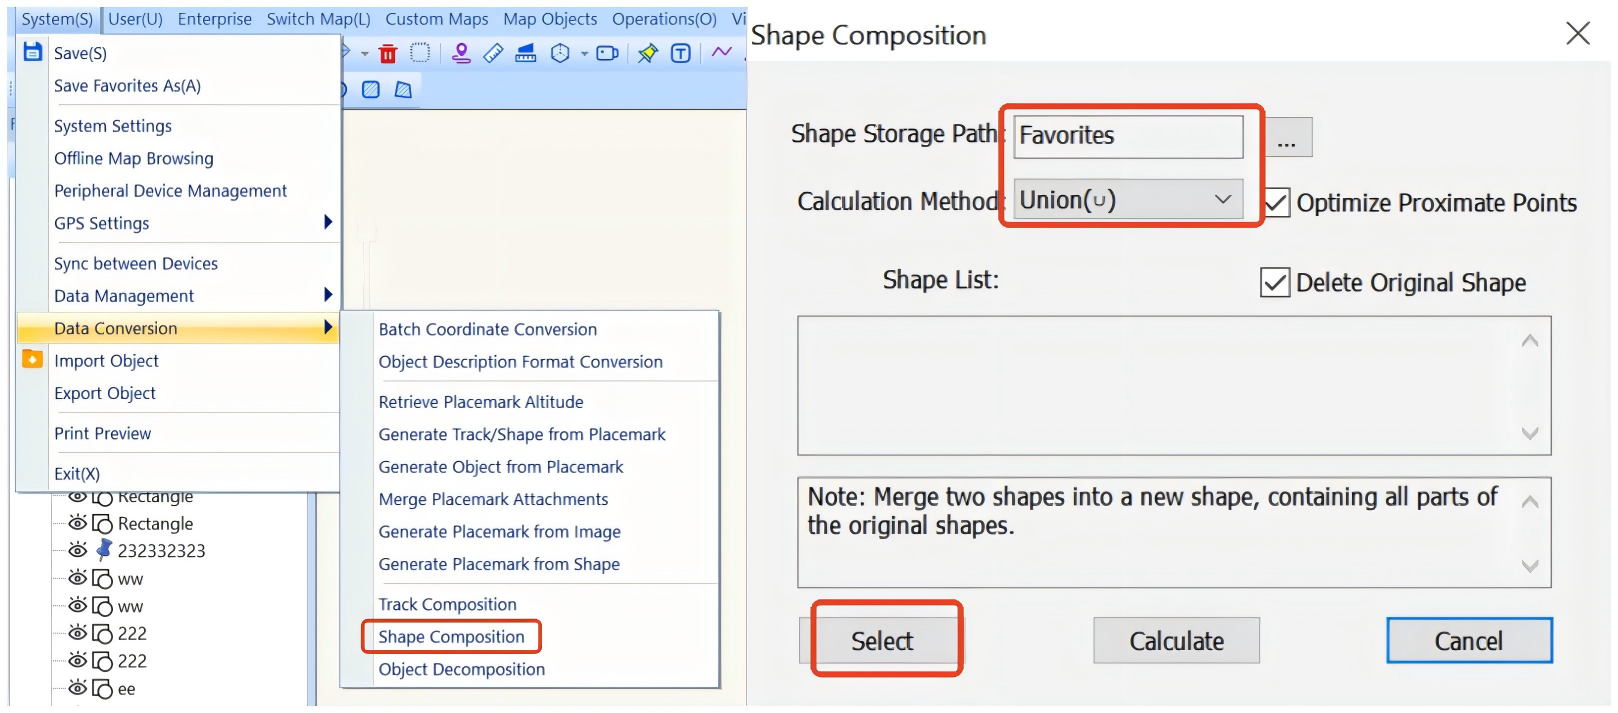
After you select the shapes to merge, click [OK] → [Calculate].
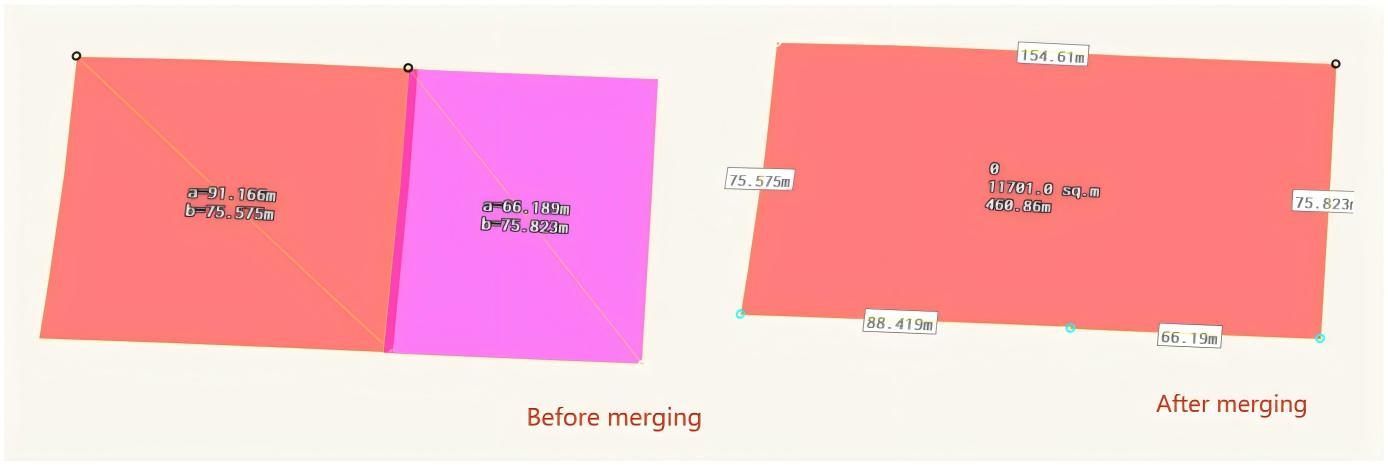
Effects after merging:
① If the original shapes share common edges, the common edges are deleted. The attributes of the generated shape after merging such as name and fill color remain the same as the first shape before merging.
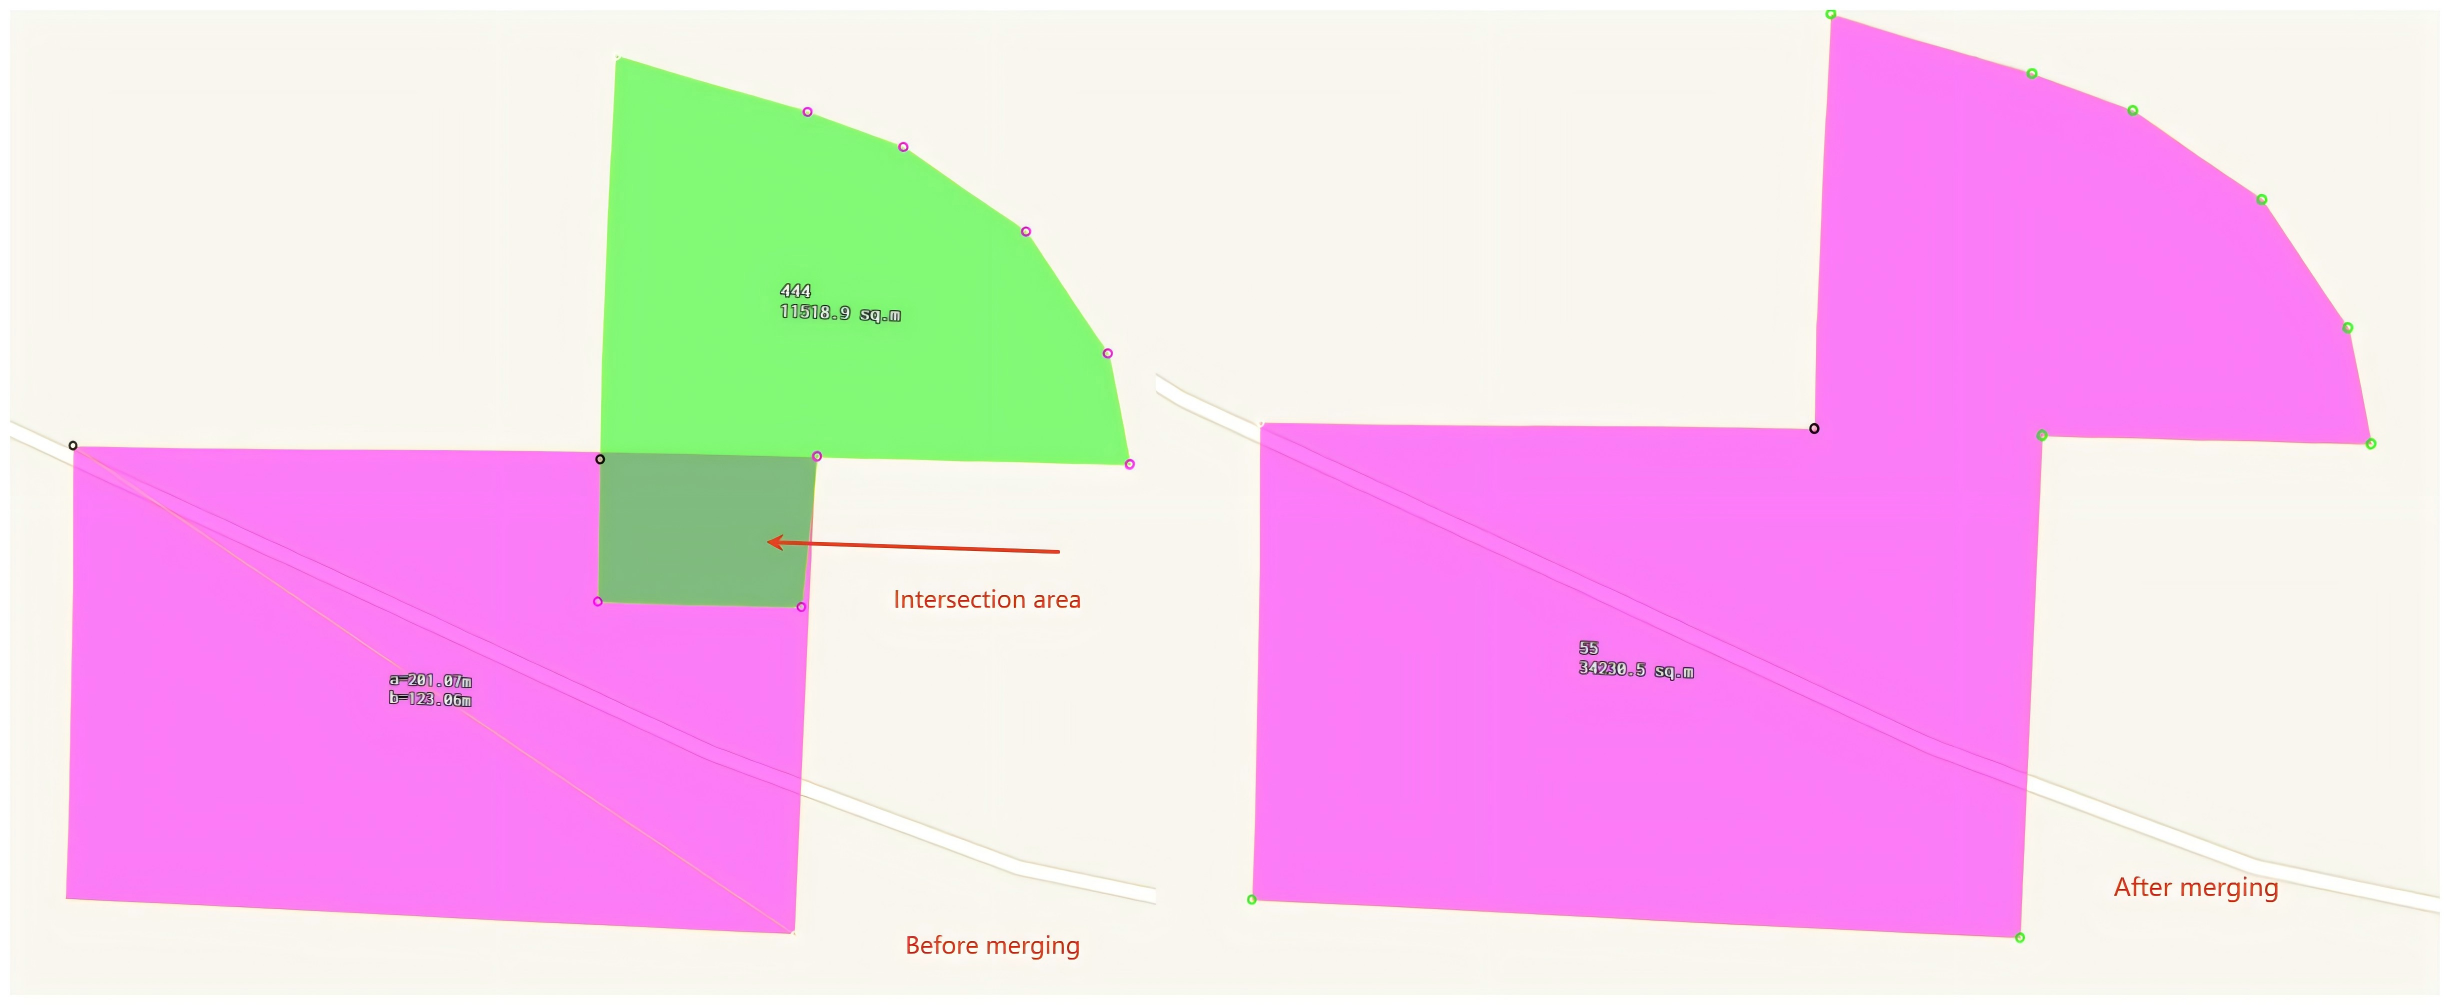
② If the original shapes intersect, the intersections are deleted. The attributes of the generated shape after merging such as name and fill color remain the same as the first shape before merging.
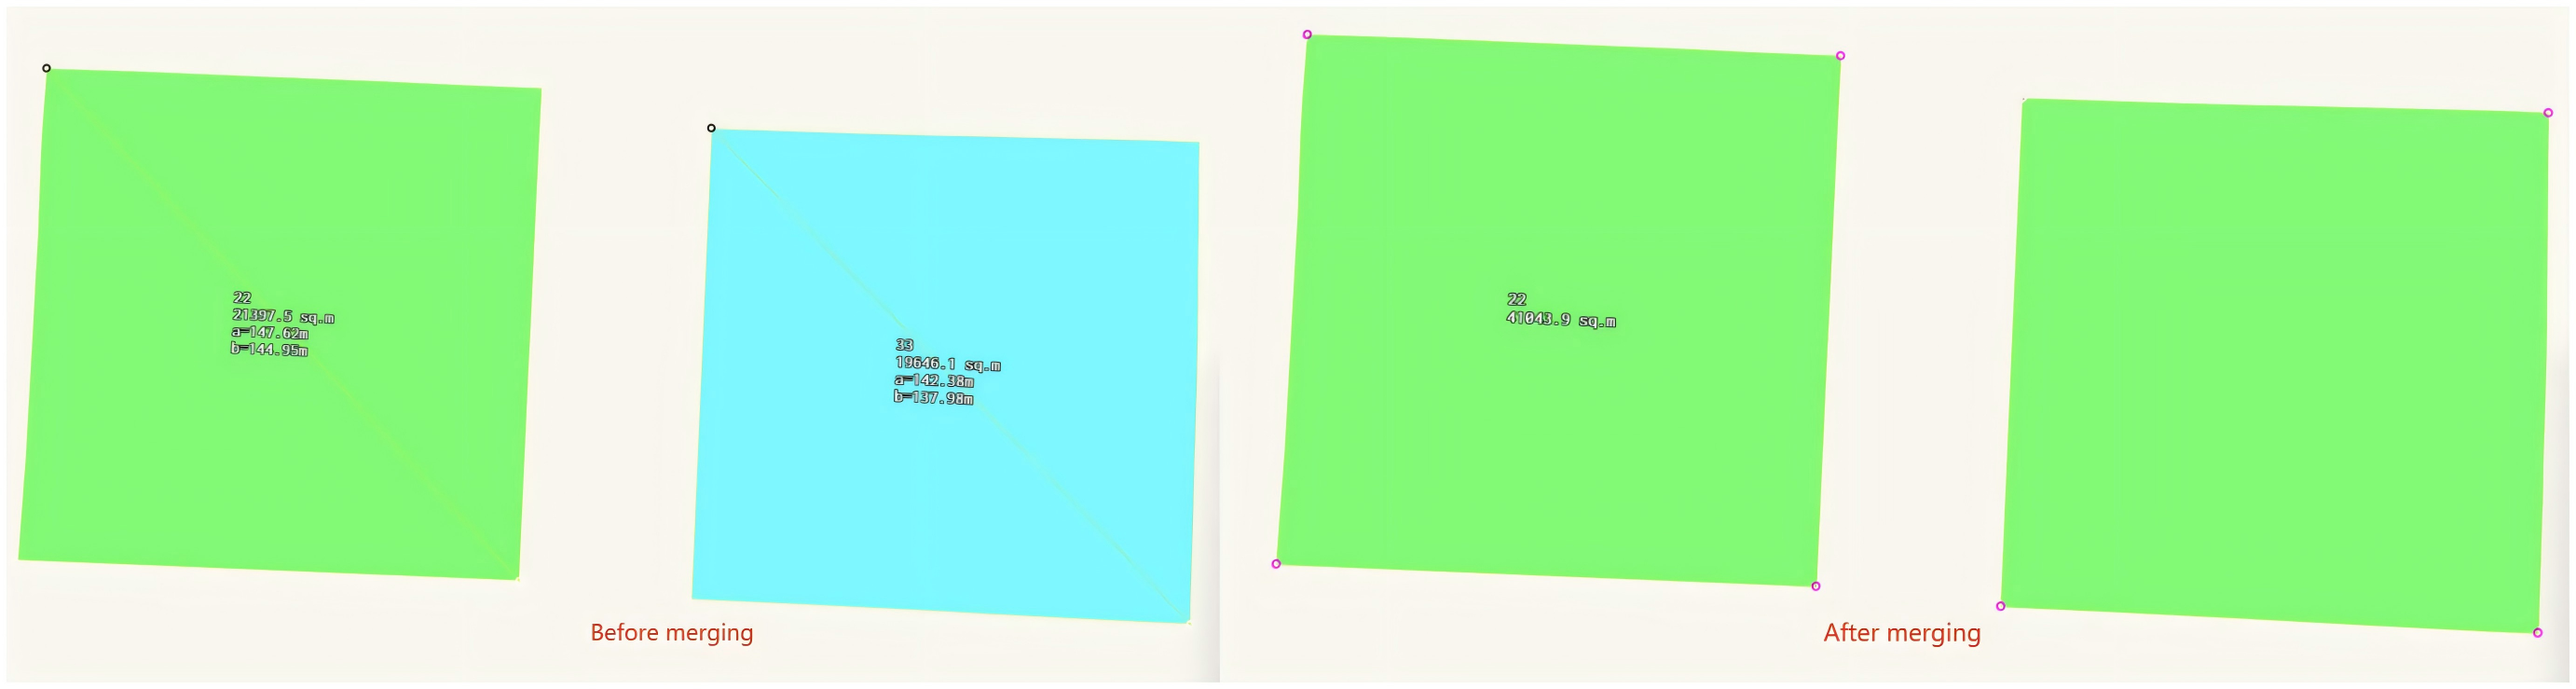
③ If the original shapes are not adjacent, their relative positions remain unchanged. The name of the generated shape after merging remains the same as the first shape before merging, and the fill pattern changes to the system default value.
2.2. Intersection (∩)
This operation is used to obtain the overlapping part of multiple shapes. You cannot select the shapes that do not intersect for this operation.
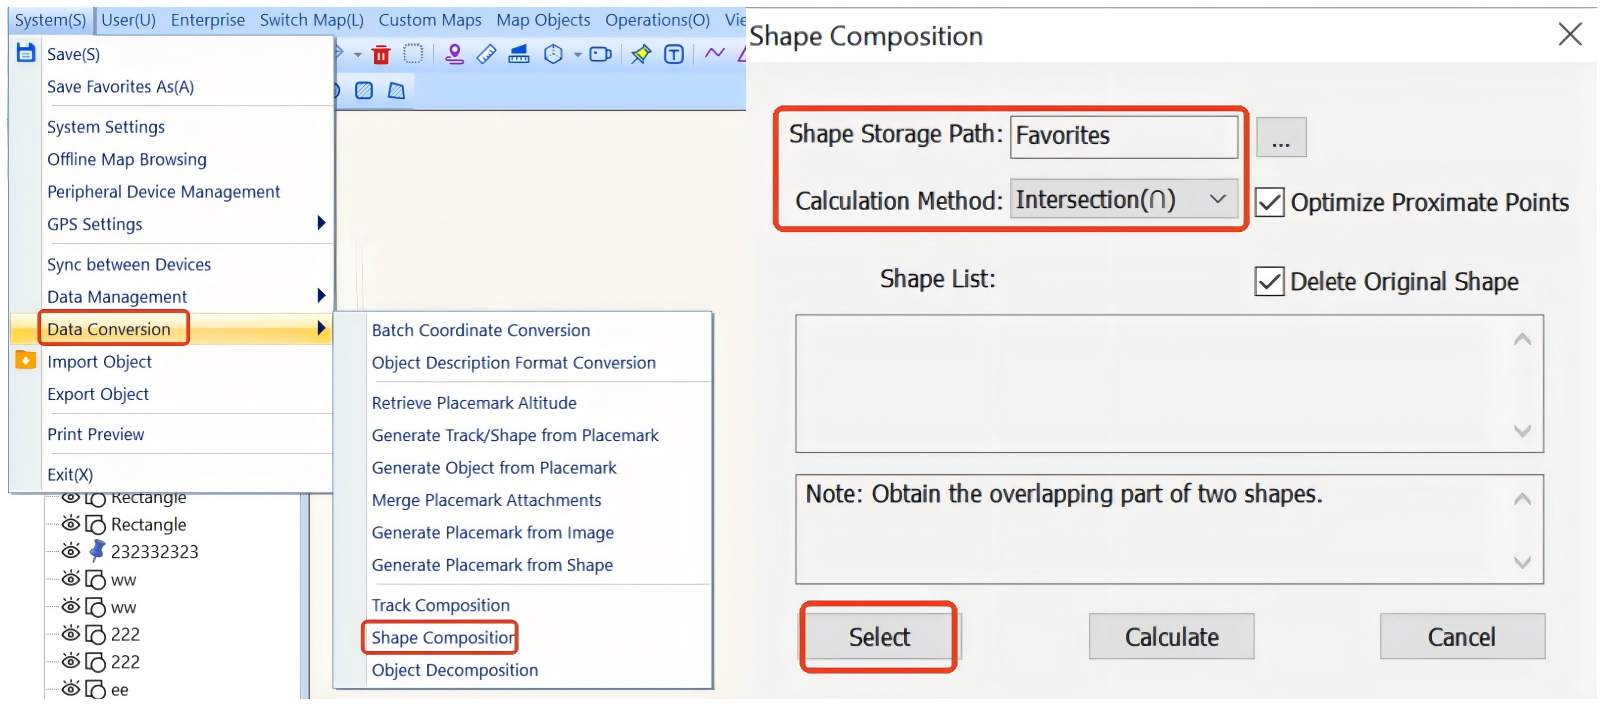
On the main UI, choose [System] > [Data Conversion] > [Shape Composition]. Specify a shape storage location, set the operation method to [Intersection (∩)], and click [Select] to select shapes.
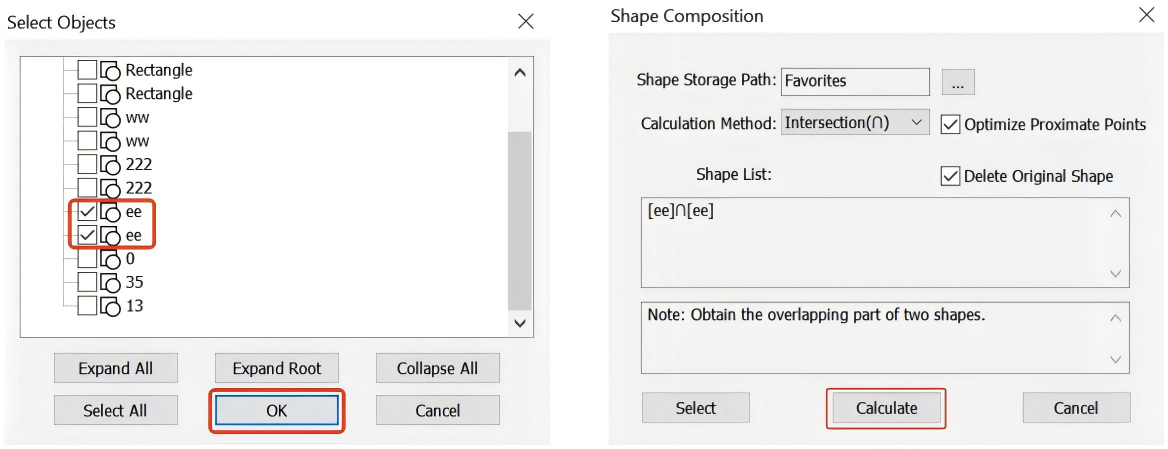
After you select the shapes, click [OK] → [Calculate].
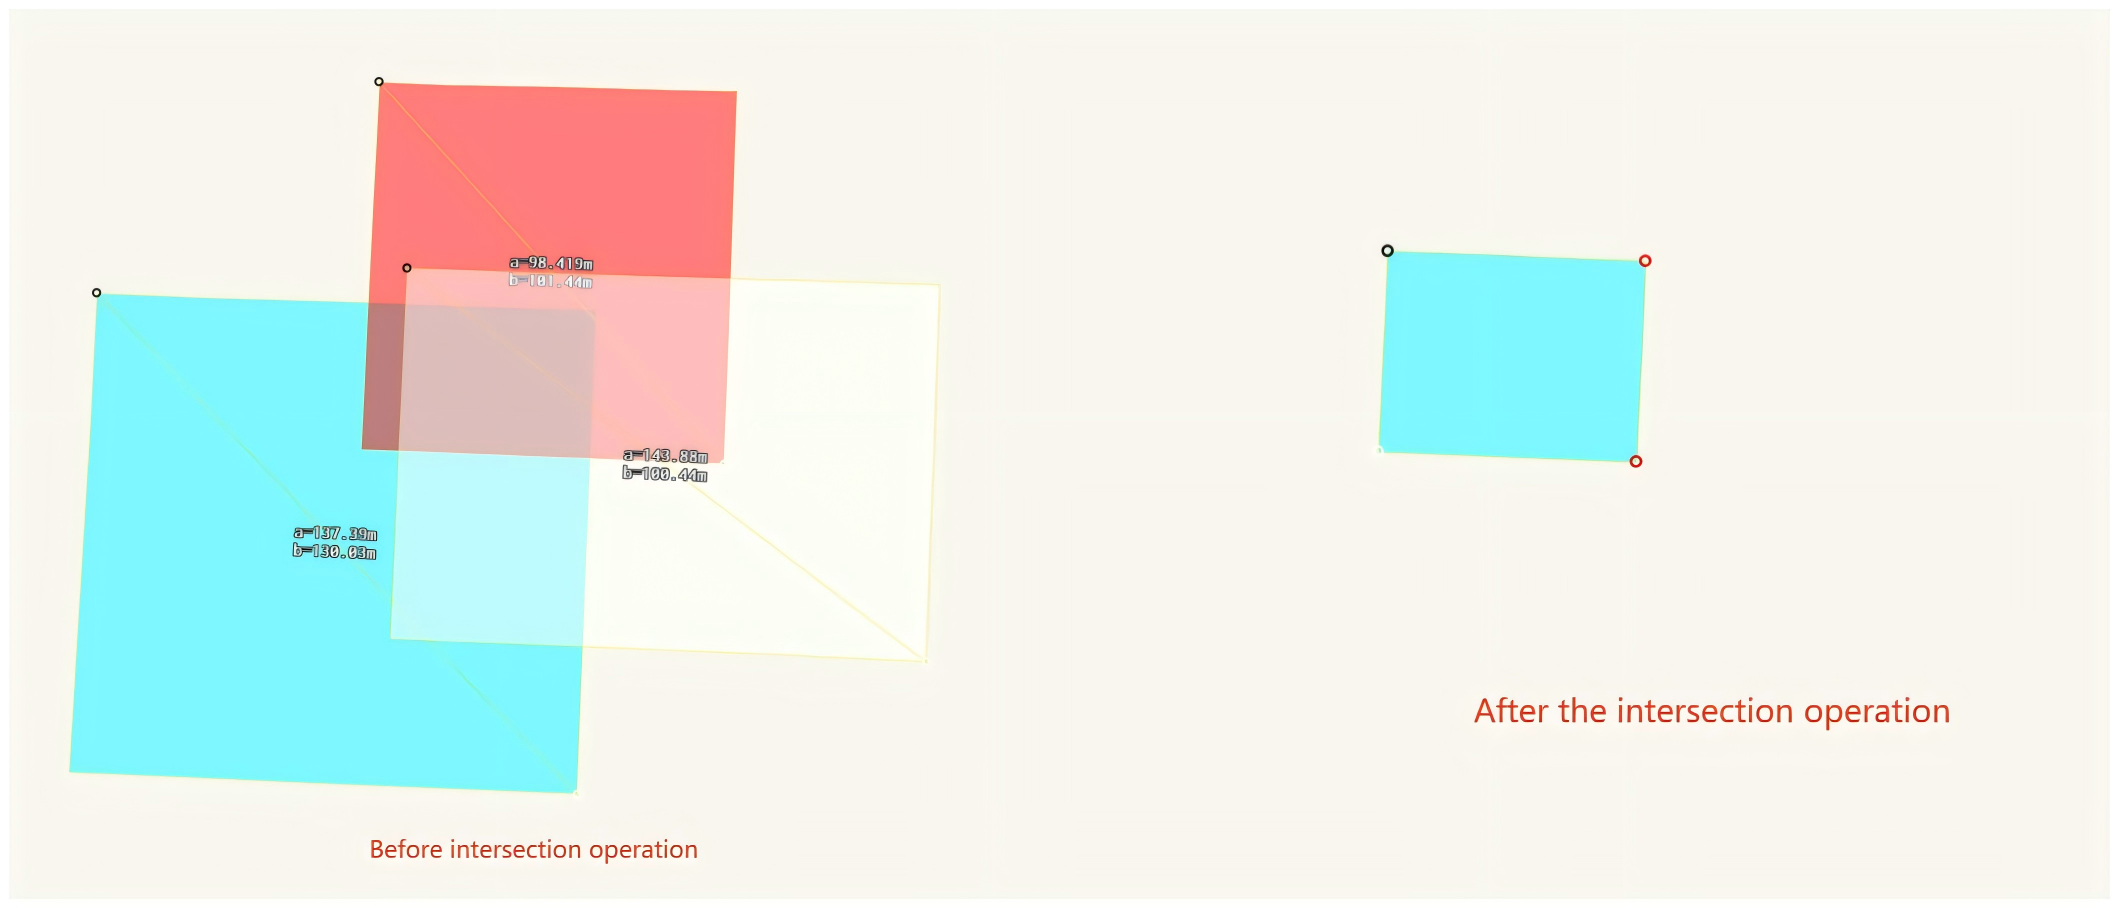
Only the overlapping part of shapes are retained, as shown in the following figure:
2.3. Difference (-)
This operation is used to remove the overlapping part of two shapes from the first shape. That is, only the non-overlapping part of the first shape is retained.
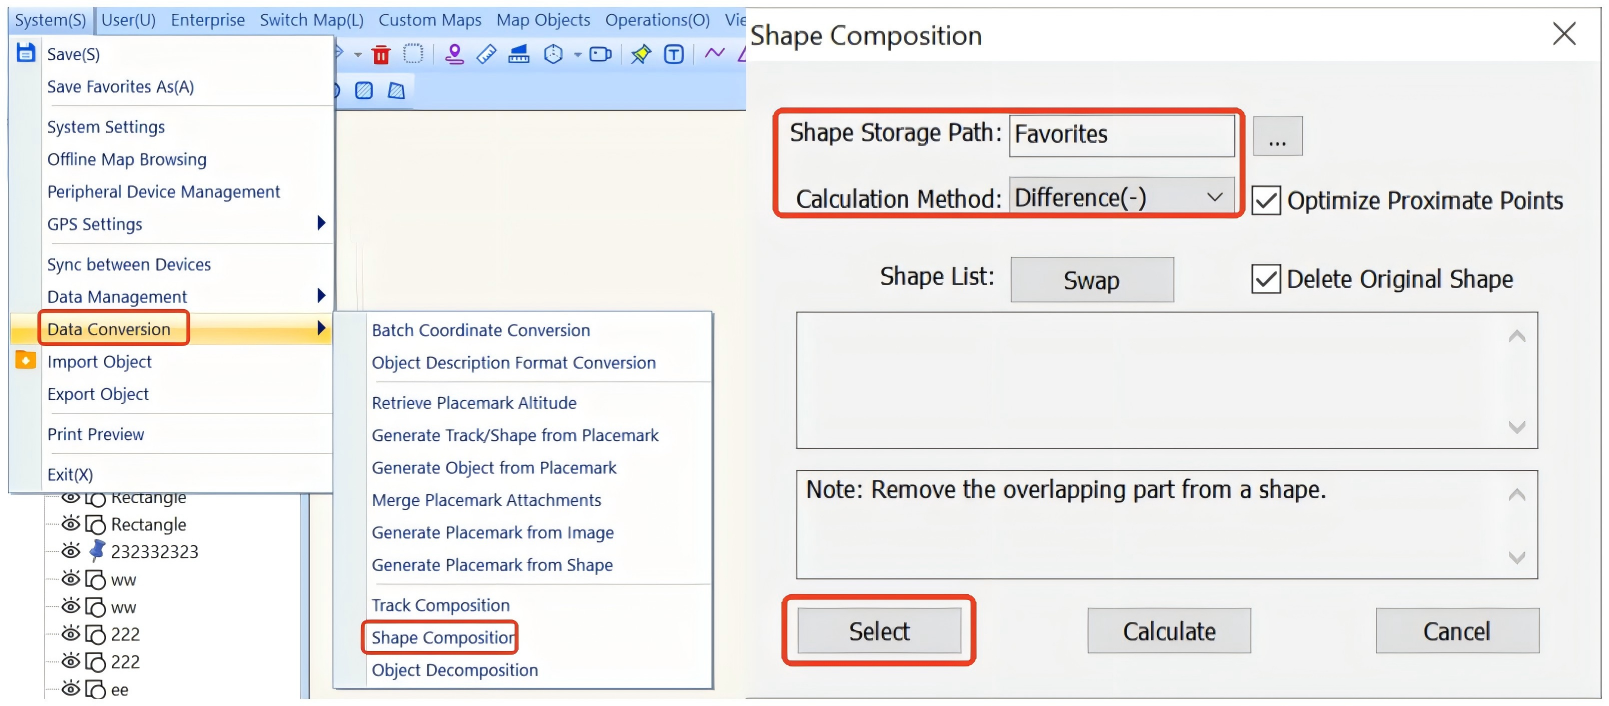
On the main UI, choose [System] > [Data Conversion] > [Shape Composition]. Specify a shape storage location, set the operation method to [Difference (-)], and click [Select] to select shapes.
After you select the shapes, click [OK] → [Calculate].
Note: You can adjust the order of shapes in the shape list.
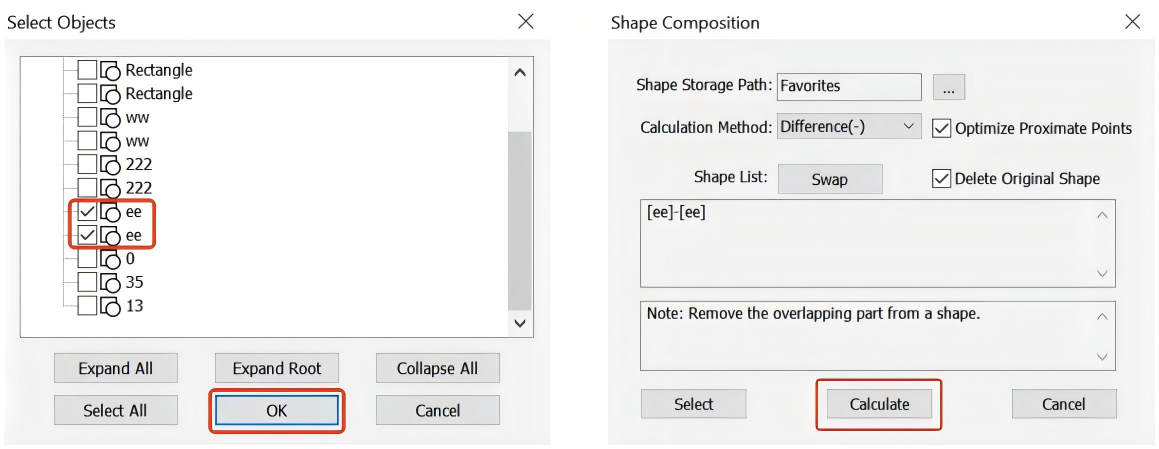
Examples:
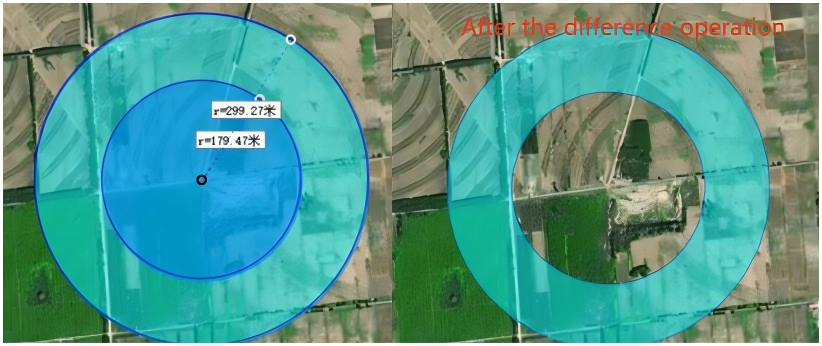
① Perform this operation on two circles, with the large circle as the first shape (namely, remove the small circle from the large circle). An annular circle is obtained, as shown in the following figure:
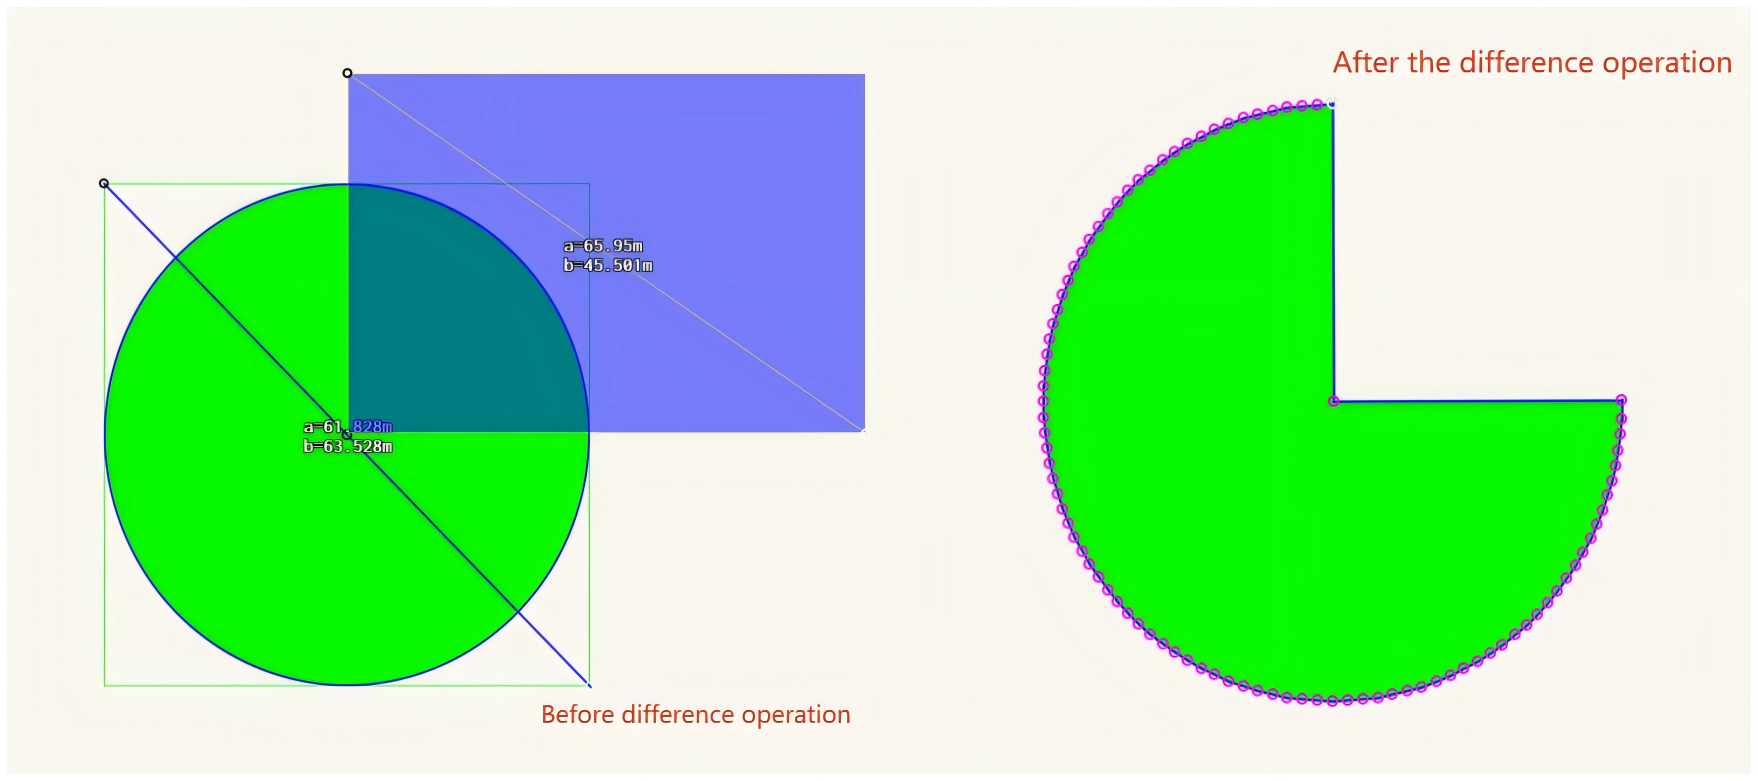
② Perform this operation on a circle and a rectangle, with the circle as the first shape. Only the non-overlapping part of the circle is retained, as shown in the following figure:
2.4. XOR (⊕)
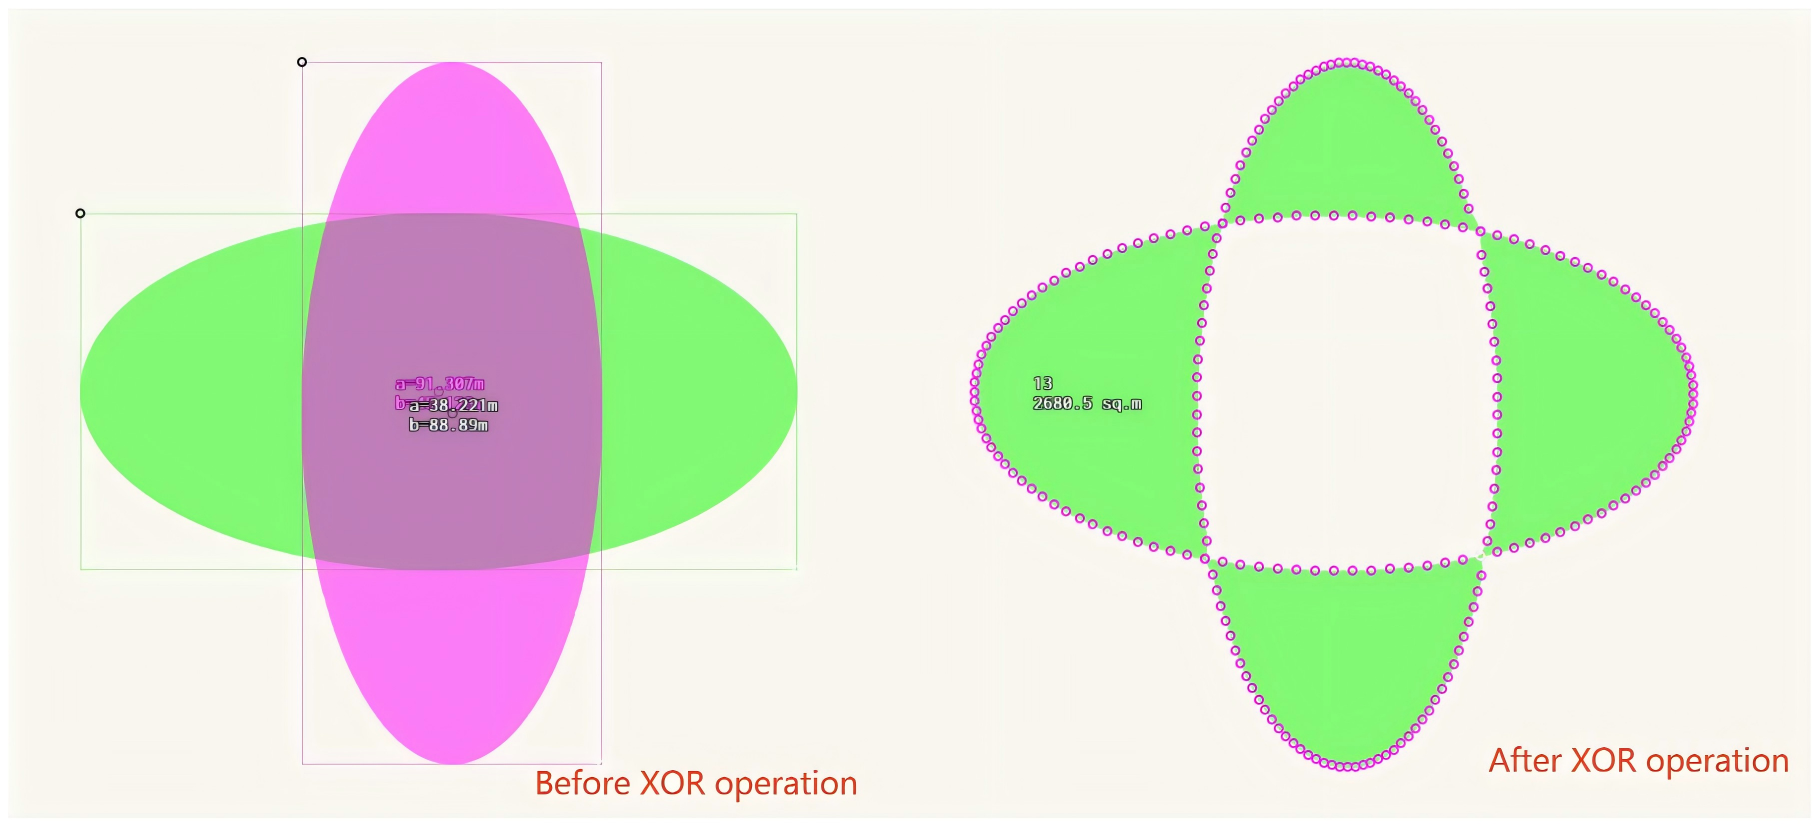
This operation is used to remove the overlapping parts of multiple shapes and retain the rest parts as a new shape. If the selected shapes that do not intersect, the result of this operation is the same as the union operation.
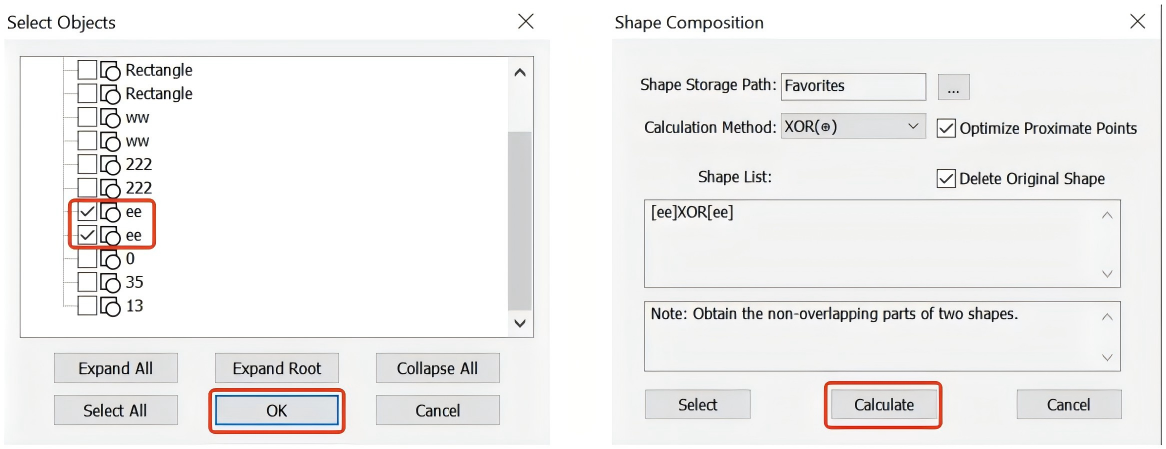
On the main UI, choose [System] > [Data Conversion] > [Shape Composition]. Specify a shape storage location, set the operation method to [XOR (⊕)], and click [Select] to select shapes.
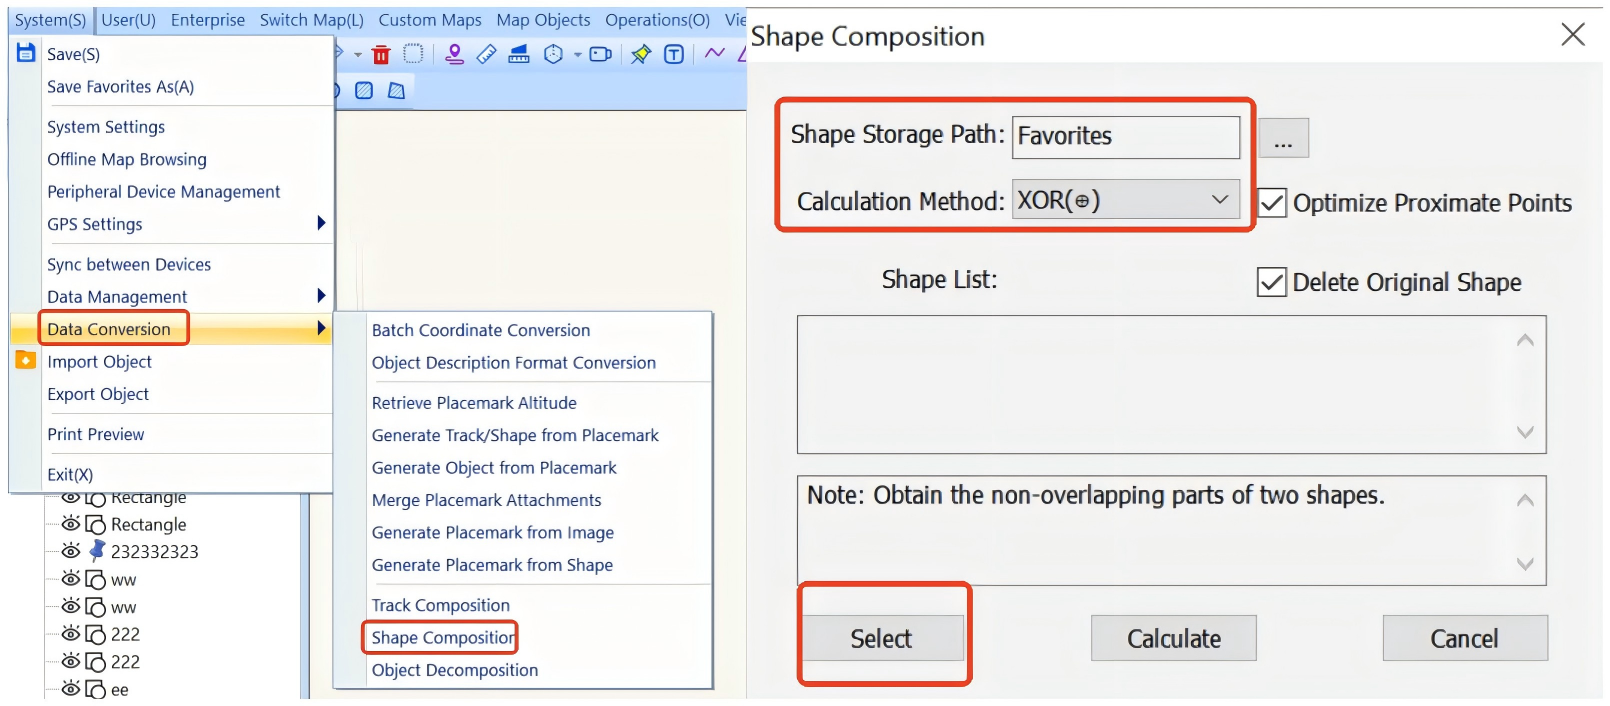
After you select the shapes, click [OK] → [Calculate].
Example: Perform this operation on two intersected ellipses. The overlapping part is removed, and the rest parts are retained as a new shape, as shown in the following figure: