How to manage map data in tiles
Posted on Categories Map Downloading
QubiMap supports tile management mode. This article describes how to manage map tiles on PC.
Enter tile management mode
Choose [Switch Map] > [Tile Management Mode] to enter the block management mode.
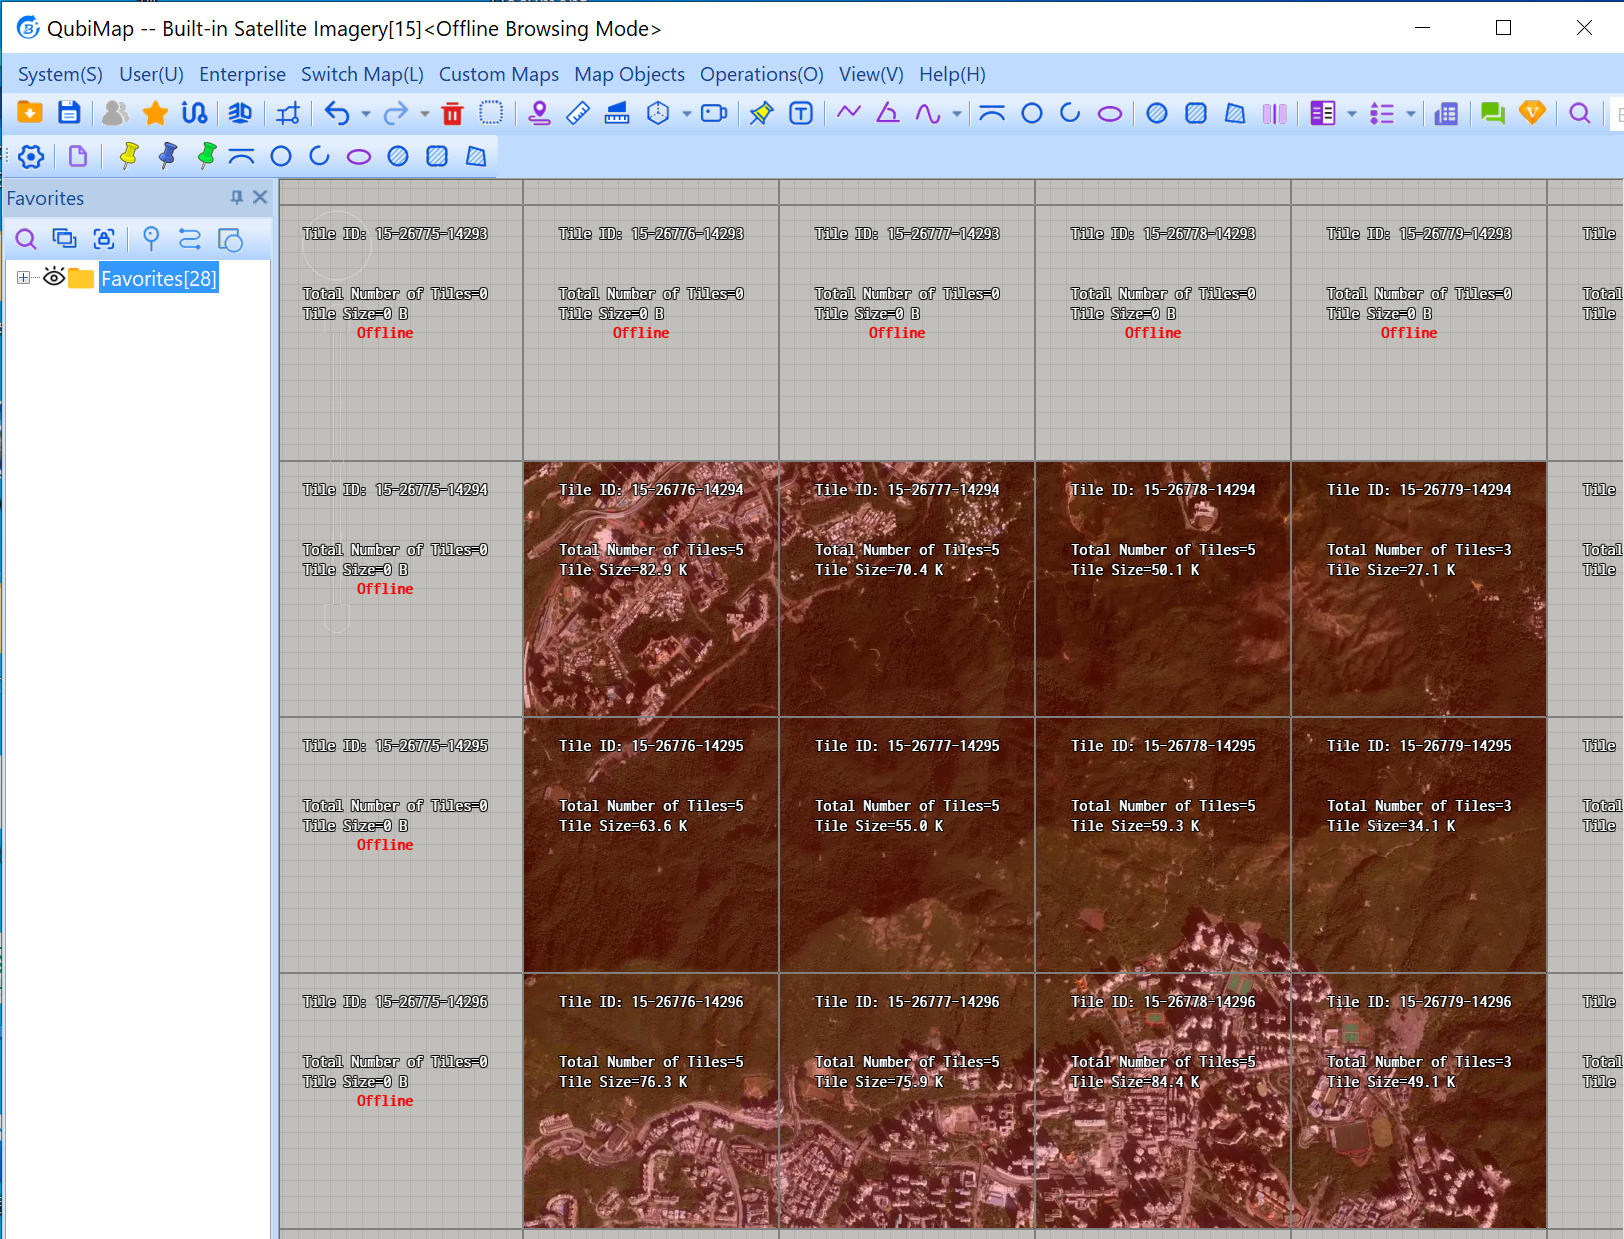
View tile information
Each grid indicates a basic tile of the current-level map, with 256*256 px. If you zoom in by one map level, the tile area is divided into four higher-level basic tiles.
Tile ID: The format is {map level}-{horizontal tile No.}-{vertical tile No.}.
Horizontal numbering rule: Ranging from left to right, beginning with 0000.
Vertical numbering rule: Ranging from top to bottom, beginning with 0000.
Total Number of Tiles: The total number of higher-level tiles within the current tile area. If you use the satellite imagery overlaid with road networks, this value indicates the total number of tiles for both types of map layers.
Tile Size: The total size of higher-level tiles within the current tile area.
In a tile, some areas may be highlighted in red, which indicates that more higher-level map data has been downloaded for these areas.
Manage a tile
Click on a tile to go to the [Tile Management] dialog box, as shown in the following figure:
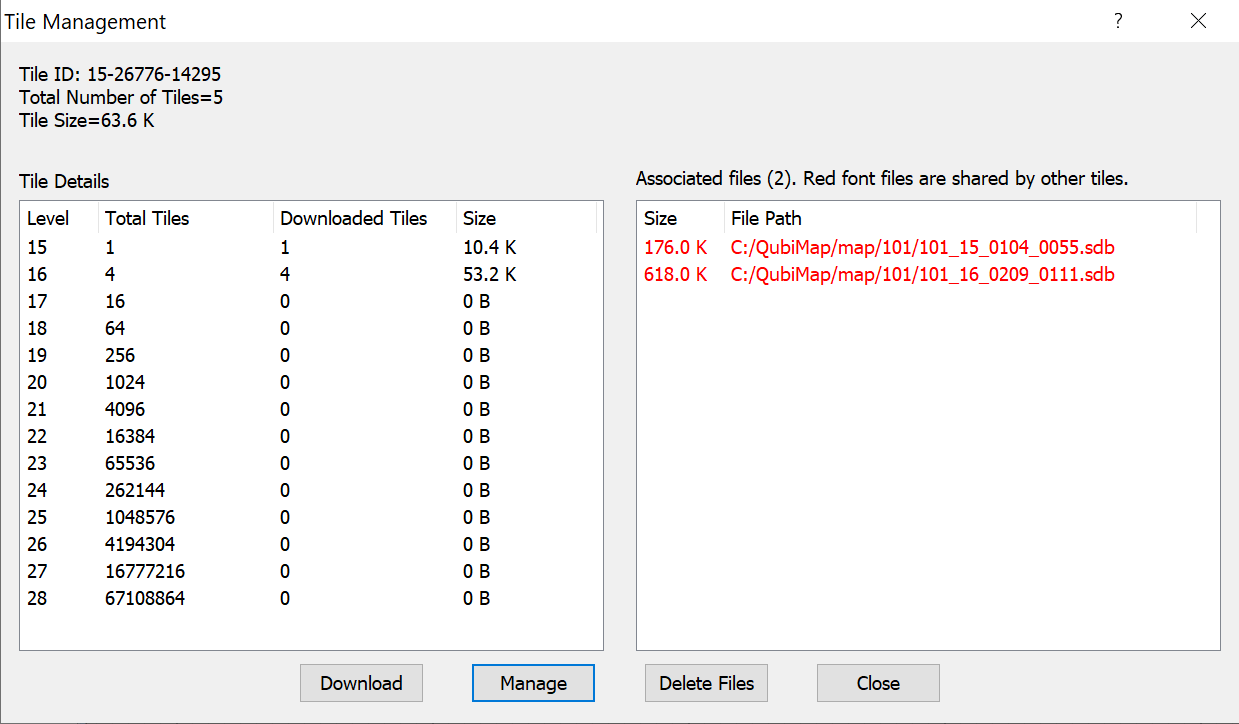
In the [Tile Details] section, you can view the total number of tiles, the number of downloaded tiles, and the size of downloaded tiles at each map level.
The map files associated with this tile are shown in the right section. Files in black are called inclusively by the current tile while files in red are shared by other tiles. If you delete files in red, other tiles cannot be normally displayed. You can delete multiple files at a time. To locate a file, double-click it; then, you can copy it to other devices.
Operations:
Click [Download] to download the map data of the current tile area, as shown in the following figure:
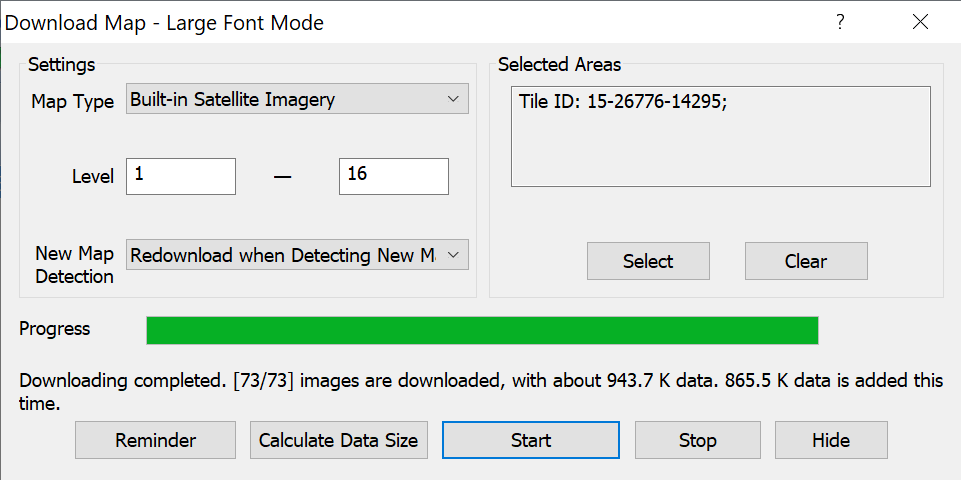
After the [Download Map] dialog box appears, a temporary shape is generated at the current tile location. You can right-click on the tile and select [Tile ID] to go to the [Shape Settings] dialog box, and then you can add the shape to your favorites.
Click [Manage] to manage the map data of the current tile area, as shown in the following figure:
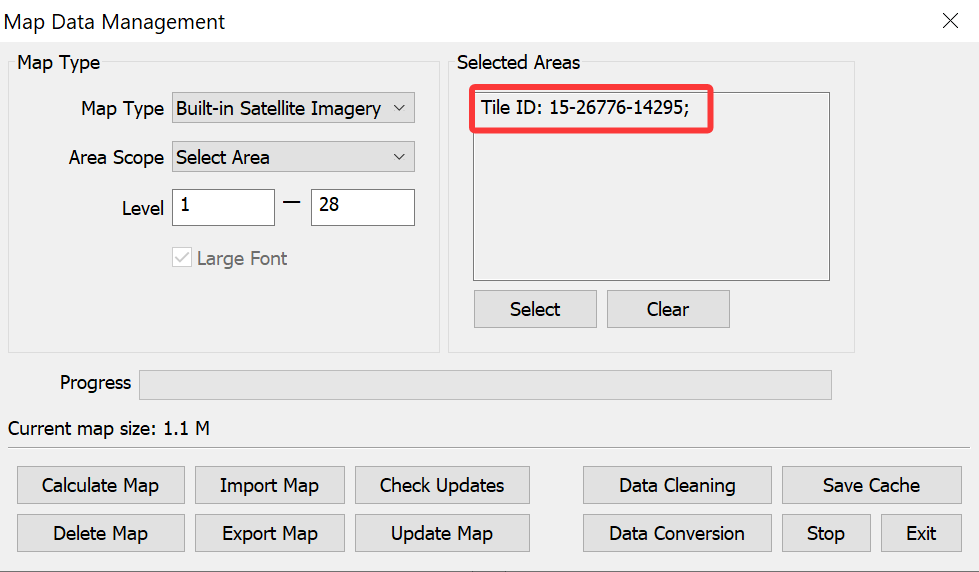
After the [Map Data Management] dialog box appears, a temporary shape is generated at the current tile location. You can right-click on the tile and select [Tile ID] to go to the [Shape Settings] dialog box, and then you can add the shape to your favorites.
Click [Delete File] to delete the selected associated files (map data) in the current tile area.