How to import WFS objects
Posted on Categories Common Features
QibiMap supports importing WFS geographic features from the WFS server and rendering them on the map. Users can edit, modify, share, and export the imported geographic features.
This article describes how to import WFS objects.
1. Import WFS geographic features
On the main UI, choose [System] > [Data Management] > [Import WFS Geographic Features].
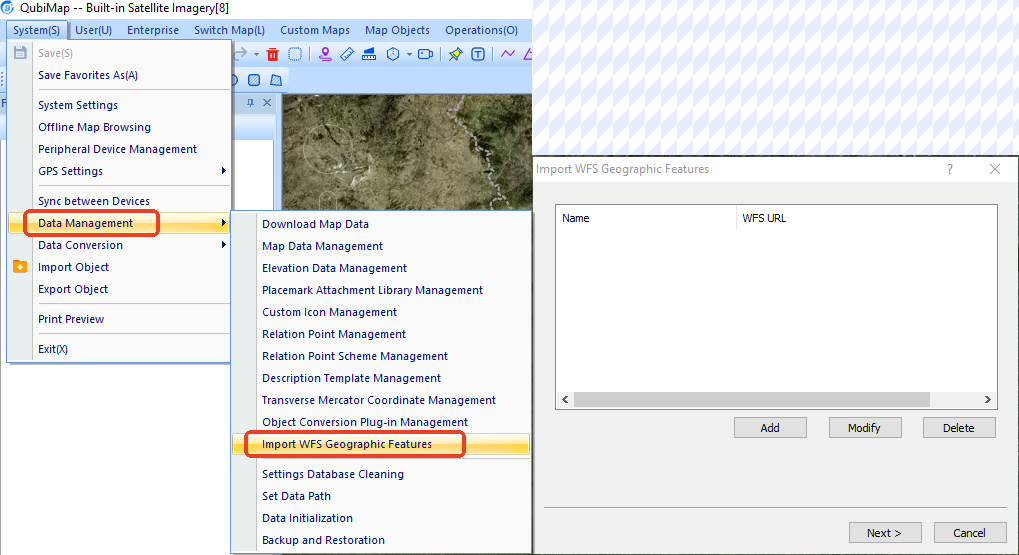
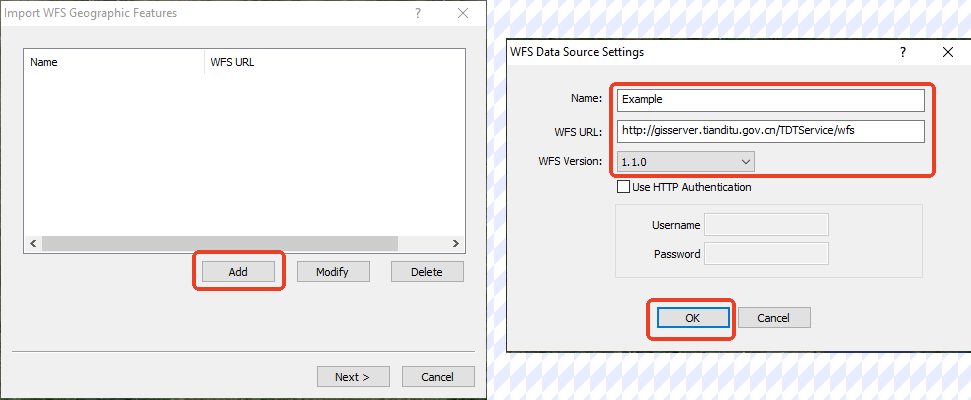
In the [Import WFS Geographic Features] dialog box, click [Add] to add a WFS server address. In the [WFS Data Source Settings] dialog box, specify a name, WFS URL and other parameters, and then click [OK].
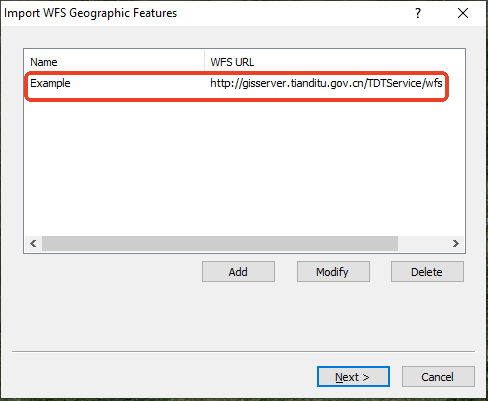
In the [Import WFS Geographic Features] dialog box, select the URL in the list, click [Next], and then set the parameters as needed.
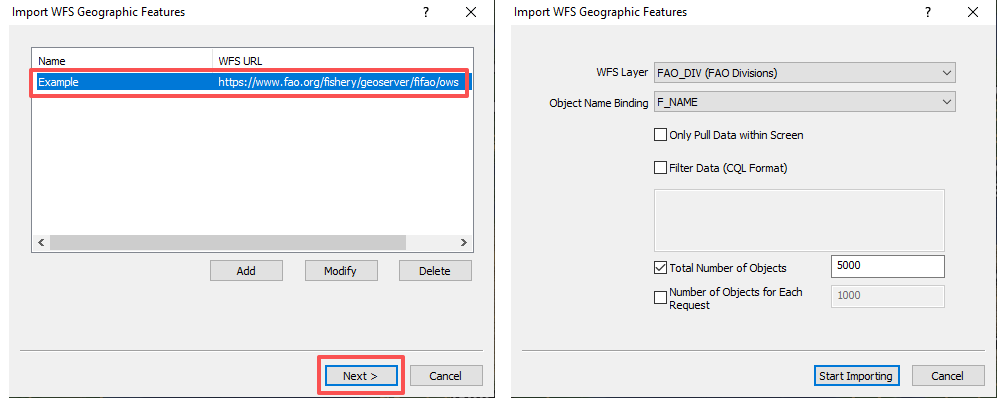
★ Parameters:
① WFS Layer: Select the layer you need to import.
② Object Name Binding: The selected field is displayed as the WFS object name in QubiMap.
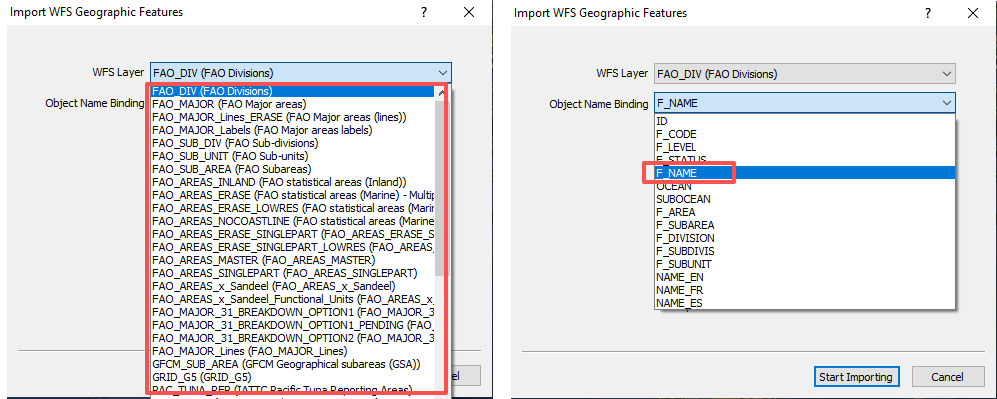
③ Only Pull Data within Screen: If you select this option, only WFS objects within the screen area are extracted.
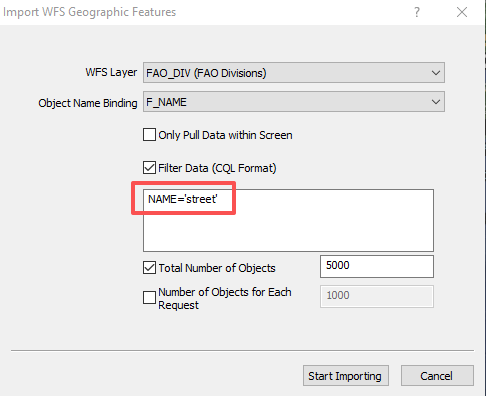
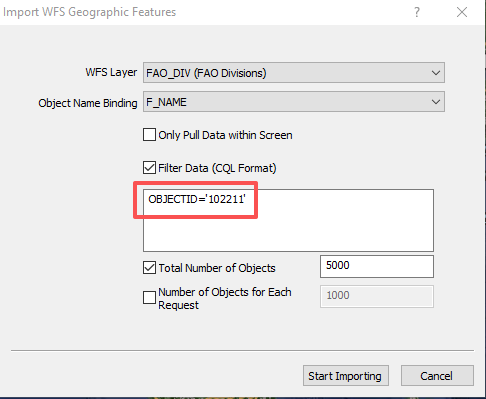
④ Filter Data (CQL Format): Set the CQL statement to extract data from the WFS layer.
Example:
◆ NAME=’street’: Extract the element named “street”.
◆ OBJECTID=’102211′: Extract the element whose ID is “102211”.
◆ NAME LIKE ‘%road%’: Extract the element whose name contains the word “road”.
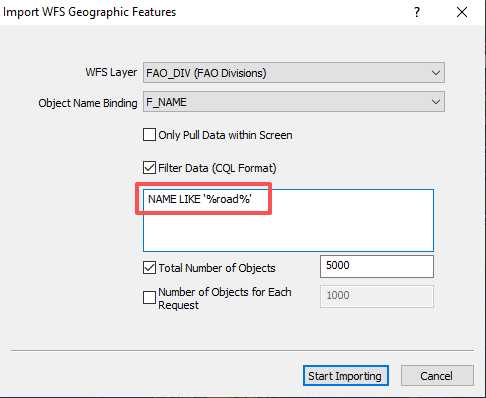
⑤ Total Number of Objects: Set the maximum number of objects that can be downloaded totally.
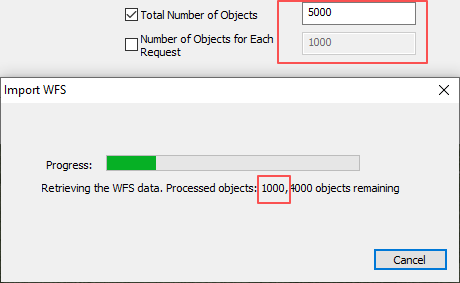
⑥ Number of Objects for Each Request: Set the maximum number of objects that can downloaded per request.
As shown in the following figure, the specified limits 5000 and 1000 indicate that 1,000 objects can be downloaded each time, and totally 5,000 geographic features can be downloaded.
After you set the parameters, click [Start Importing] → [Import] → [OK].
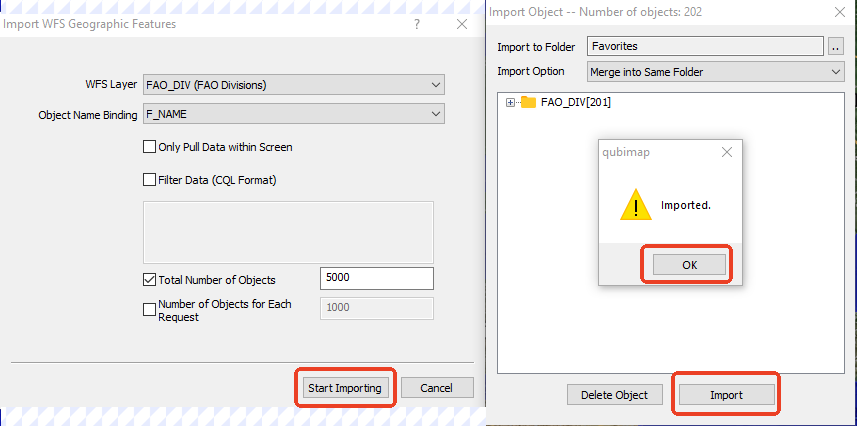
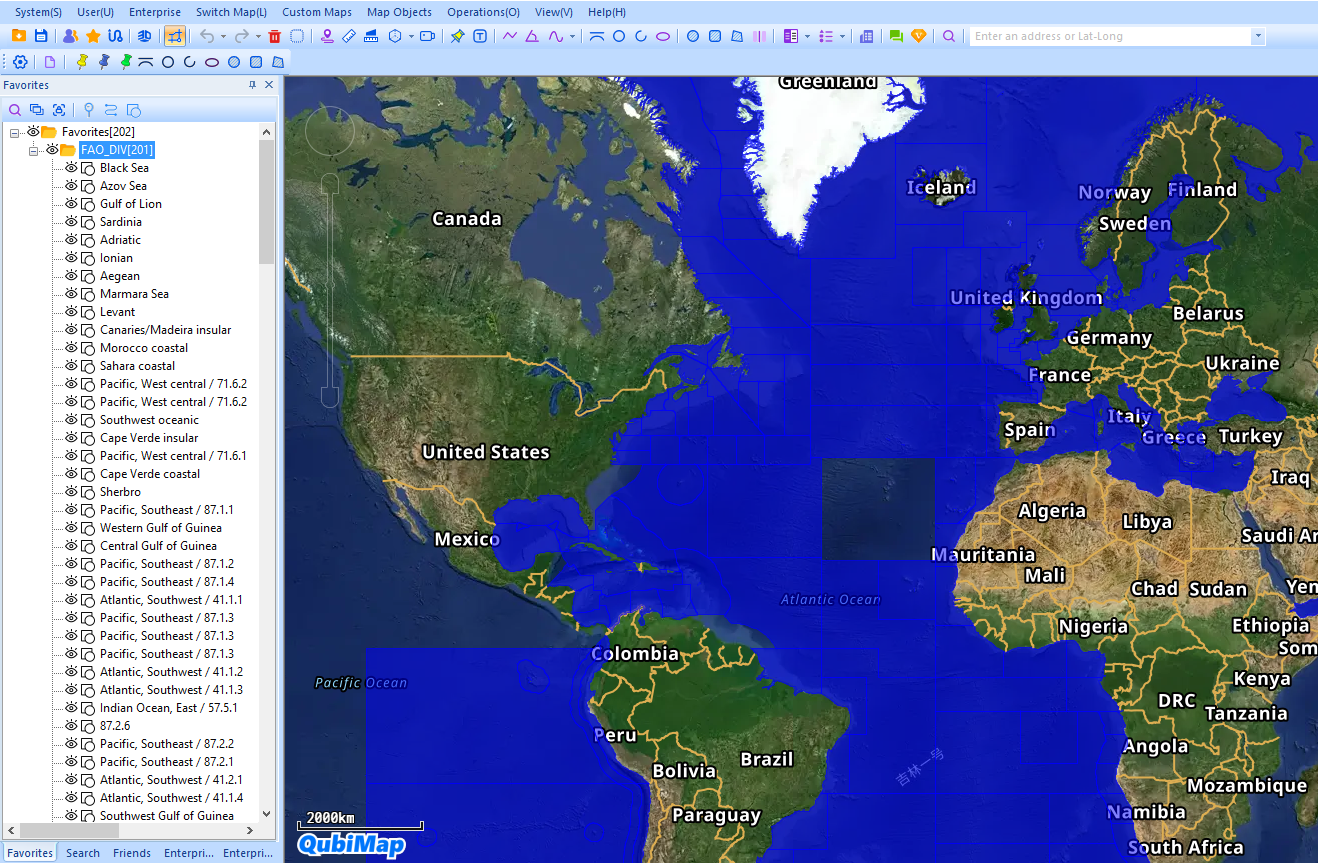
The imported data is saved in the favorites and displayed on the map.