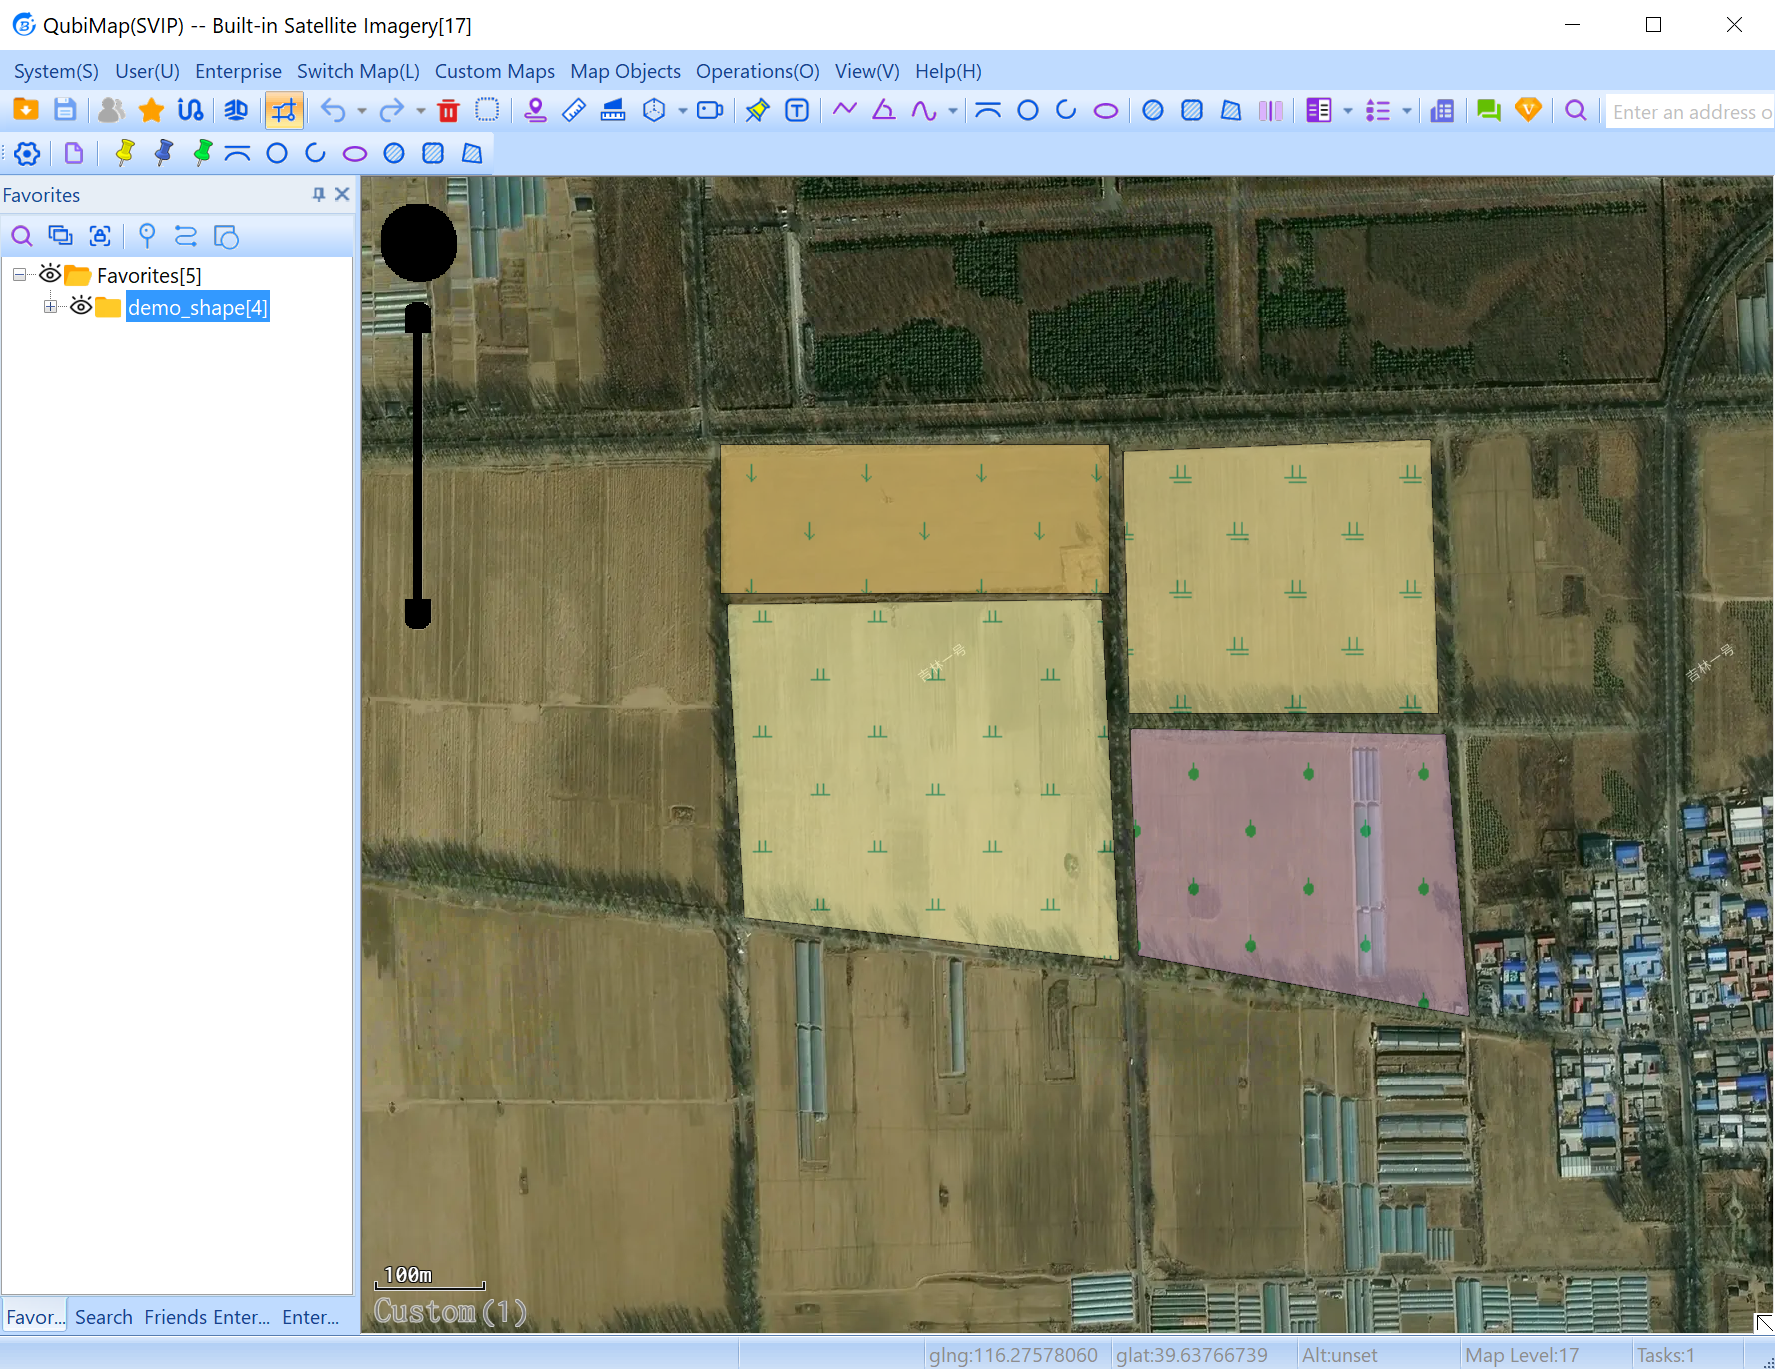
How to customize fill schemes when importing SHP files
Posted on Categories Common Features
To meet the needs of users in different industries, QubiMap supports customizing fill schemes when importing shapefiles. The corresponding fill types are applied to the imported shapes based on matching fields. You can specify a fill type such as fixed color, gradient color, image pattern, or CAD pattern.
This article describes how to customize a fill scheme when you import a SHP file.
1. Select a matching field
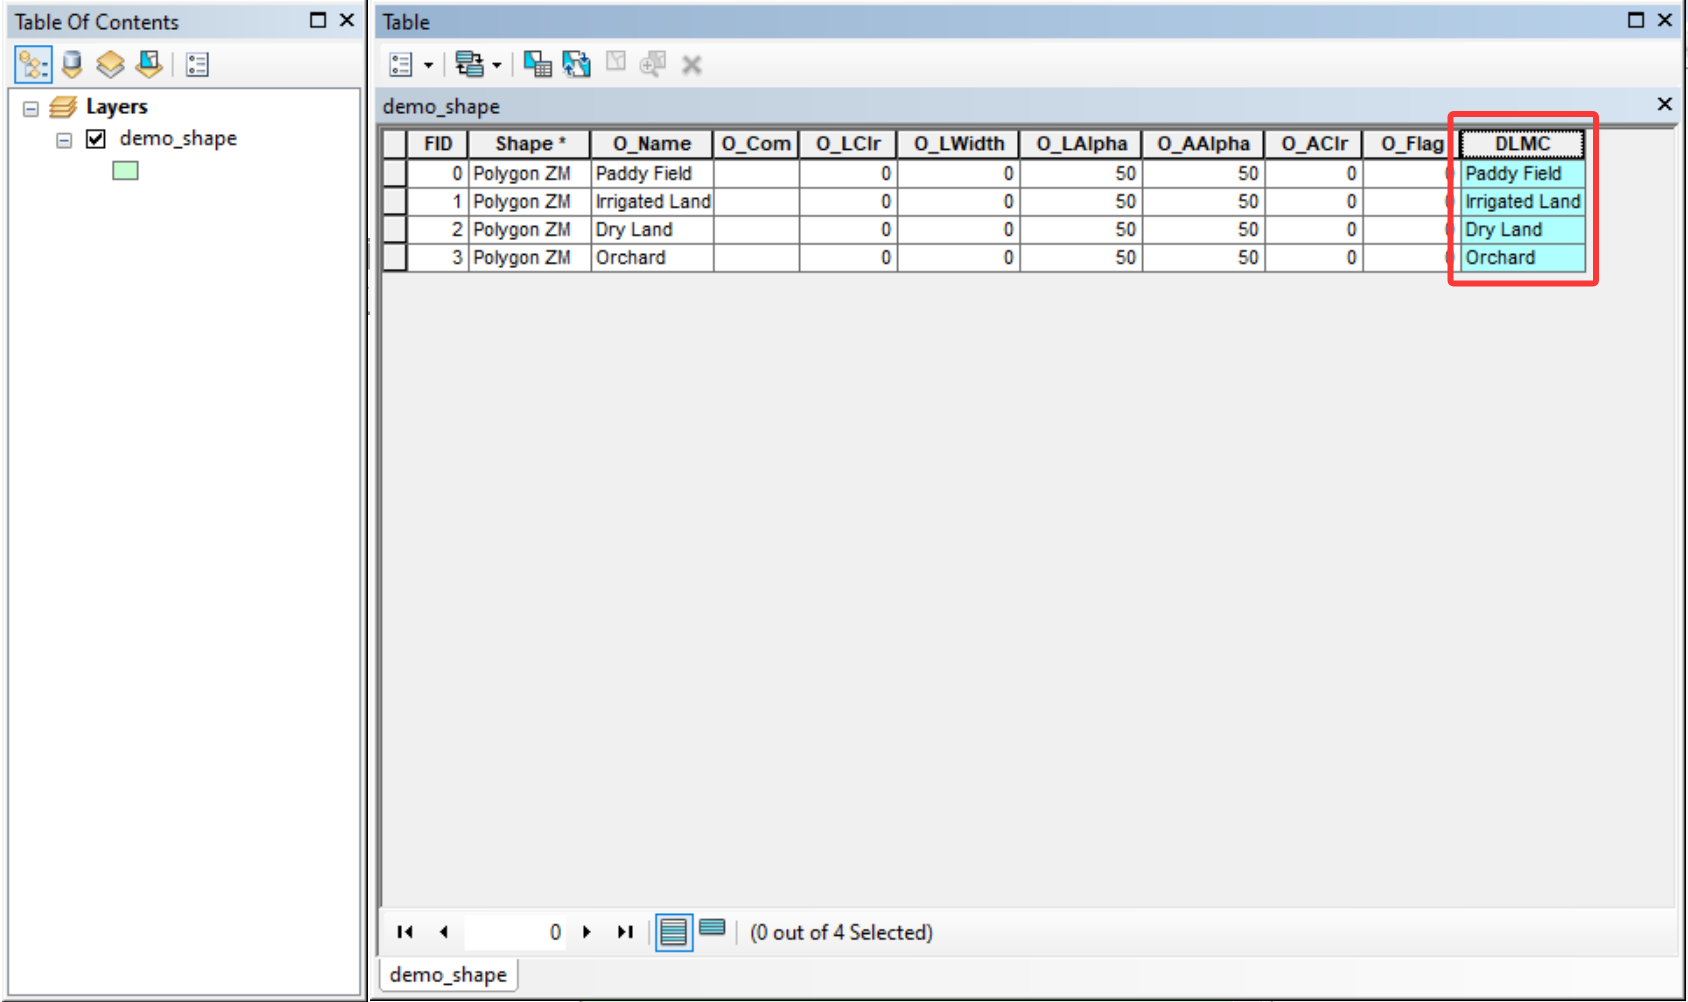
Open the attribute table of the SHP file by using GIS software. You can add a matching field or use an existing field as the matching field. In this example, DLMC is used as the matching field.
2. Create a fill scheme
Currently, the fill scheme feature is only available on the PC version.
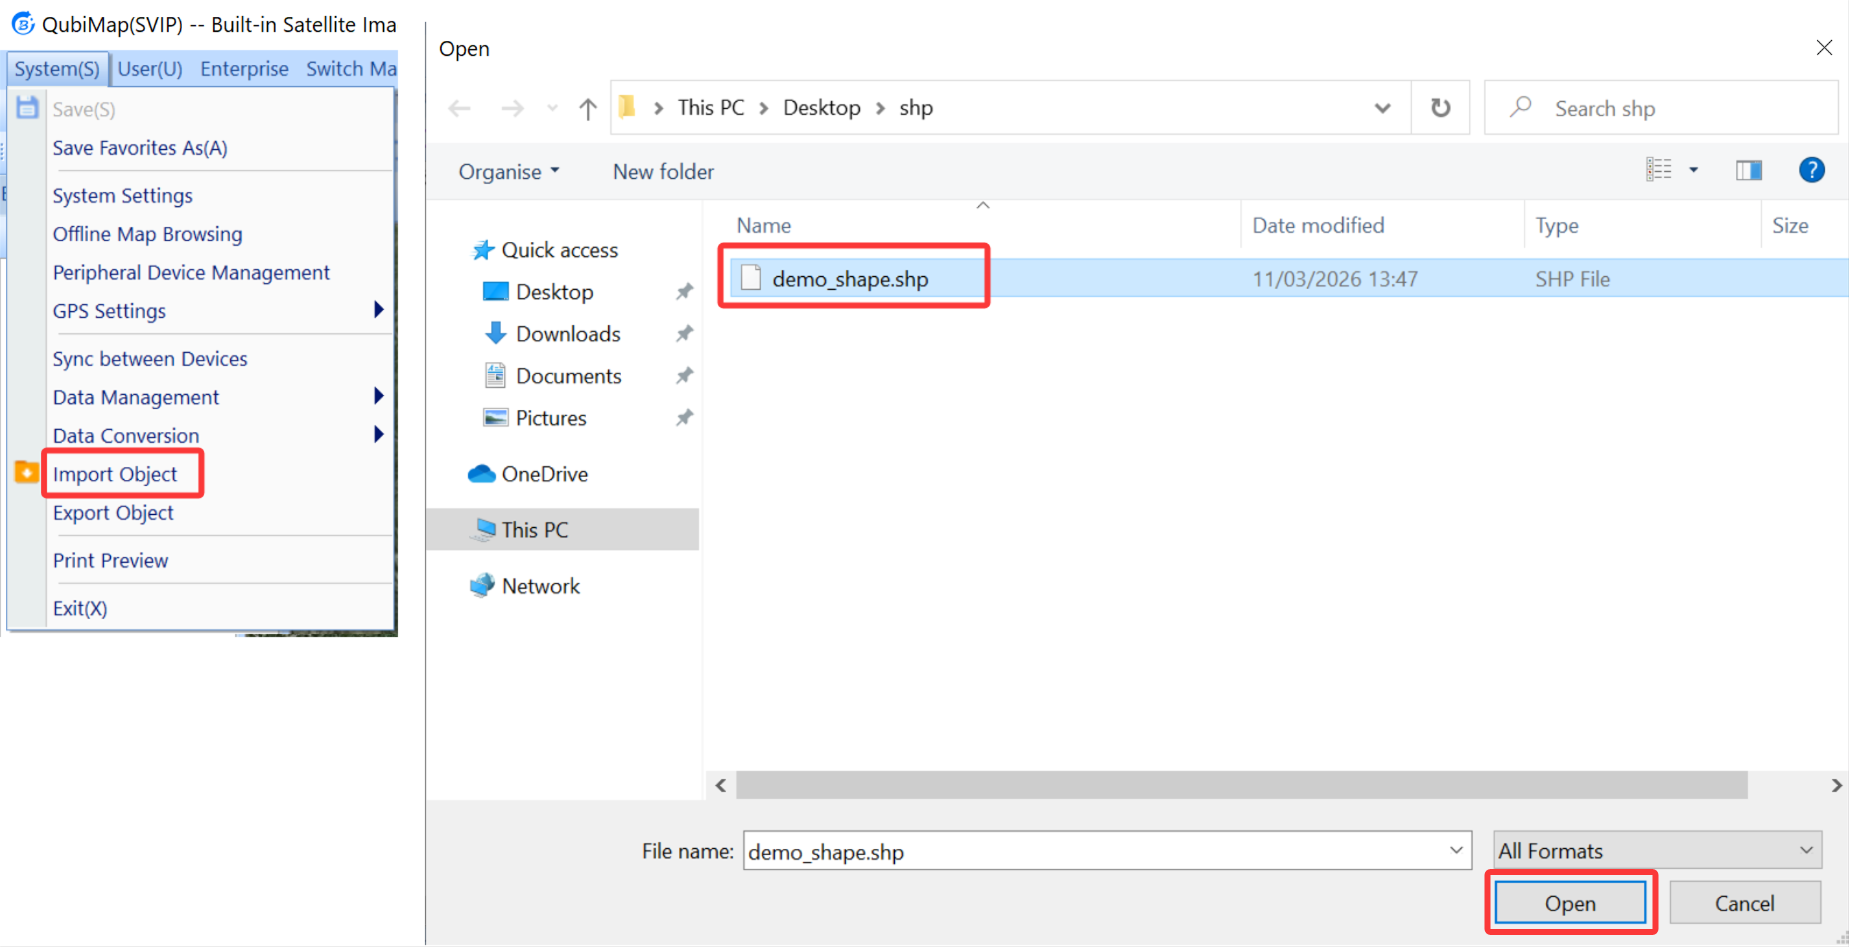
On the main interface of the QubiMap PC client, click [System] → [Import Object], select the SHP file you previously viewed in the GIS software, and click [Open].
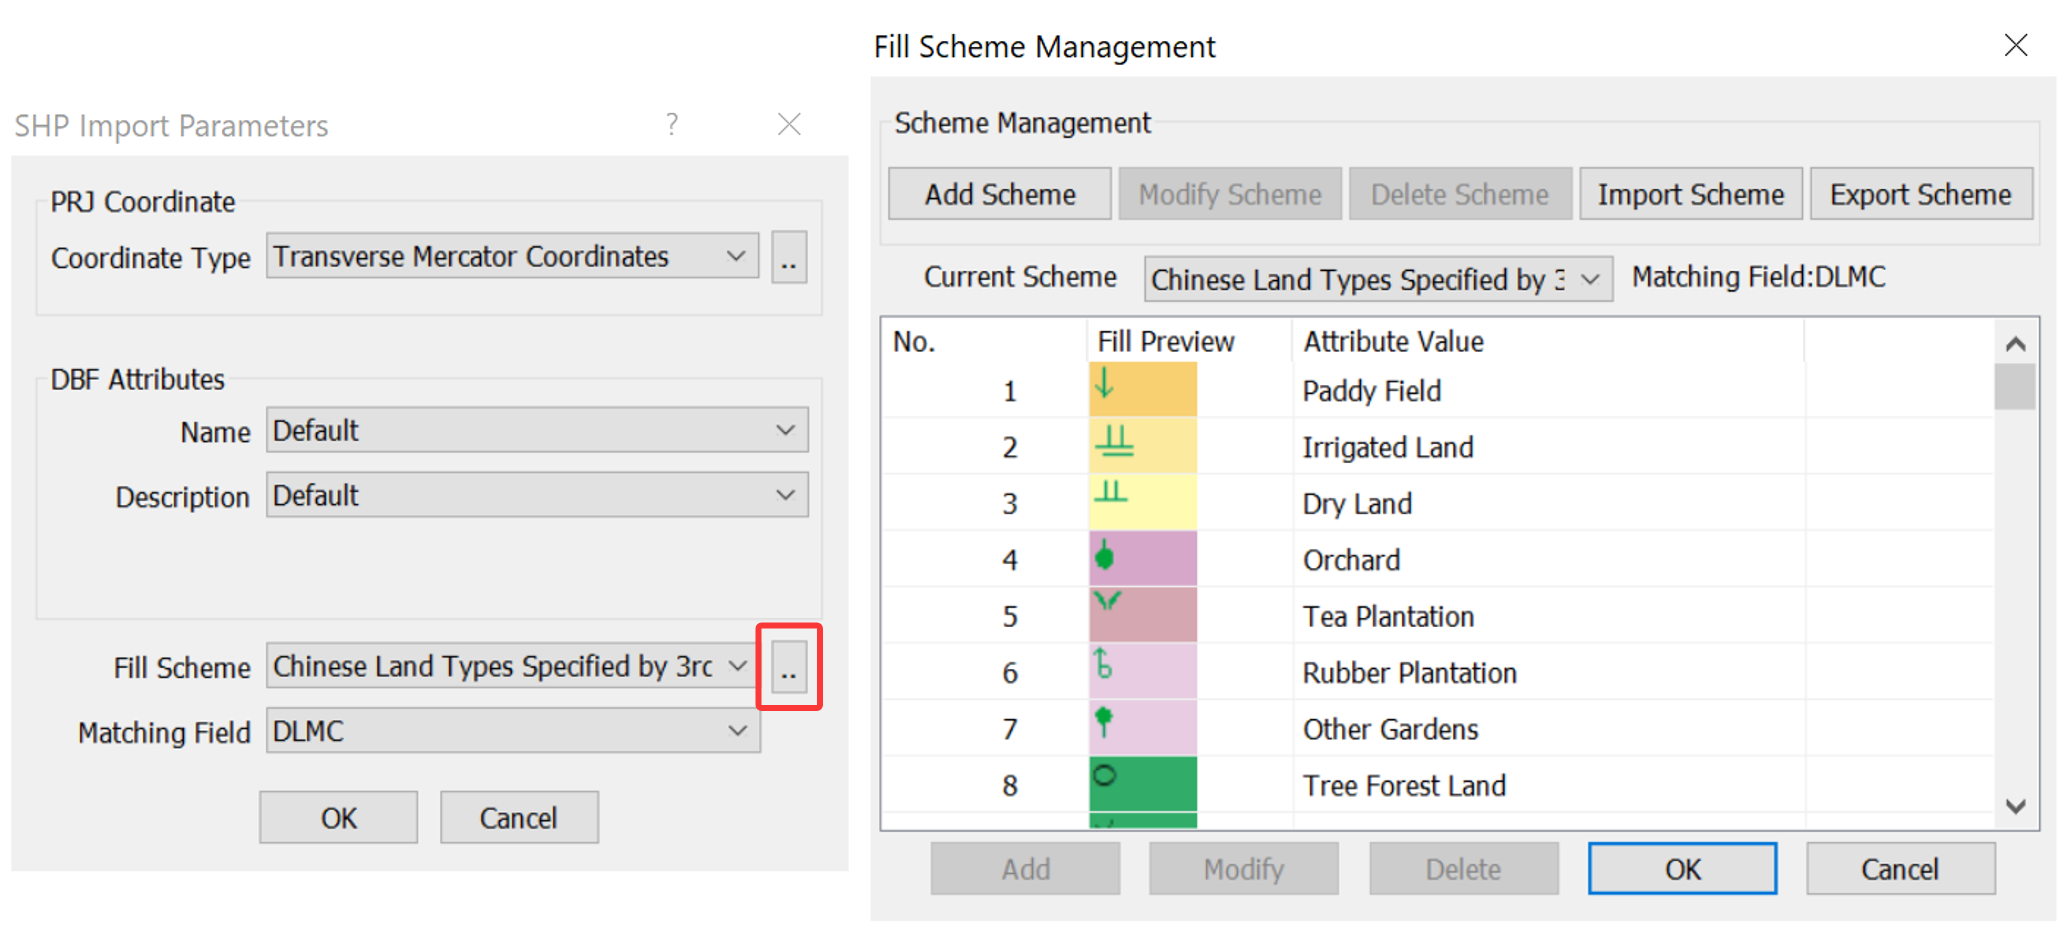
In the [SHP Import Parameters] dialog box, click the  button next to the fill scheme field. In the [Fill Scheme Management] dialog box, you can add schemes, and modify, delete, or export the added schemes. You can also import pre-defined .ovspc fill schemes. The built-in fill schemes cannot be modified or deleted.
1) Add a scheme
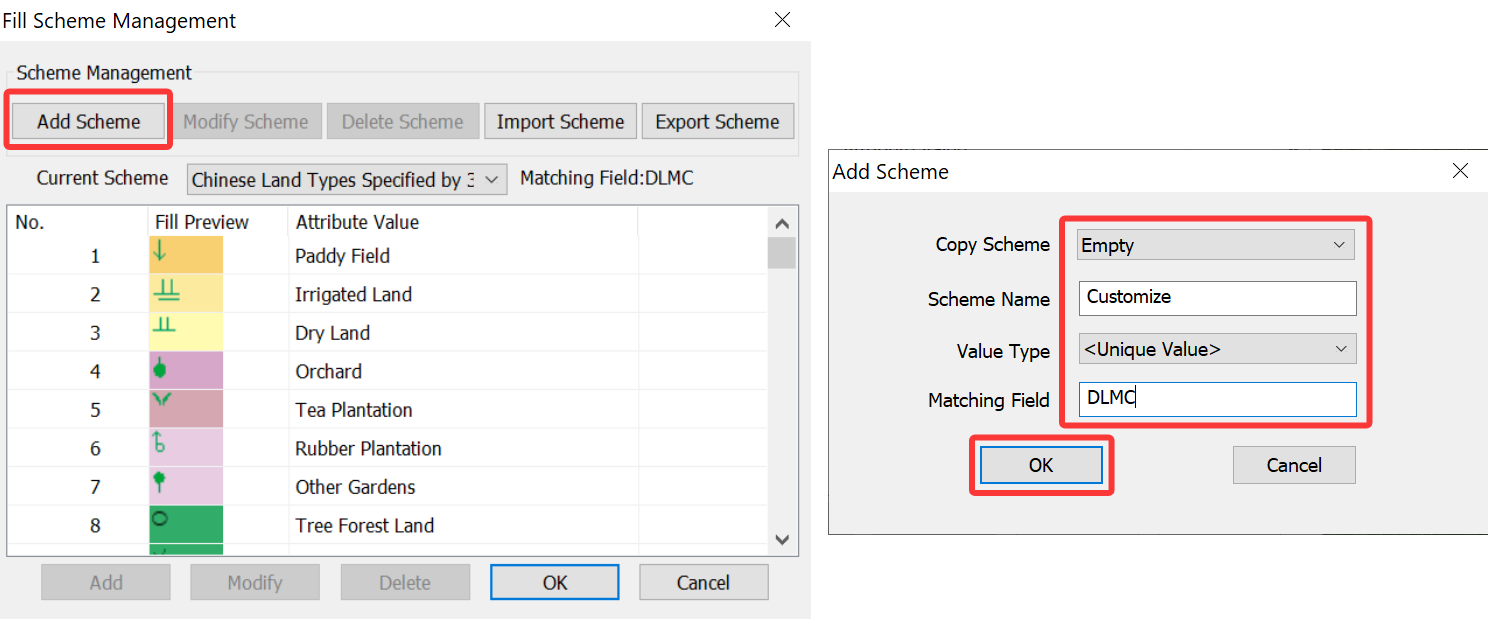
In the [Fill Scheme Management] dialog box, click [Add Scheme].
a. Scheme Name: Enter a scheme name.
b. Value Type: You can set it to
c. Matching Field: This value must be the same as the field specified in the step “1. Select a matching field“.
Then click the [OK] button.
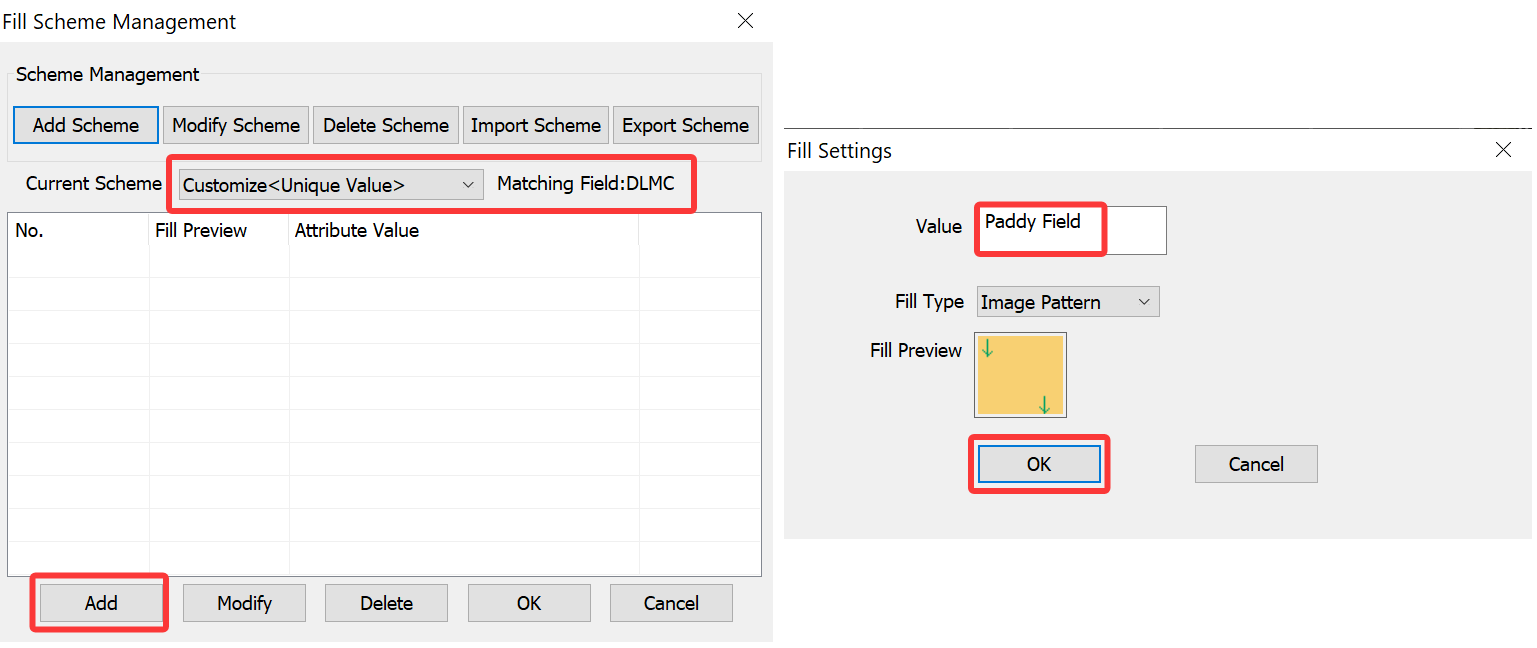
In the [Fill Scheme Management] dialog box, the name of the scheme you added, the value type, and the matching field are displayed in the current scheme field. Click the [Add] button. In the [Fill Settings] dialog box, enter an attribute value of the matching field in the shapefile, set the fill type, and then click the [OK] button.
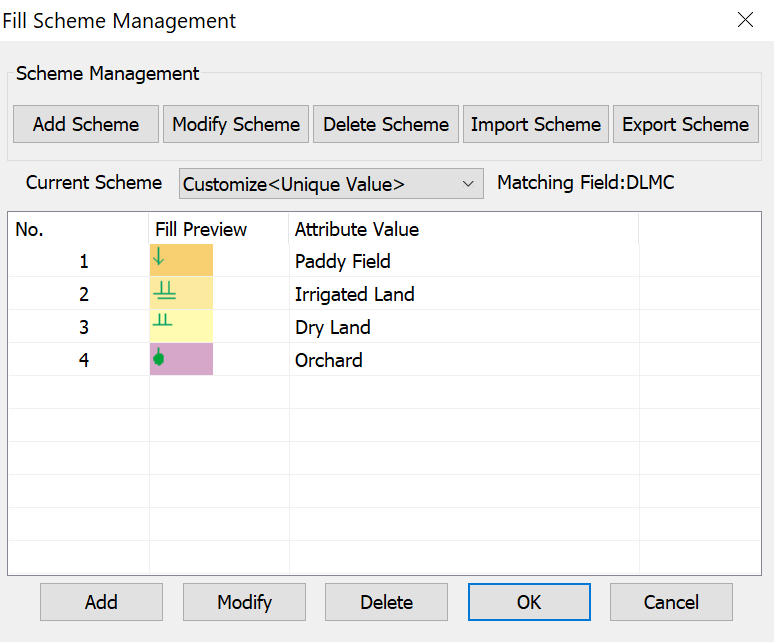
You can follow these steps to create fill types for other attribute values. In the [Fill Scheme Management] dialog box, you can modify or delete the fill types you added. After you complete the configuration, click the [OK] button.
In the [SHP Import Parameters] dialog box, the system automatically recognizes the fill scheme and matching field. Click [OK] → [Import].
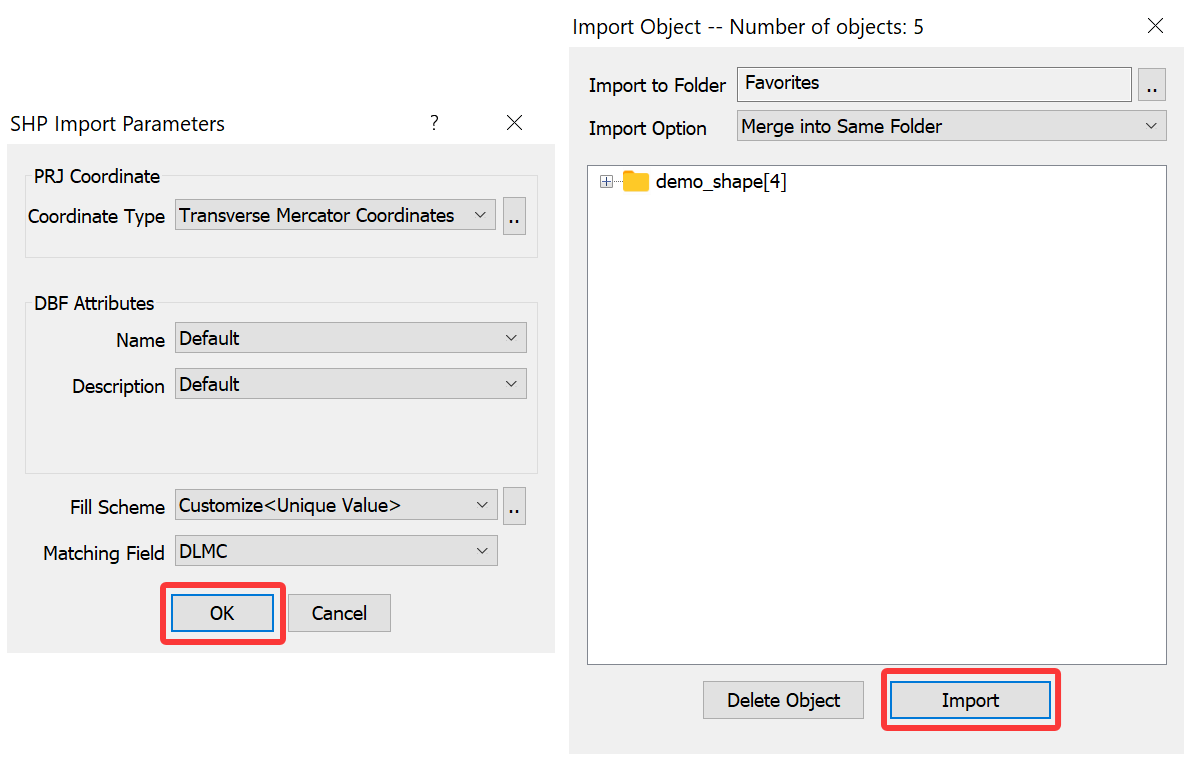
The imported shape data is added to the favorites and displayed on the map based on the customized fill scheme.