Import custom maps by using Lat-Long
Posted on Categories Custom Maps
1. Import instructions
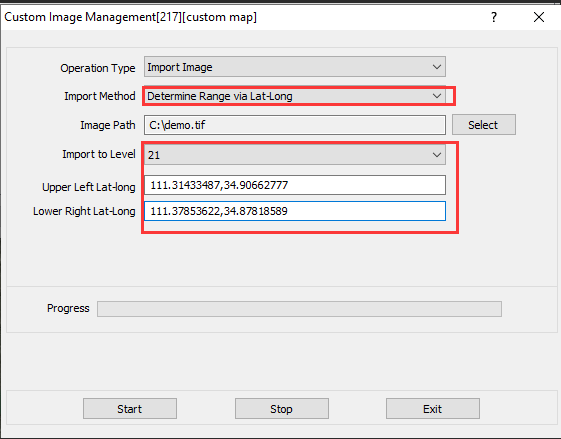
If images to be imported contain the Lat-Long information of the upper-left and lower-right corners, you can use this method, which ensures precise alignment with the actual locations on the map.
The system automatically detects the display level based on the image resolution and Lat-Long information of the upper-left and lower-right corners. You do not need to set the [Import to Level], [Upper Left Lat-Long], and [Lower Right Lat-Long] parameters.
2. Procedure
On the main UI of QubiMap on your PC, choose [Custom Maps] > [Custom Map Management].
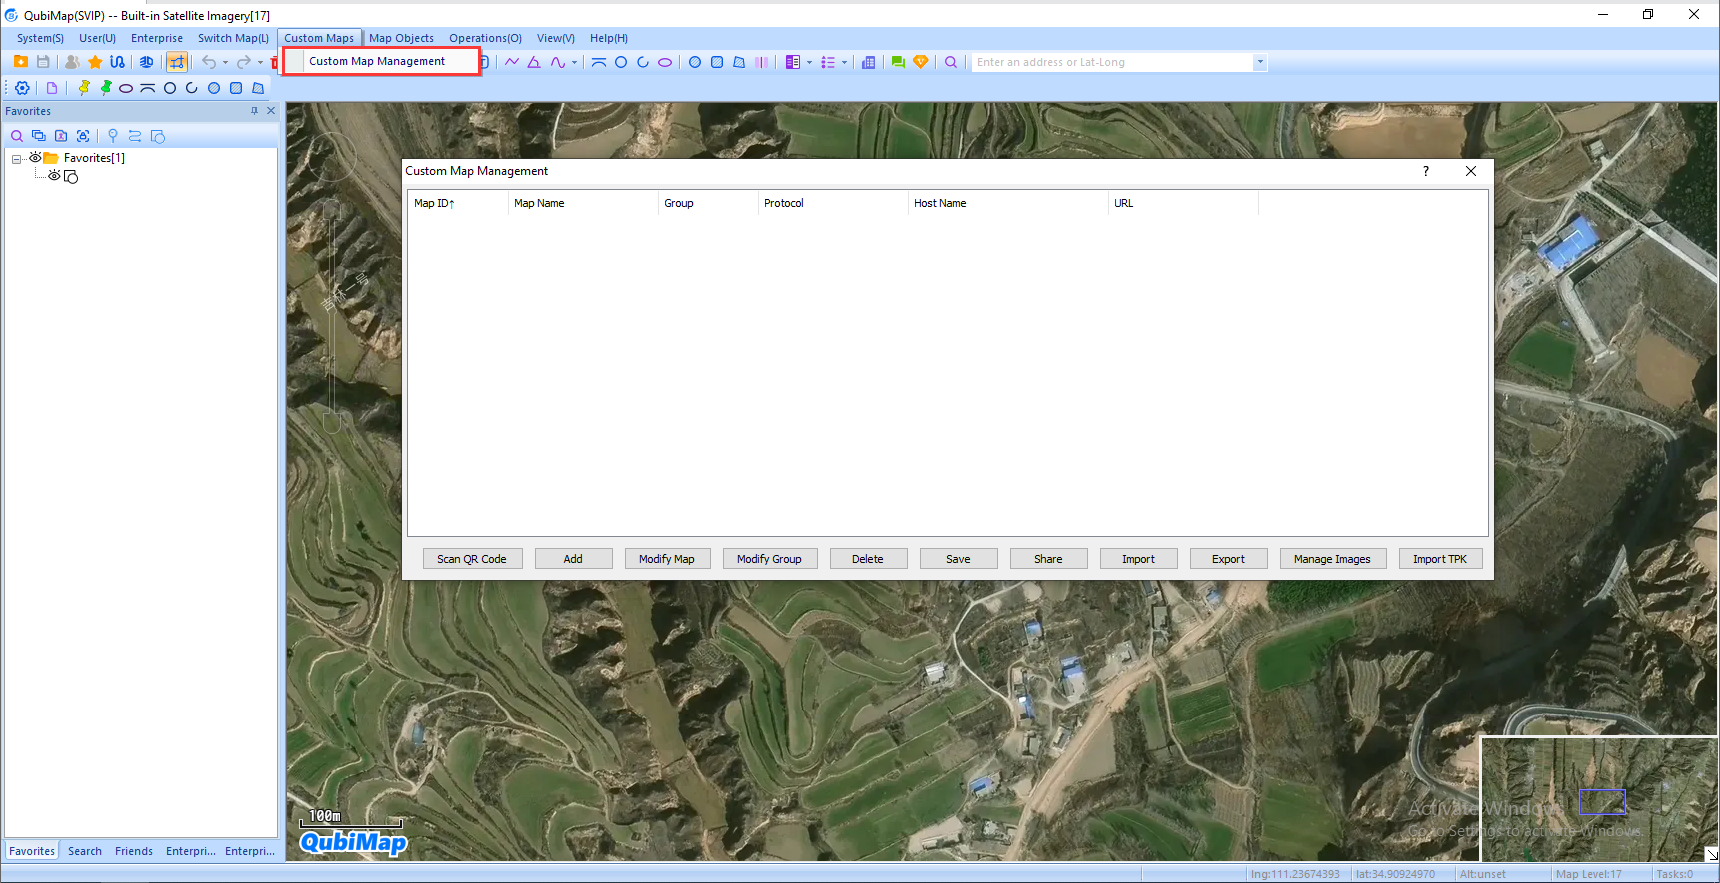
In the [Custom Map Management] dialog box, click [Add] and select [Add Custom Map] from the drop-down list.
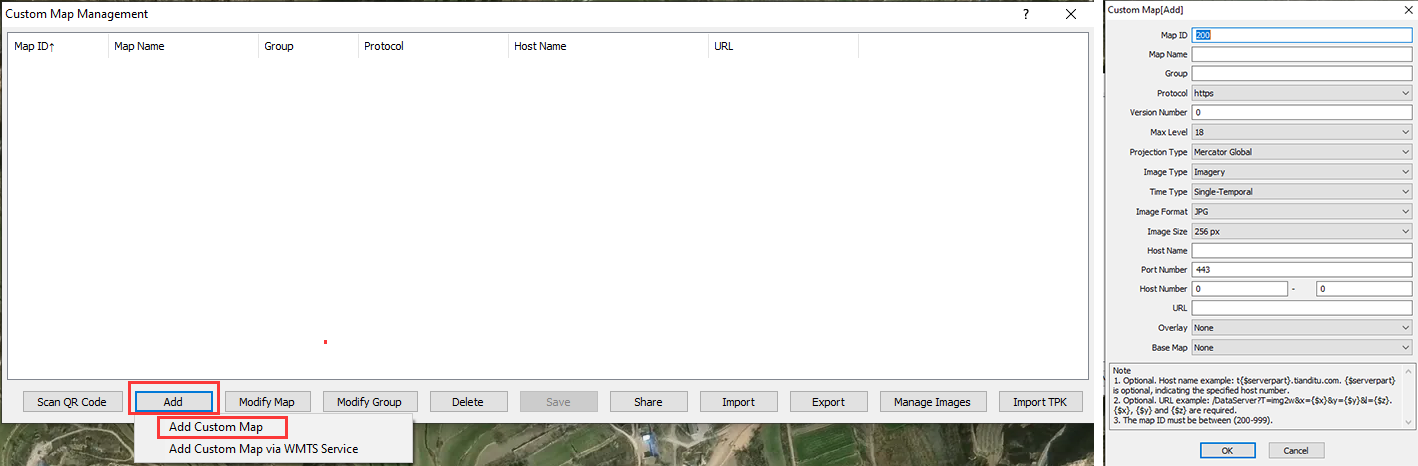
In the dialog box that appears, set the parameters and click [OK]. The added map layer is displayed in the custom map list.
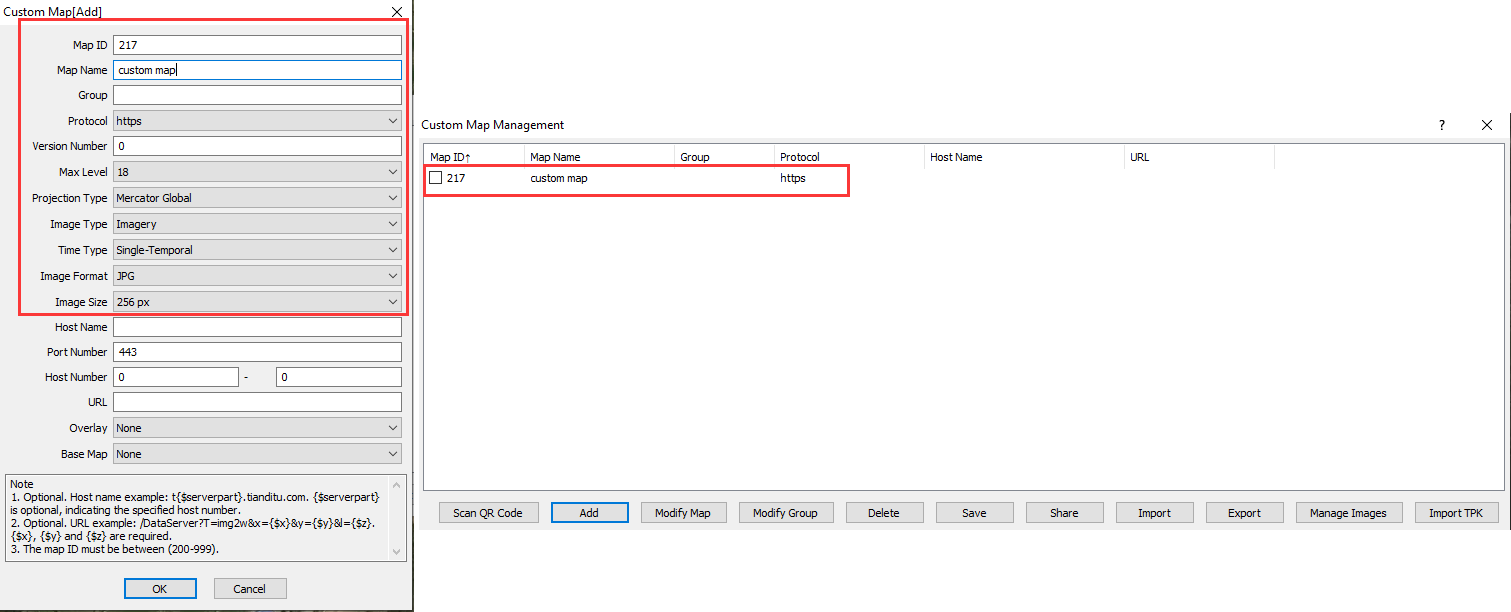
★ Parameters:
① Map ID: a unique ID number assigned to each custom map, ranging from 200 to 999.
② Map Name: the name of the map displayed in the custom map list.
③ Max Level: the highest display level of this map.
④ Projection Type: Select [Mercator Global].
⑤ Time Type: Select [Single-Temporal] or [Multi-Temporal (Historical Images)] as needed. For more information about multi-temporal images, see the help document “How to add multi-temporal (historical) images to a custom map”.
⑥ For other parameters, you can keep the default values.
In the [Custom Map Management] dialog box, select the custom map and click [Manage Images].
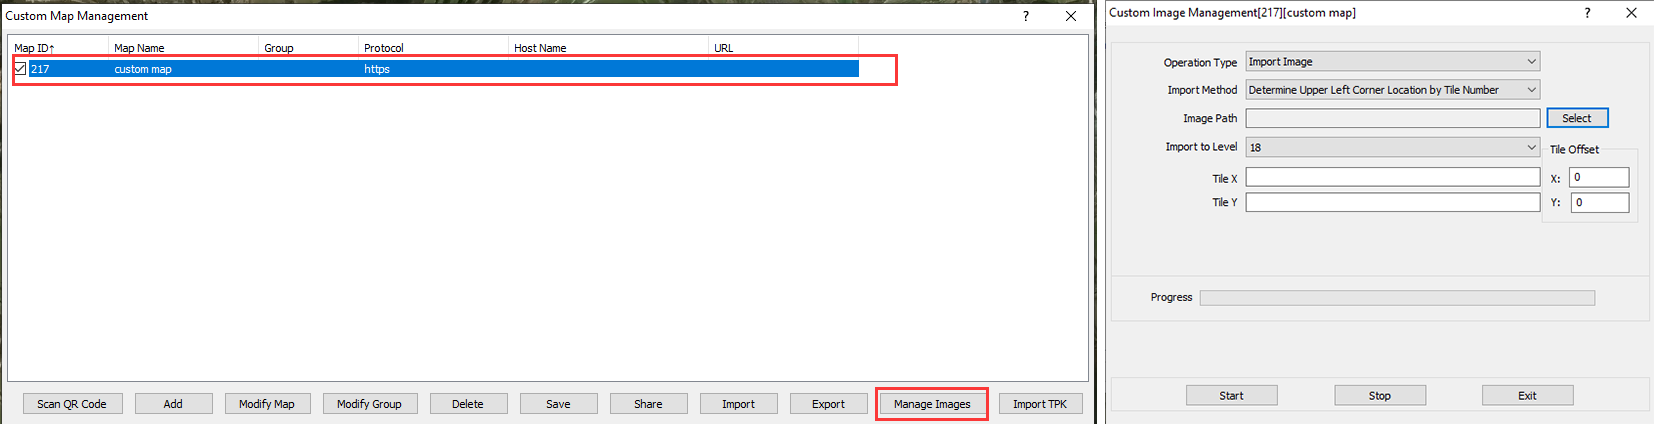
In the [Custom Image Management] dialog box, select [Import Image] for the [Operation Type] parameter, select [Determine Range via Lat-Long] for the [Import Method] parameter, and then click [Select] next to [Image Path].
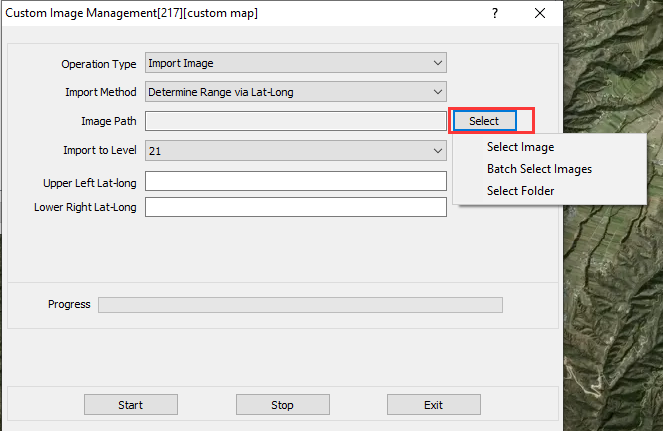
The following options are available:
Select Image: Select a single image to import.
Batch Select Images: Select multiple images to import at a time.
Select Folder: Select all images from an entire folder to import.
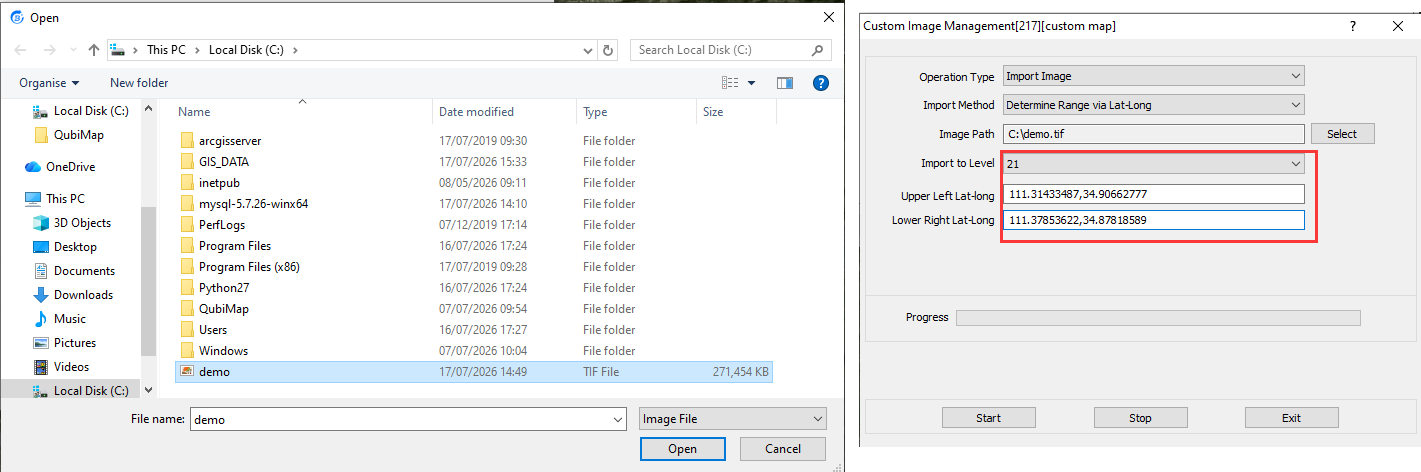
In this example, Select [Select Image]. Select the image you want to import and click [Open].
The system automatically detects the image information and auto-fills the values of the [Import to Level], [Upper Left Lat-Long], and [Lower Right Lat-Long] parameters.
Click [Start] to start importing.
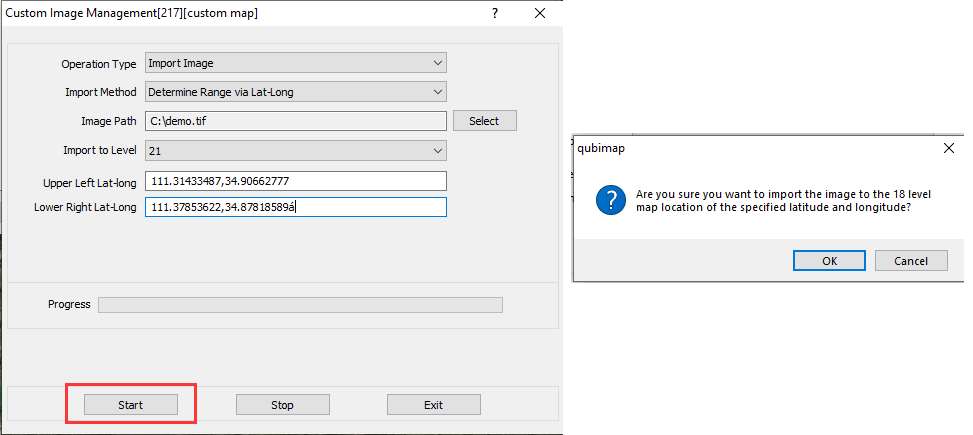
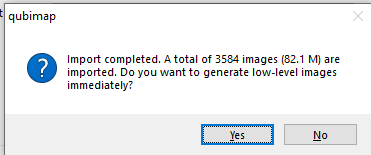
After the import is completed, click [Yes].
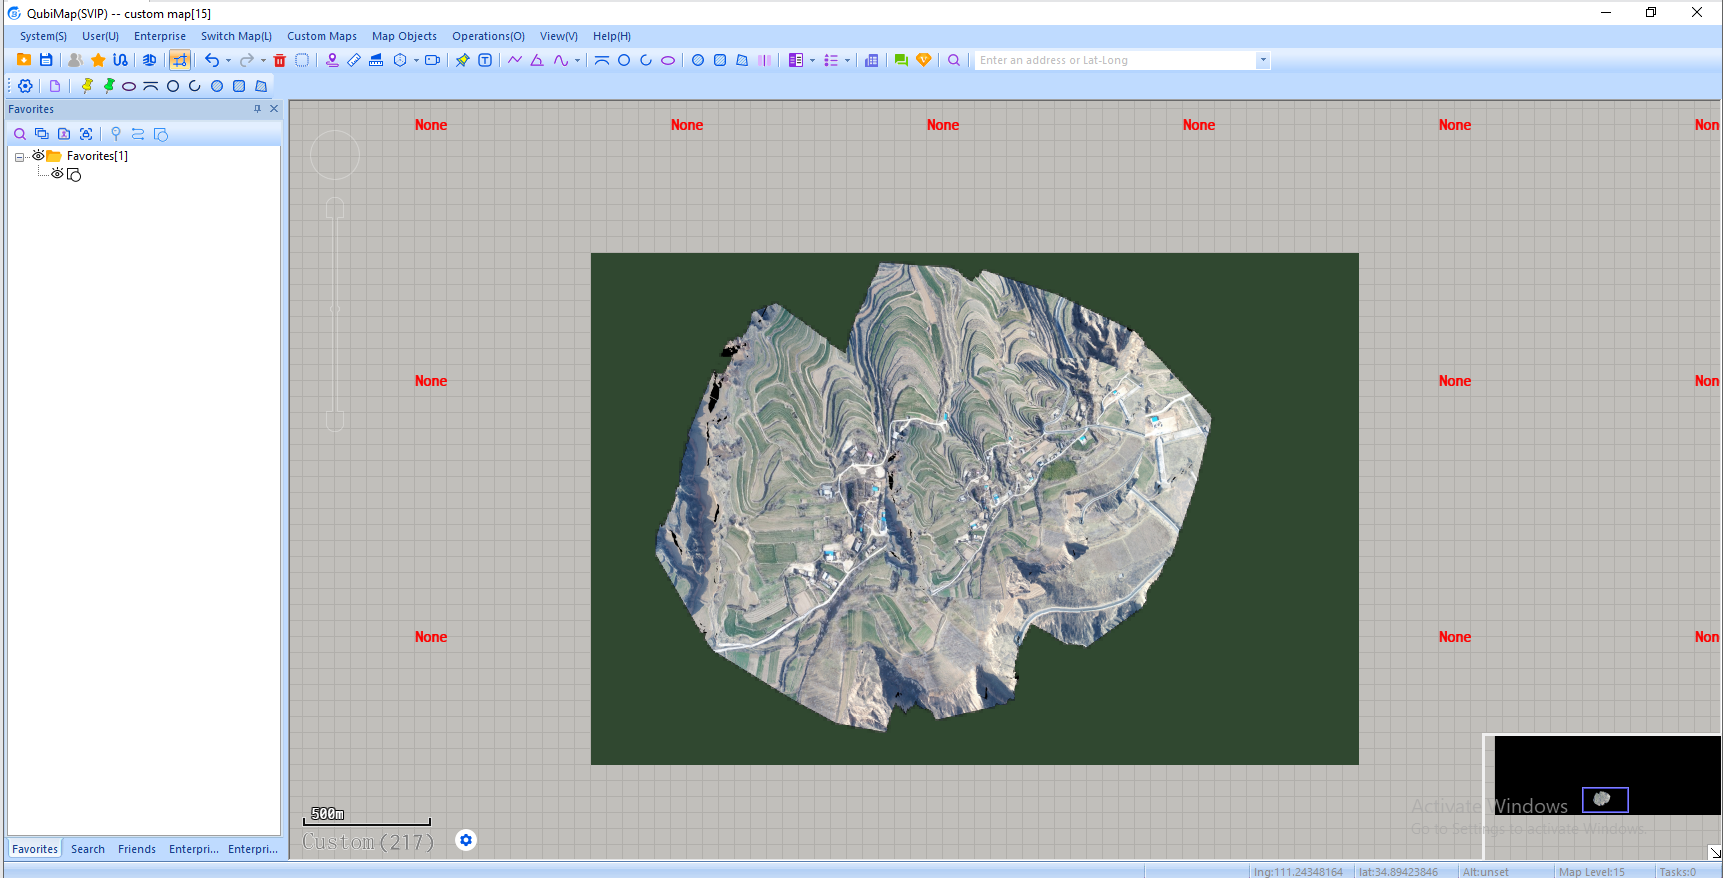
On the main UI, switch to the custom map that is added, and you can view the imported image.
For information about how to set map overlays, see the help document “How to import aerial images and set map overlays“.