How to generate TPK files in ArcGIS and import them to QubiMap
Posted on Categories Custom Maps
QubiMap supports importing TPK files as custom maps. The procedure is as follows:
1. Generate a TPK file in ArcGIS
In ArcGIS, TPK files can be generated from TIFF, PNG, and JPEG image files and SHP vector files.
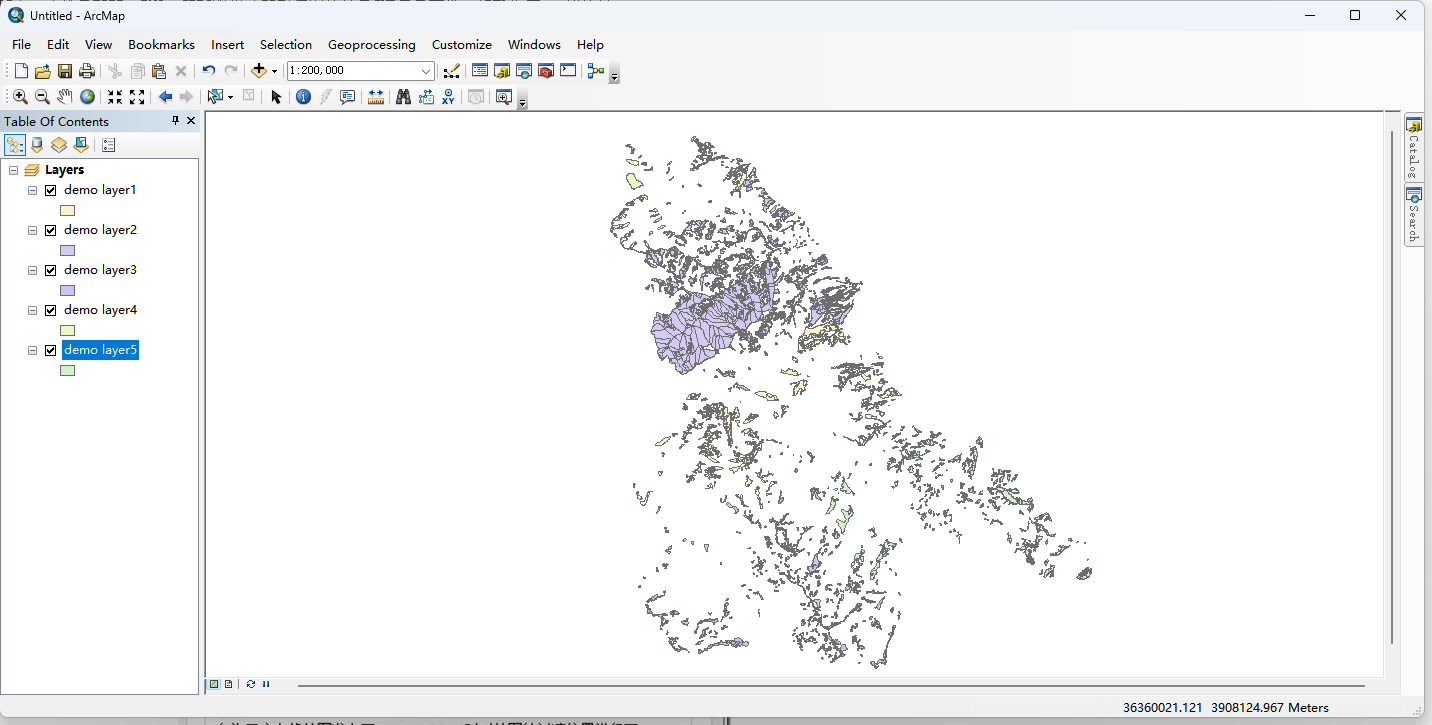
In this example, the data to be exported from ArcGIS is shown in the following figure:
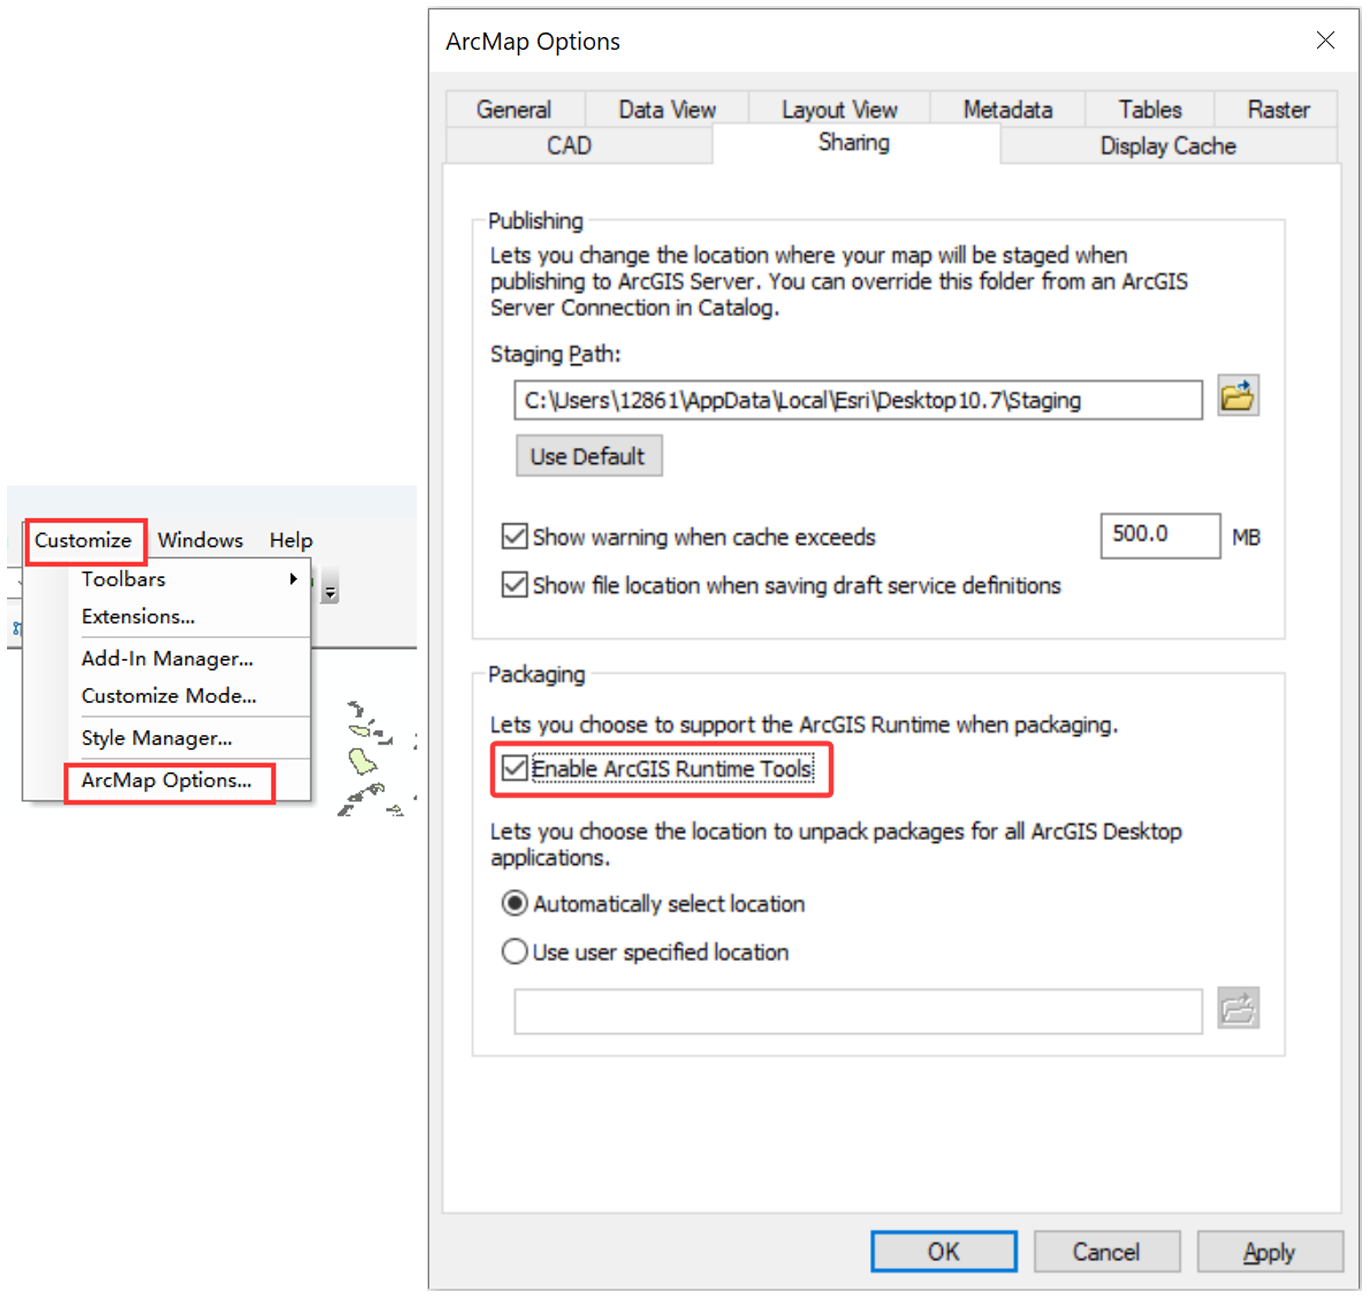
Choose [Customize] > [ArcMap Options]. In the [ArcMap Options] dialog box, click the [Sharing] tab. In this tab, select [Enable ArcGIS Runtime Tools], click [Apply], and then click [OK].
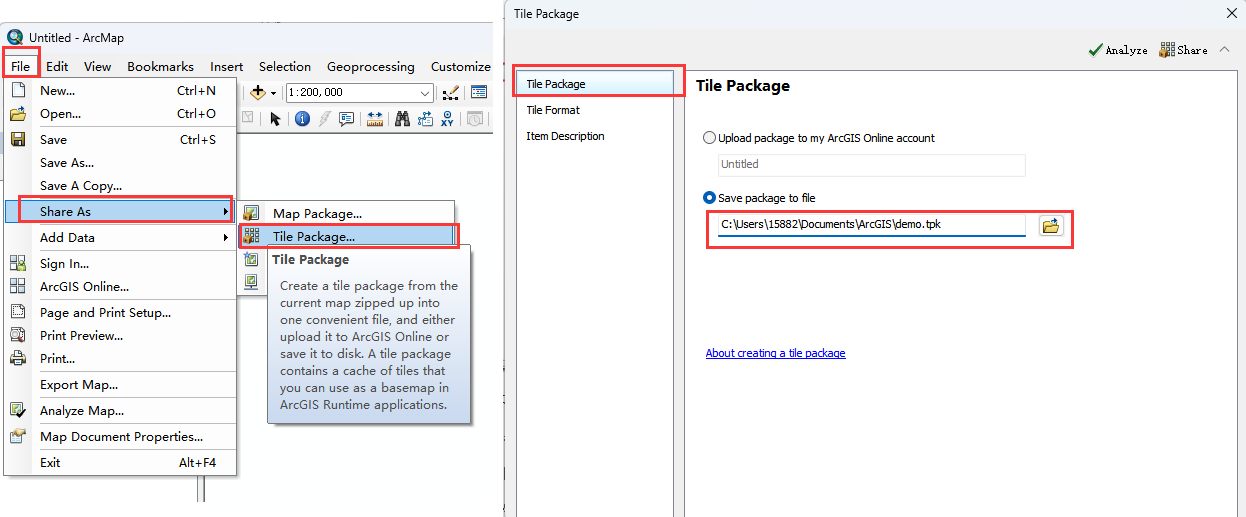
Choose [File] > [Share As] > [Tile Package].
In the [Tile Package] dialog box, select [Save package to file] and set the storage directory.
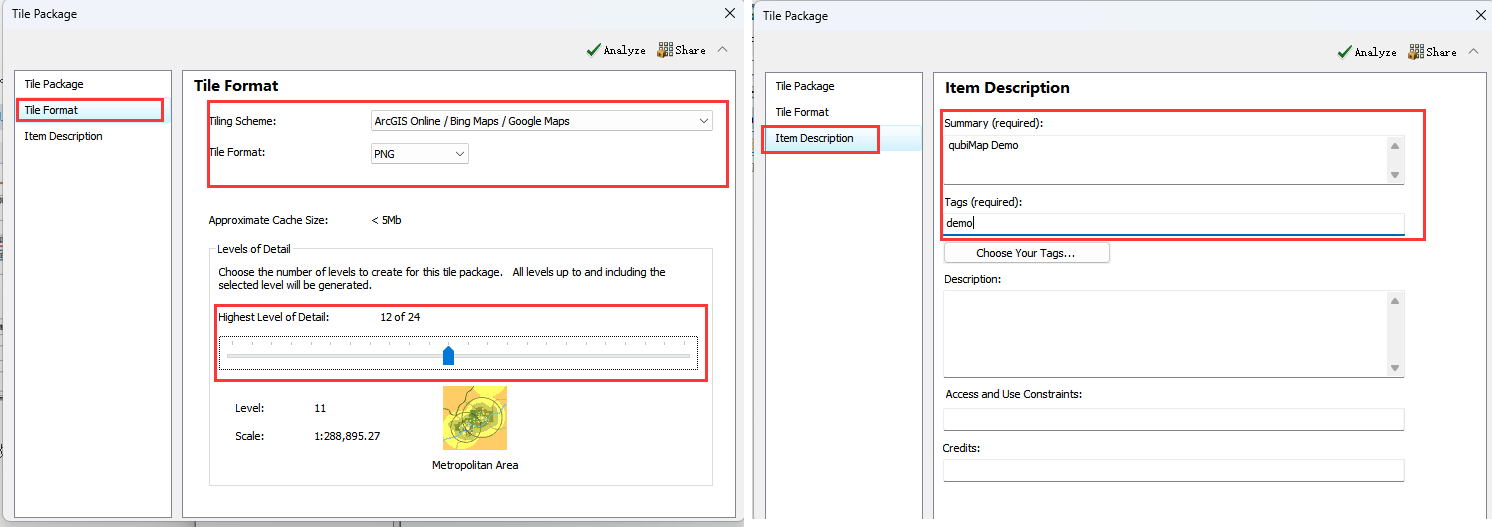
Switch to [Tile Format]. Set the [Tile Scheme], [Tile Format], and [Highest Level of Detail] parameters.
Tile Scheme: We recommend that you keep the default value. Currently, QubiMap only supports importing TPK files that use the Web Mercator projection.
Tile Format: You can select PNG, JPEG, and MIXED.
Highest Level of Detail: The value starts from 0. If you set it to 12, the corresponding tile level is 11.
Switch to [Item Description]. Enter the summary and tags. Other fields are optional.
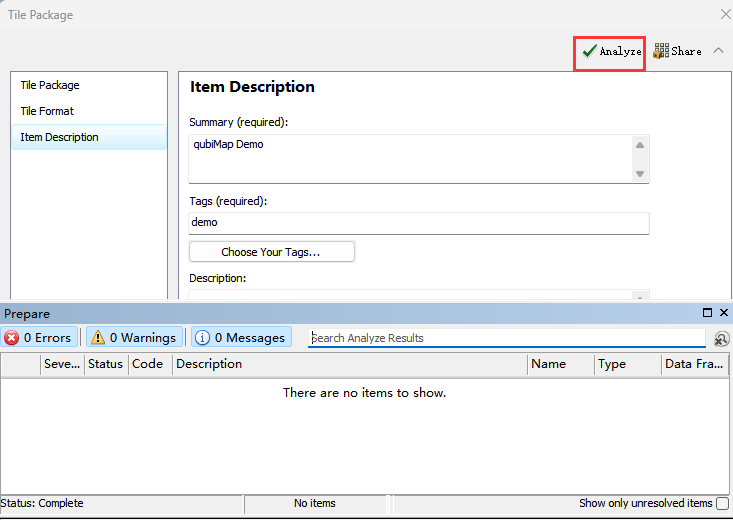
Click [Analyze]. The system automatically analyzes the map data. If any error messages appear, resolve the issues. Warnings can be skipped.
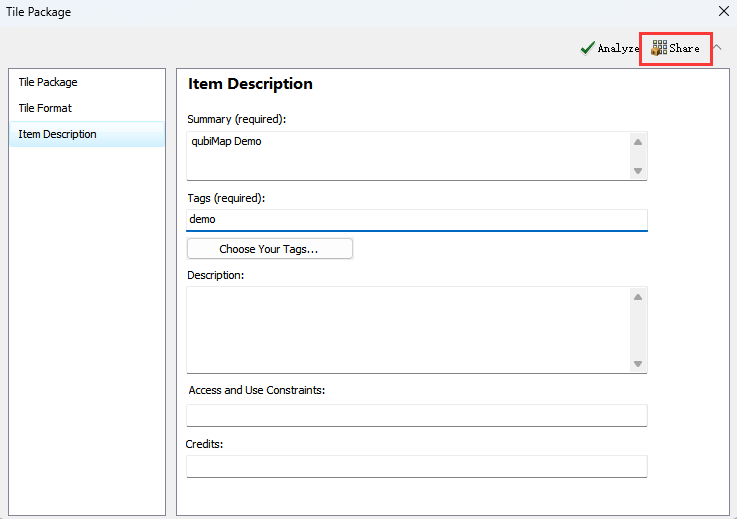
After the analysis is completed, click [Share] → [Yes] to save the TPK file. Then, click [OK].
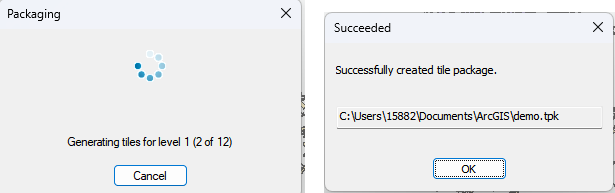
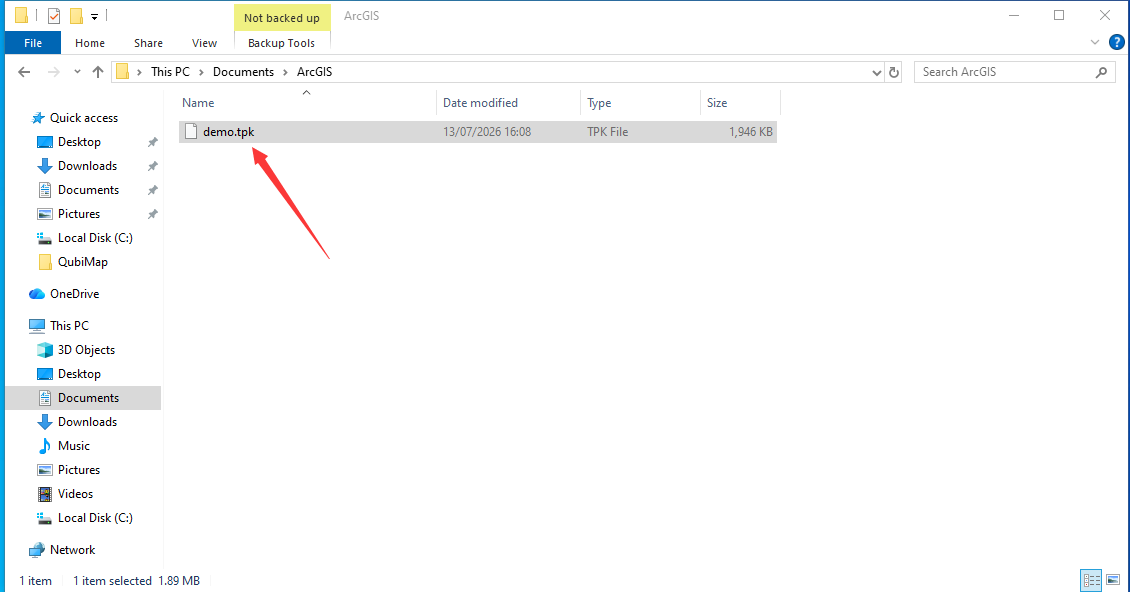
You can view the generated TPK file in the specified directory.
2. Import the TPK file to QubiMap
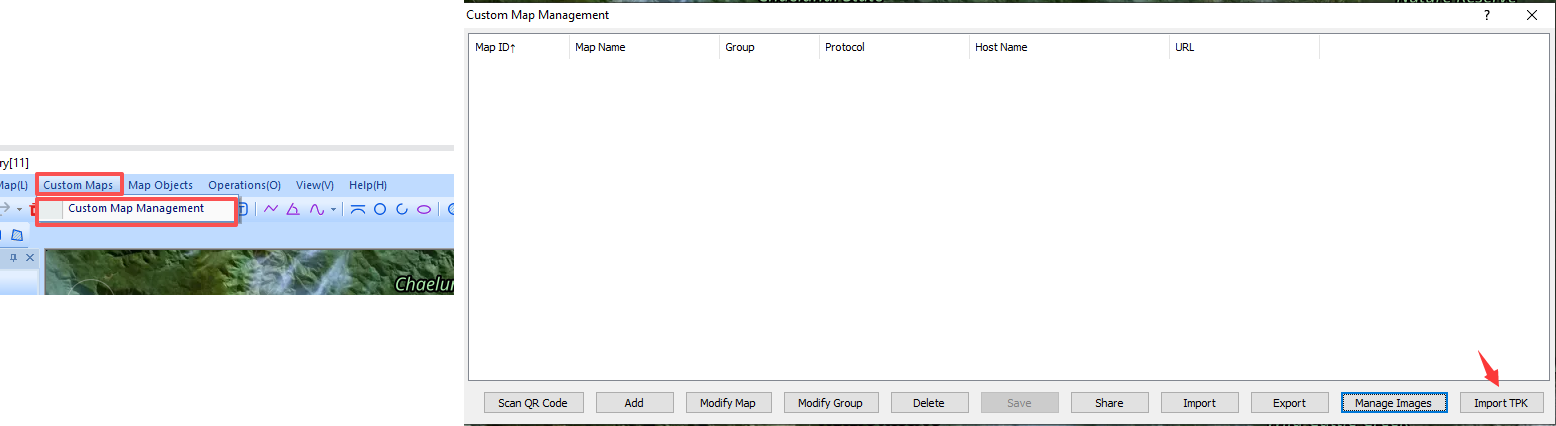
On the main UI of QubiMap, choose [Custom Maps] > [Custom Map Management]. In the dialog box that appears, click [Import TPK].
In the [Import TPK] dialog box, enter the map name, click [Select] to select the TPK file to be imported, and click [Open].
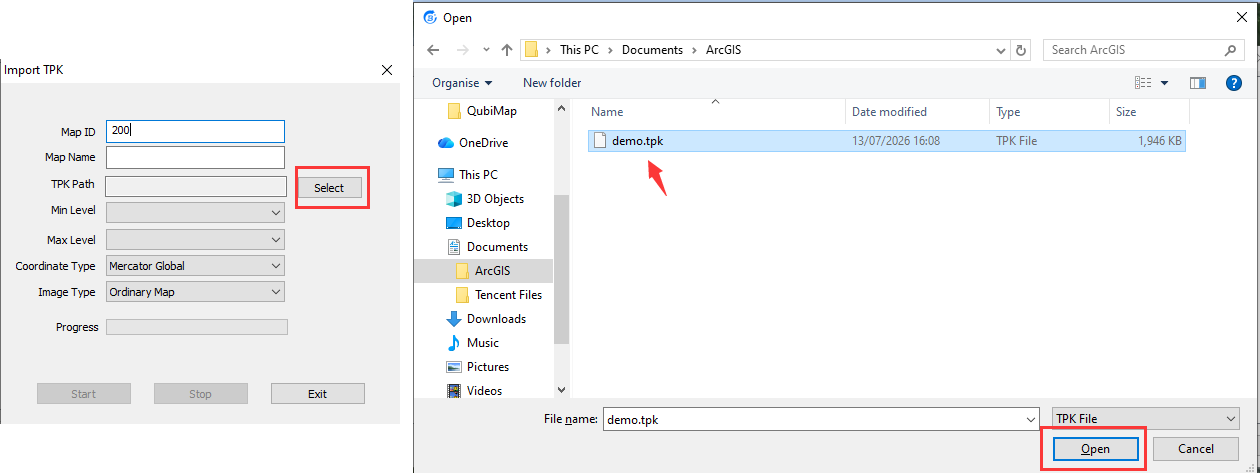
Min Level and Max Level: The system automatically retrieves the levels of the TPK file. You do not need to modify the values.
Coordinate Type: Set the value based on the projection type of the TPK file.
Image Type: You can select [Ordinary Map] or [Imagery]. Ordinary Map: Select this option if the imported map is a vector map. Imagery: Select this option if the imported map is aerial imagery or satellite imagery.
After you set the parameters, click [Start] to import the data.
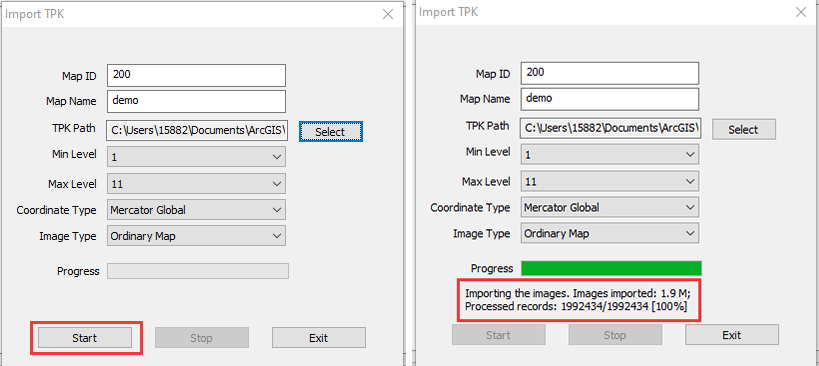
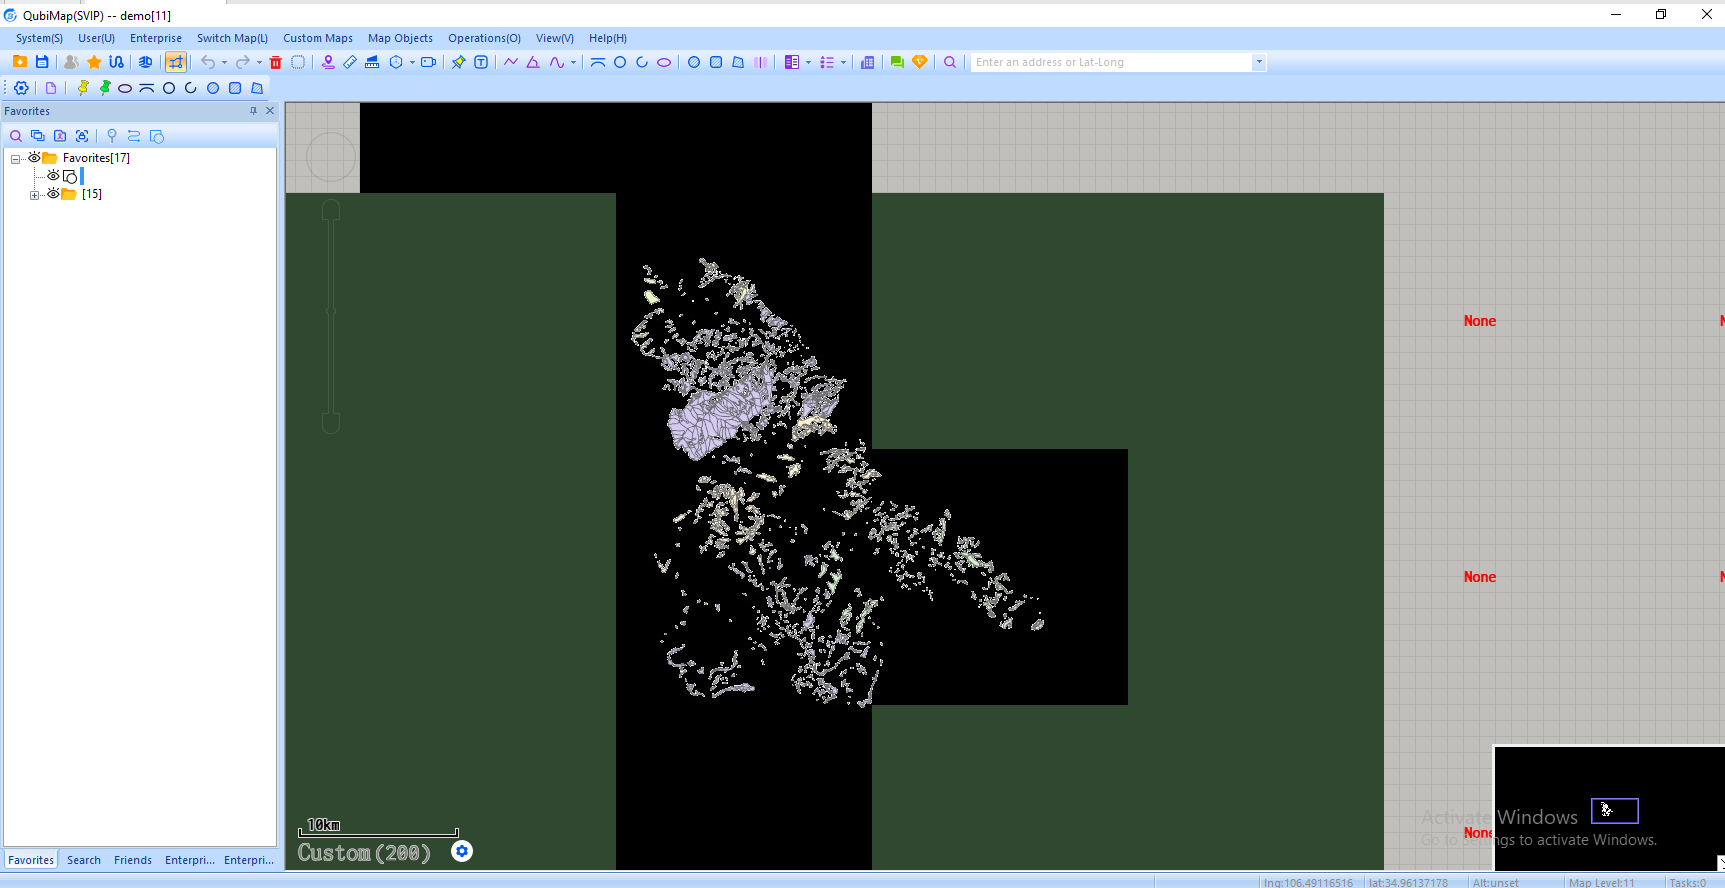
After the import is completed, click [OK]. Then, you can switch to the added custom map to view the imported data.