How to use the My Teams feature (PC)
Posted on Categories Common Features
You can create a team in QubiMap and add your friends to the team for messaging, data sharing, and real-time location sharing.
Version requirement: V10.0.2 or later
1. Create a team
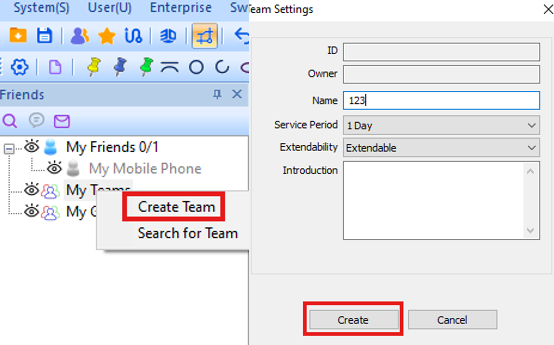
① Log in to your QubiMap account on PC, switch to the [Friends] pane, right-click My Teams, and select [Create Team].
② Enter a name and team introduction. Set the service period of the team and the extendability of the period.
③ Click [Create]. Then, a team is created and displayed under [My Teams].
Parameters:
Name: Specify a team name as needed.
Service Period: Set the team’s validity period. Valid values: 1 to 31 days. The team is automatically dismissed after the expiration date.
Extendability: Extend the team’s validity period by setting the value to [Extendable]. The maximum validity period is 45 days.
Introduction: Enter a description to introduce the purpose and function of the team.
2. Manage team members
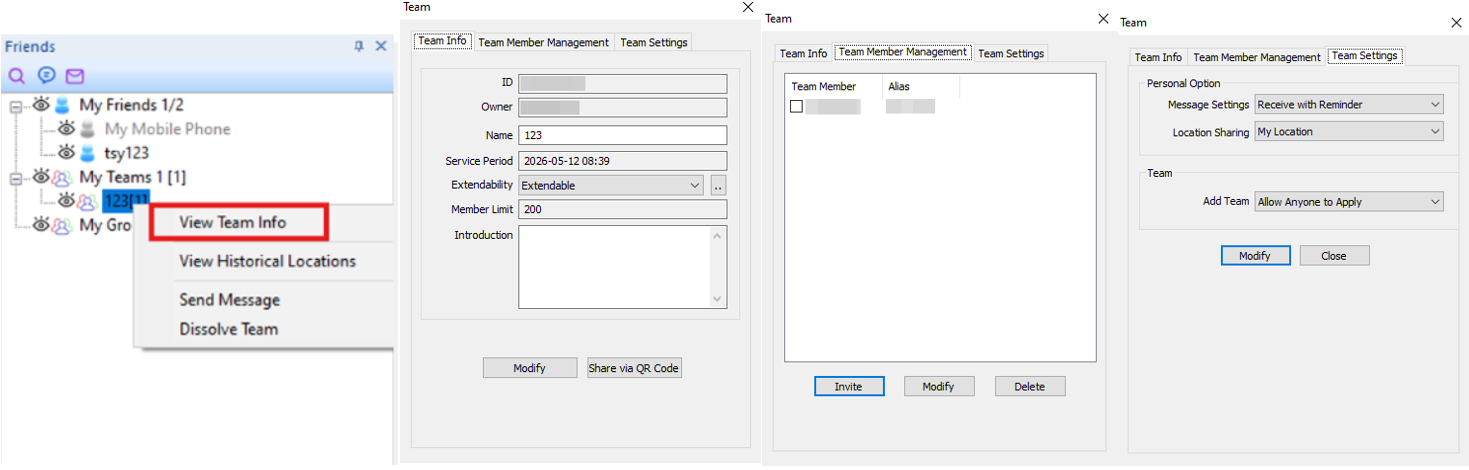
In the [My Teams] list, select a team, right-click it, and select [View Team Info]. In the [Team] dialog box, you can view team information, manage team members, and configure team settings.
2.1. View team information
On the [Team Info] tab, team members can view the team information, such as team owner, team name, service period, and maximum number of members.
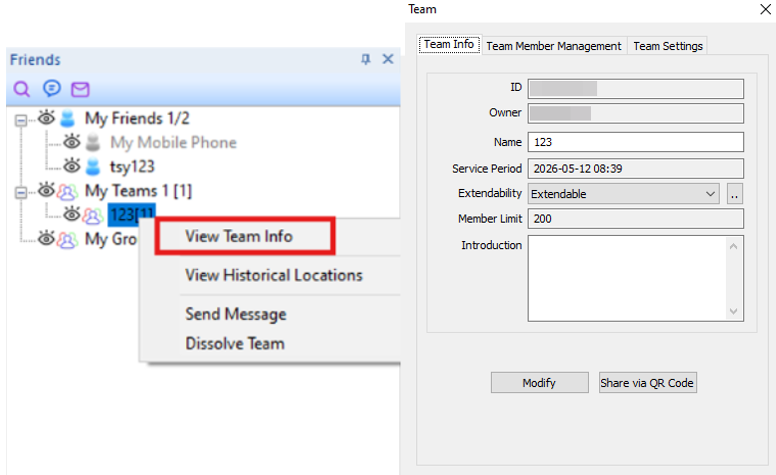
You can also click [Share via QR Code] to share the team with your friends. Your friends can scan the code with their mobile devices to join the team.
2.2. Manage team members
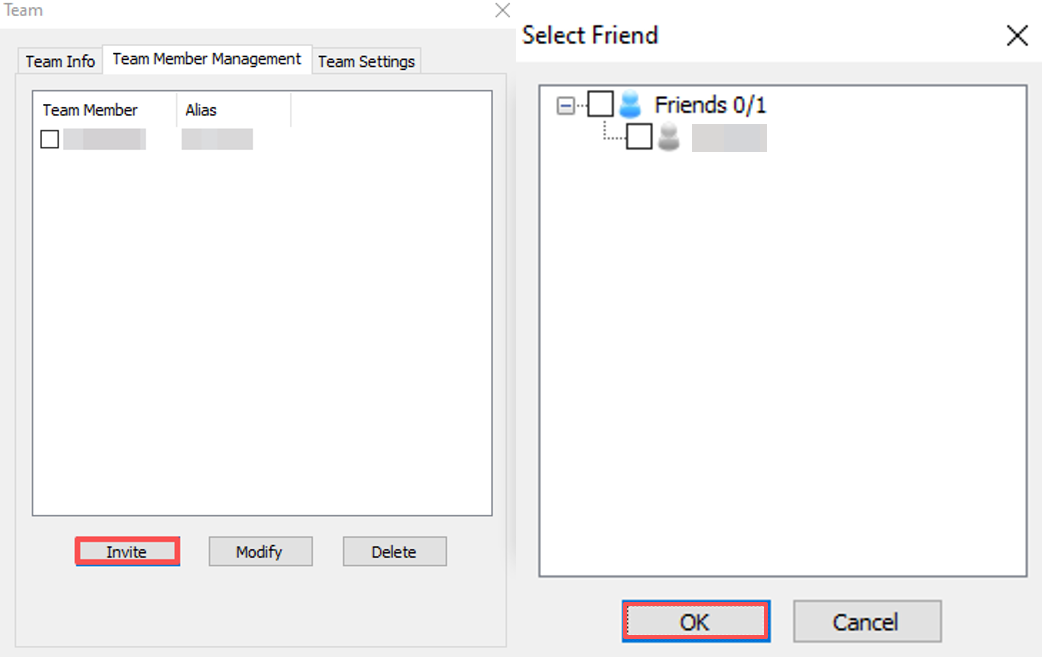
On the [Team Member Management] tab, the team owner can invite friends to join the team and modify the aliases and location display settings of team members.
To invite your friends, click [Invite]. In the [Select Friend] dialog box, select the friends you want to add to the team, click [OK], and wait for your friends to accept the invitation.
2.3. Configure team settings
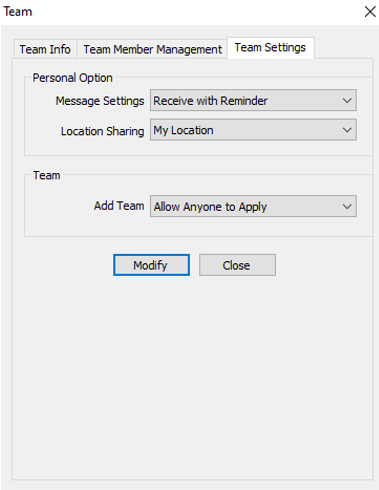
On the [Team Settings] tab, team members can configure message and location sharing settings, while the team owner can configure the method of joining teams.
(1) Message Settings
Valid options: [Don’t Receive], [Receive without Reminder], and [Receive with Reminder]. We recommend that you select [Receive with Reminder], so that received messages will be shown in the dialog box with voice notification.
(2) Location Sharing
Valid options: [Don’t Share], and [My Location].
My Location: the location information collected by the device bound to your QubiMap account.
(3) Joining Method
Only the team owner can set this parameter.
Allow Anyone to Apply: Any QubiMap user can search for this team by team ID and apply to join the team.
Only Allow Administrator to Add: Only the team owner can add members. Other QubiMap users cannot join this team by applying.
3. Send messages
You can send messages to the team, such as text, placemarks, images, files, settings, and audio messages.
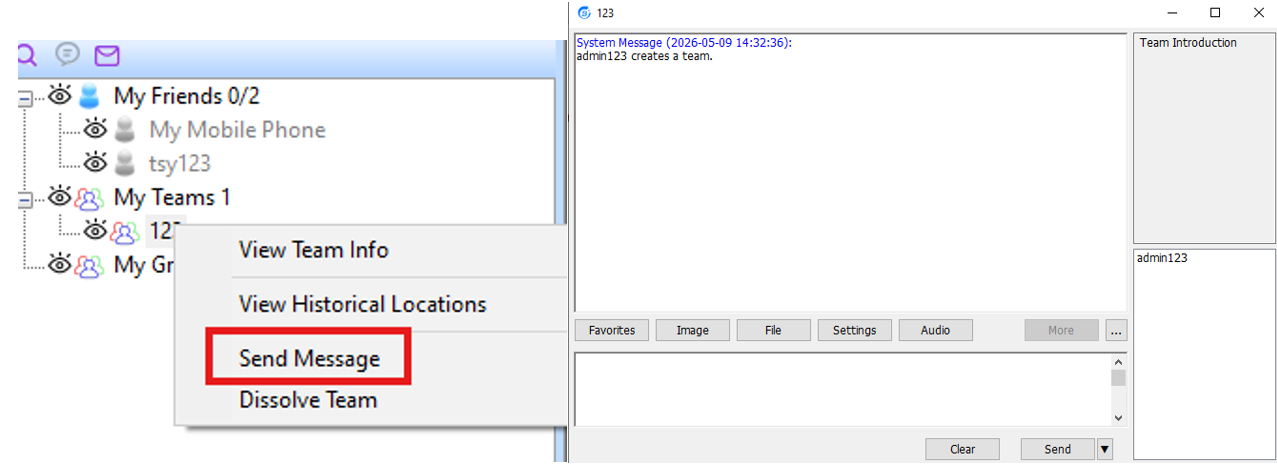
3.1. Send QubiMap objects
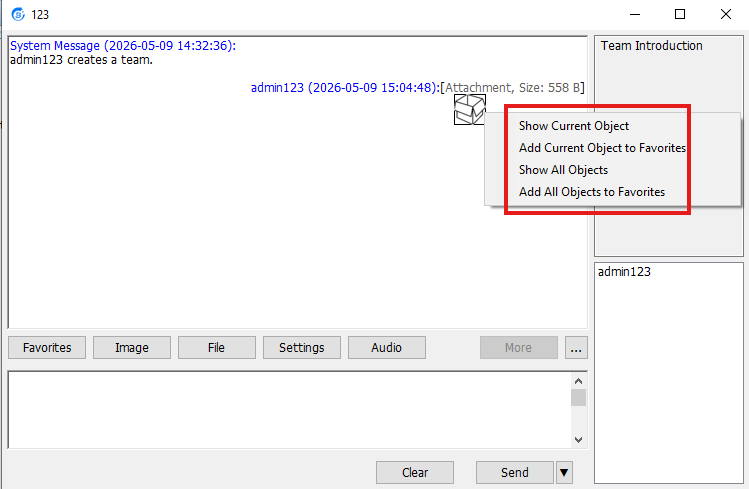
Team members can send QubiMap objects from the local favorites to the team, and others can download these objects.
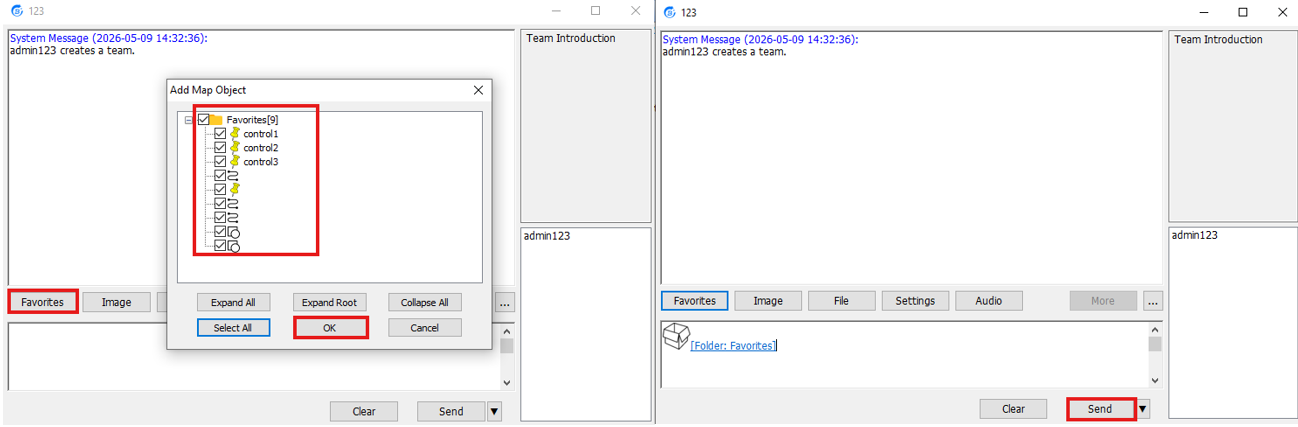
After downloading, team members can manage the objects by selecting the following options:
Show Current Object: Show the current object on the map.
Show All Objects: Show all downloaded objects on the map.
Add Current Object to Favorites: Add the current object to the local favorites.
Add All Objects to Favorites: Add all downloaded objects to the local favorites.
3.2. Send images and files
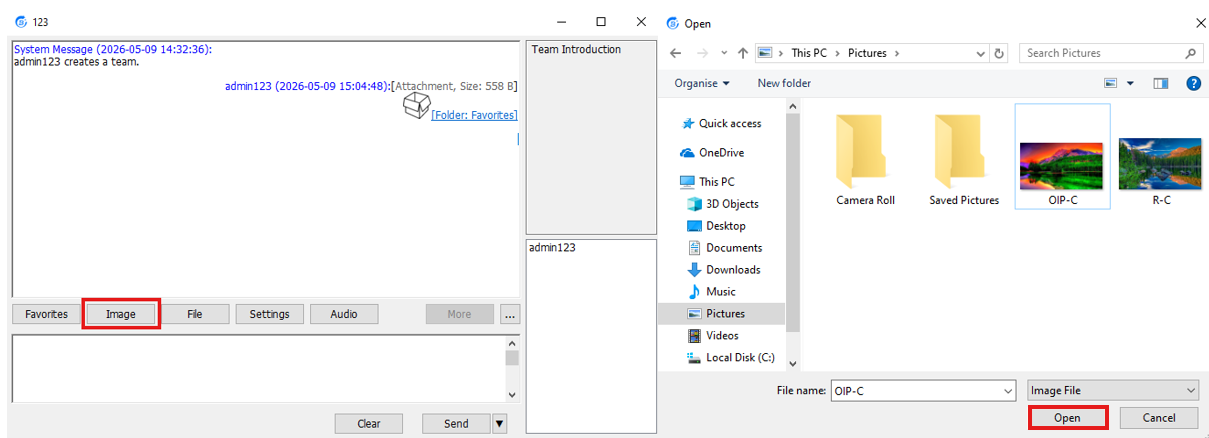
Team members can send images and files from the local disk to the team.
4. View members’ locations
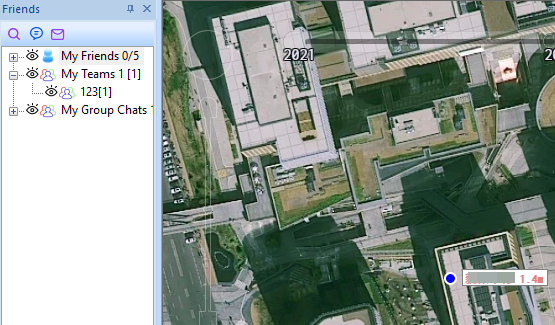
Online team members can view each other’s current location on the map without any configuration.
4.1. View members’ historical locations
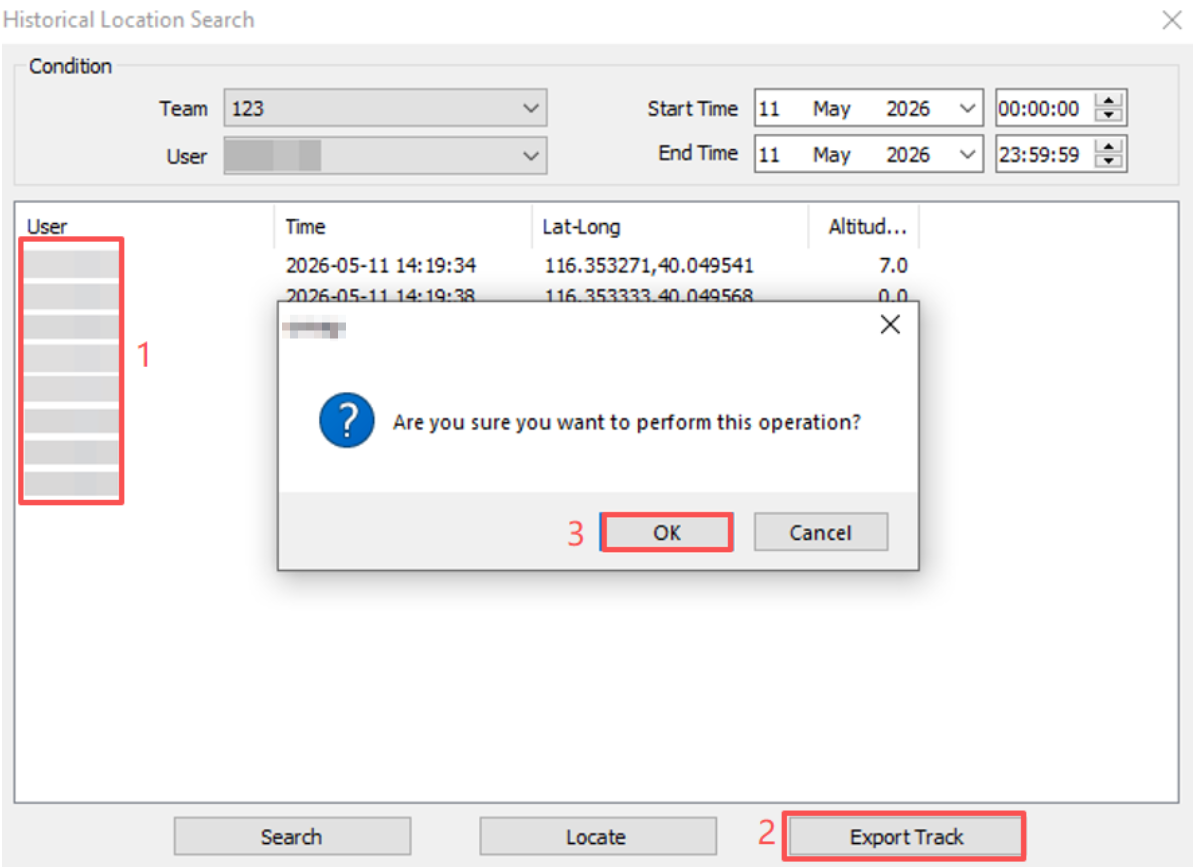
Right-click the team and select [View Historical Locations]. In the [Historical Location Search] dialog box, set search conditions, and click [Search] to view each other’s historical locations and historical track information.
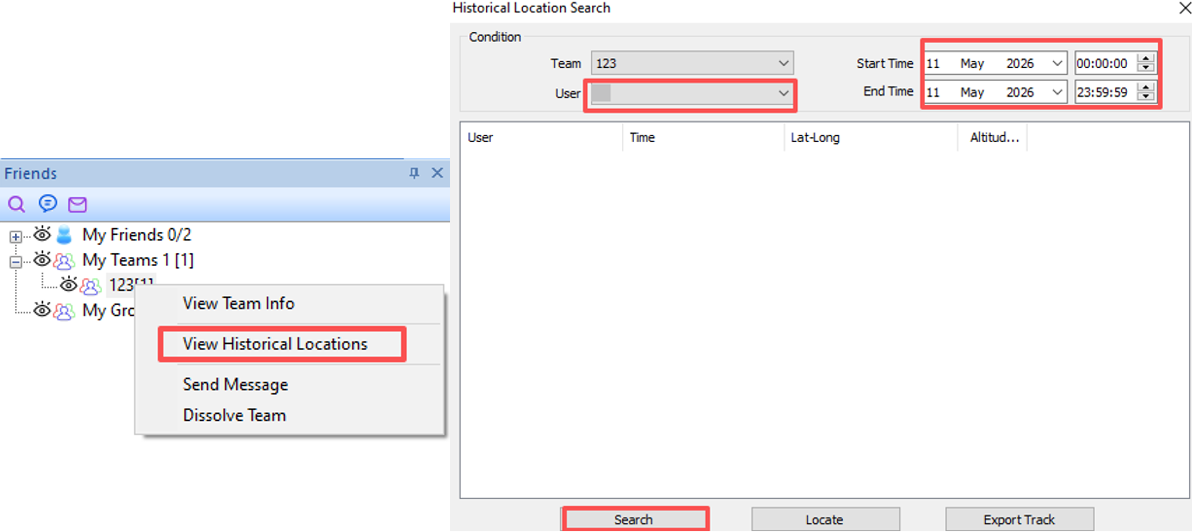
If you want to export the location information as a track, follow these steps:
① Click the first one, hold down the Shift key, and click the last one to select multiple locations;
② Click [Export Track], and then click [OK]. The exported track is added to the favorites.
5. Search for a team
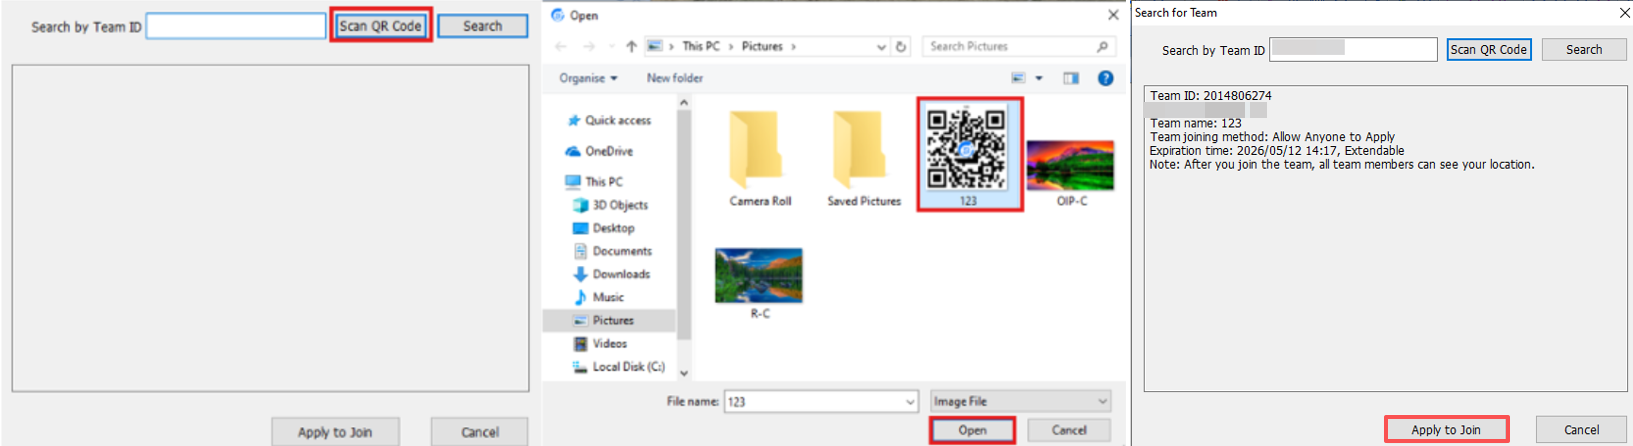
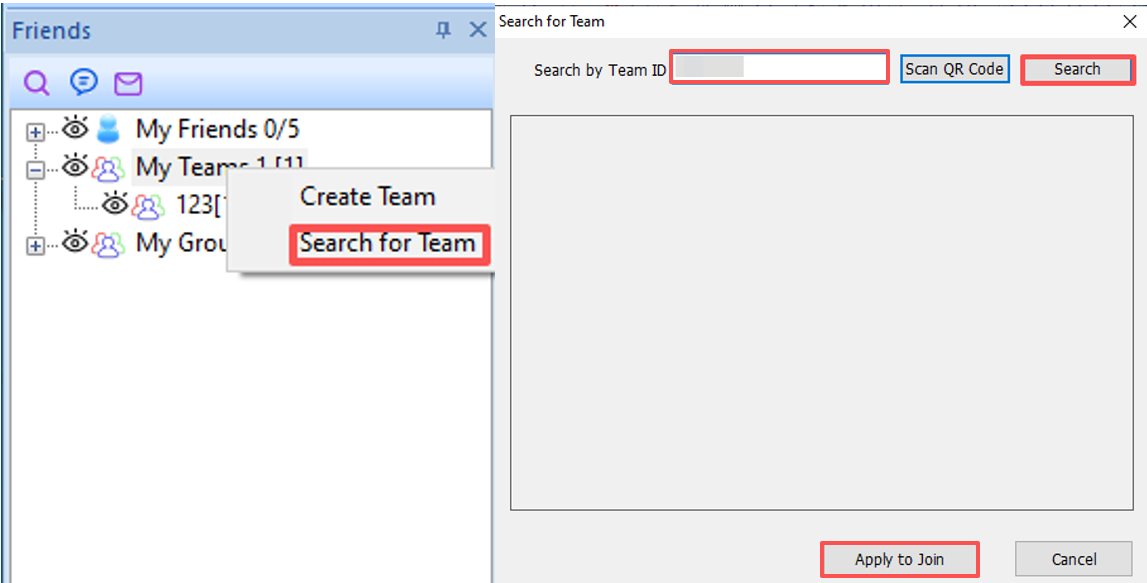
In QubiMap, you can search for a team by team ID or scan a team’s QR code. After finding the team, you can apply to join it.
(1) Search by team ID
In the [Friends] pane, right-click [My Teams], and select [Search for Team]. In the [Search for Team] dialog box, enter a team ID, and click [Search].
After you find the required team, click [Apply to Join] to send a request. Once the team owner agrees, you can join the team. Exceptionally, however, if the Joining Method parameter of a team is set to [Only Allow Administrator to Add], other users cannot apply to join the team; they must be invited by the team owner.
(2) Scan a QR code
In the [Friends] pane, right-click [My Teams], and select [Search for Team]. In the [Search for Team] dialog box, click [Scan QR Code]. Find the QR code file shared by your friend, and click [Open]. The team information is displayed in the dialog box. Click [Apply to Join] to send a request. Once the team owner agrees, you can join the team. Also, if the Joining Method parameter of a team is set to [Only Allow Administrator to Add], other users cannot apply to join the team; they must be invited by the team owner.